Dell XPS One 2720 Me and My Dell - Page 58
Using the Webcam, Capturing a Still Image, Recording a Video, Selecting the Camera and Microphone
 |
View all Dell XPS One 2720 manuals
Add to My Manuals
Save this manual to your list of manuals |
Page 58 highlights
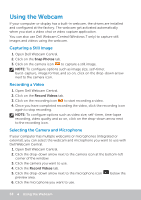
Using the Webcam If your computer or display has a built-in webcam, the drivers are installed and configured at the factory. The webcam get activated automatically when you start a video chat or video capture application. You can also use Dell Webcam Central (Windows 7 only) to capture still images and videos using the webcam. Capturing a Still Image 1. Open Dell Webcam Central. 2. Click on the Snap Photos tab. 3. Click on the camera icon to capture a still image. NOTE: To configure options such as image size, self-timer, burst‑capture, image format, and so on, click on the drop‑down arrow next to the camera icon. Recording a Video 1. Open Dell Webcam Central. 2. Click on the Record Videos tab. 3. Click on the recording icon to start recording a video. 4. Once you have completed recording the video, click the recording icon again to stop recording. NOTE: To configure options such as video size, self-timer, time‑lapse recording, video quality and so on, click on the drop‑down arrow next to the recording icon. Selecting the Camera and Microphone If your computer has multiple webcams or microphones (integrated or external), you can select the webcam and microphone you want to use with Dell Webcam Central. 1. Open Dell Webcam Central. 2. Click the drop‑down arrow next to the camera icon at the bottom‑left corner of the window. 3. Click the camera you want to use. 4. Click the Record Videos tab. 5. Click the drop‑down arrow next to the microphone icon preview area. below the 6. Click the microphone you want to use. 58 Using the Webcam
-
 1
1 -
2
-
3
-
4
-
5
-
6
-
7
-
8
-
9
-
10
-
11
-
12
-
13
-
14
-
15
-
16
-
17
-
18
-
19
-
20
-
21
-
22
-
23
-
24
-
25
-
26
-
27
-
28
-
29
-
30
-
31
-
32
-
33
-
34
-
35
-
36
-
37
-
38
-
39
-
40
-
41
-
42
-
43
-
44
-
45
-
46
-
47
-
48
-
49
-
50
-
51
-
52
-
 53
53 -
 54
54 -
 55
55 -
 56
56 -
 57
57 -
 58
58 -
 59
59 -
 60
60 -
 61
61 -
 62
62 -
 63
63 -
64
-
65
-
66
-
67
-
68
-
69
-
70
-
71
-
72
-
73
-
74
-
75
-
76
-
77
-
78
-
79
-
80
-
81
-
82
-
83
-
84
-
85
-
86
-
87
-
88
-
89
-
90
-
91
-
92
-
93
-
94
-
95
-
96
-
97
-
98
-
99
-
100
-
101
-
102
-
103
-
104
 |
 |
