Epson ET-4550 User Manual - Page 109
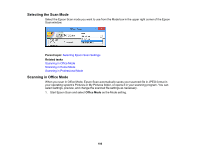
Selecting a Scan Area - Office Mode, Scanning in Office Mode
 |
View all Epson ET-4550 manuals
Add to My Manuals
Save this manual to your list of manuals |
Page 109 highlights
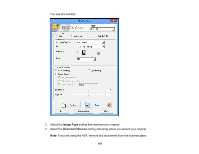
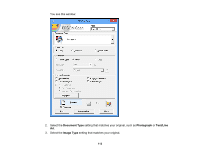
ADF Selects the Automatic Document Feeder as the location where the originals are placed on your product for scanning. Scanner Glass Selects the scanner glass as the location where the originals are placed on your product for scanning. Parent topic: Scanning in Office Mode Selecting a Scan Area - Office Mode You can select a specific area in your preview image to include in your scanned image. You can select the entire image area or a portion of it. You can even select multiple scan areas to create multiple scanned images of different areas. You can also use the scan area to select specific Image Adjustments settings for a scanned image. Just be sure to click inside the scan area before selecting the settings. 109
-
 1
1 -
2
-
3
-
4
-
5
-
6
-
7
-
8
-
9
-
10
-
11
-
12
-
13
-
14
-
15
-
16
-
17
-
18
-
19
-
20
-
21
-
22
-
23
-
24
-
25
-
26
-
27
-
28
-
29
-
30
-
31
-
32
-
33
-
34
-
35
-
36
-
37
-
38
-
39
-
40
-
41
-
42
-
43
-
44
-
45
-
46
-
47
-
48
-
49
-
50
-
51
-
52
-
53
-
54
-
55
-
56
-
57
-
58
-
59
-
60
-
61
-
62
-
63
-
64
-
65
-
66
-
67
-
68
-
69
-
70
-
71
-
72
-
73
-
74
-
75
-
76
-
77
-
78
-
79
-
80
-
81
-
82
-
83
-
84
-
85
-
86
-
87
-
88
-
89
-
90
-
91
-
92
-
93
-
94
-
95
-
96
-
97
-
98
-
99
-
100
-
101
-
102
-
103
-
 104
104 -
 105
105 -
 106
106 -
 107
107 -
 108
108 -
 109
109 -
 110
110 -
 111
111 -
 112
112 -
 113
113 -
 114
114 -
115
-
116
-
117
-
118
-
119
-
120
-
121
-
122
-
123
-
124
-
125
-
126
-
127
-
128
-
129
-
130
-
131
-
132
-
133
-
134
-
135
-
136
-
137
-
138
-
139
-
140
-
141
-
142
-
143
-
144
-
145
-
146
-
147
-
148
-
149
-
150
-
151
-
152
-
153
-
154
-
155
-
156
-
157
-
158
-
159
-
160
-
161
-
162
-
163
-
164
-
165
-
166
-
167
-
168
-
169
-
170
-
171
-
172
-
173
-
174
-
175
-
176
-
177
-
178
-
179
-
180
-
181
-
182
-
183
-
184
-
185
-
186
-
187
-
188
-
189
-
190
-
191
-
192
-
193
-
194
-
195
-
196
-
197
-
198
-
199
-
200
-
201
-
202
-
203
-
204
-
205
-
206
-
207
-
208
-
209
-
210
-
211
-
212
-
213
-
214
-
215
-
216
-
217
-
218
-
219
-
220
-
221
-
222
-
223
-
224
-
225
-
226
-
227
-
228
-
229
-
230
-
231
-
232
-
233
-
234
-
235
-
236
-
237
-
238
-
239
-
240
-
241
-
242
-
243
-
244
-
245
-
246
-
247
-
248
-
249
-
250
-
251
-
252
-
253
-
254
-
255
-
256
-
257
-
258
-
259
-
260
-
261
-
262
-
263
-
264
-
265
-
266
-
267
-
268
-
269
-
270
-
271
-
272
-
273
-
274
-
275
-
276
-
277
-
278
-
279
-
280
-
281
-
282
-
283
-
284
-
285
-
286
-
287
-
288
 |
 |

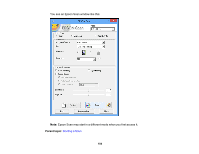
ADF
Selects the Automatic Document Feeder as the location where the originals are placed on your
product for scanning.
Scanner Glass
Selects the scanner glass as the location where the originals are placed on your product for scanning.
Parent topic:
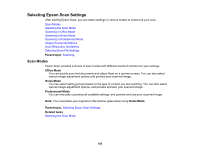
Scanning in Office Mode
Selecting a Scan Area - Office Mode
You can select a specific area in your preview image to include in your scanned image. You can select
the entire image area or a portion of it. You can even select multiple scan areas to create multiple
scanned images of different areas.
You can also use the scan area to select specific Image Adjustments settings for a scanned image. Just
be sure to click inside the scan area before selecting the settings.
109