Epson ET-4550 User Manual - Page 171
Speed Dial, Group, Parent topic, Related topics, Setting Up Contacts and Contact Groups
 |
View all Epson ET-4550 manuals
Add to My Manuals
Save this manual to your list of manuals |
Page 171 highlights
You see this window: 5. Select an empty entry and click the icon. Note: To edit an entry, select it and click the icon. To delete an entry, select it and click the icon. 6. Do one of the following: • To create a speed dial entry, select Speed Dial, enter a name and fax number, and click OK. • To create a group dial entry, select Group, enter a name, select your desired fax numbers, and click OK. 7. Repeat the previous steps as necessary to add all your speed dial or group dial entries. 8. When you are finished, click the icon to save the entries to your product's memory. Parent topic: Setting Up Contacts and Contact Groups Related topics Setting Up Contacts Using the Product Control Panel 171
-
 1
1 -
2
-
3
-
4
-
5
-
6
-
7
-
8
-
9
-
10
-
11
-
12
-
13
-
14
-
15
-
16
-
17
-
18
-
19
-
20
-
21
-
22
-
23
-
24
-
25
-
26
-
27
-
28
-
29
-
30
-
31
-
32
-
33
-
34
-
35
-
36
-
37
-
38
-
39
-
40
-
41
-
42
-
43
-
44
-
45
-
46
-
47
-
48
-
49
-
50
-
51
-
52
-
53
-
54
-
55
-
56
-
57
-
58
-
59
-
60
-
61
-
62
-
63
-
64
-
65
-
66
-
67
-
68
-
69
-
70
-
71
-
72
-
73
-
74
-
75
-
76
-
77
-
78
-
79
-
80
-
81
-
82
-
83
-
84
-
85
-
86
-
87
-
88
-
89
-
90
-
91
-
92
-
93
-
94
-
95
-
96
-
97
-
98
-
99
-
100
-
101
-
102
-
103
-
104
-
105
-
106
-
107
-
108
-
109
-
110
-
111
-
112
-
113
-
114
-
115
-
116
-
117
-
118
-
119
-
120
-
121
-
122
-
123
-
124
-
125
-
126
-
127
-
128
-
129
-
130
-
131
-
132
-
133
-
134
-
135
-
136
-
137
-
138
-
139
-
140
-
141
-
142
-
143
-
144
-
145
-
146
-
147
-
148
-
149
-
150
-
151
-
152
-
153
-
154
-
155
-
156
-
157
-
158
-
159
-
160
-
161
-
162
-
163
-
164
-
165
-
 166
166 -
 167
167 -
 168
168 -
 169
169 -
 170
170 -
 171
171 -
 172
172 -
 173
173 -
 174
174 -
 175
175 -
 176
176 -
177
-
178
-
179
-
180
-
181
-
182
-
183
-
184
-
185
-
186
-
187
-
188
-
189
-
190
-
191
-
192
-
193
-
194
-
195
-
196
-
197
-
198
-
199
-
200
-
201
-
202
-
203
-
204
-
205
-
206
-
207
-
208
-
209
-
210
-
211
-
212
-
213
-
214
-
215
-
216
-
217
-
218
-
219
-
220
-
221
-
222
-
223
-
224
-
225
-
226
-
227
-
228
-
229
-
230
-
231
-
232
-
233
-
234
-
235
-
236
-
237
-
238
-
239
-
240
-
241
-
242
-
243
-
244
-
245
-
246
-
247
-
248
-
249
-
250
-
251
-
252
-
253
-
254
-
255
-
256
-
257
-
258
-
259
-
260
-
261
-
262
-
263
-
264
-
265
-
266
-
267
-
268
-
269
-
270
-
271
-
272
-
273
-
274
-
275
-
276
-
277
-
278
-
279
-
280
-
281
-
282
-
283
-
284
-
285
-
286
-
287
-
288
 |
 |
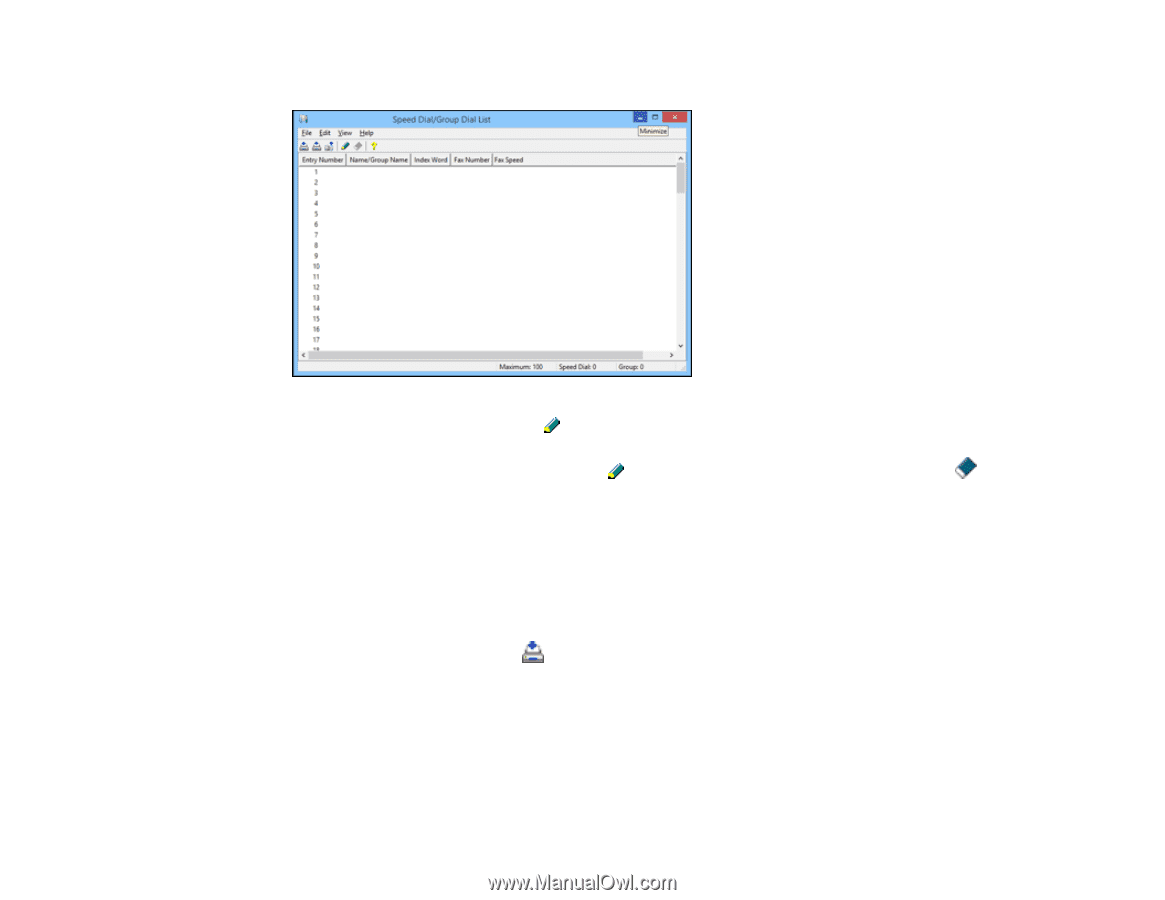
You see this window:
5.
Select an empty entry and click the
icon.
Note:
To edit an entry, select it and click the
icon. To delete an entry, select it and click the
icon.
6.
Do one of the following:
• To create a speed dial entry, select
Speed Dial
, enter a name and fax number, and click
OK
.
• To create a group dial entry, select
Group
, enter a name, select your desired fax numbers, and
click
OK
.
7.
Repeat the previous steps as necessary to add all your speed dial or group dial entries.
8.
When you are finished, click the
icon to save the entries to your product's memory.
Parent topic:
Setting Up Contacts and Contact Groups
Related topics
Setting Up Contacts Using the Product Control Panel
171