Epson Ensemble HD 720 User's Guide - Page 37
Entering the Setup Code for Your Component
 |
View all Epson Ensemble HD 720 manuals
Add to My Manuals
Save this manual to your list of manuals |
Page 37 highlights
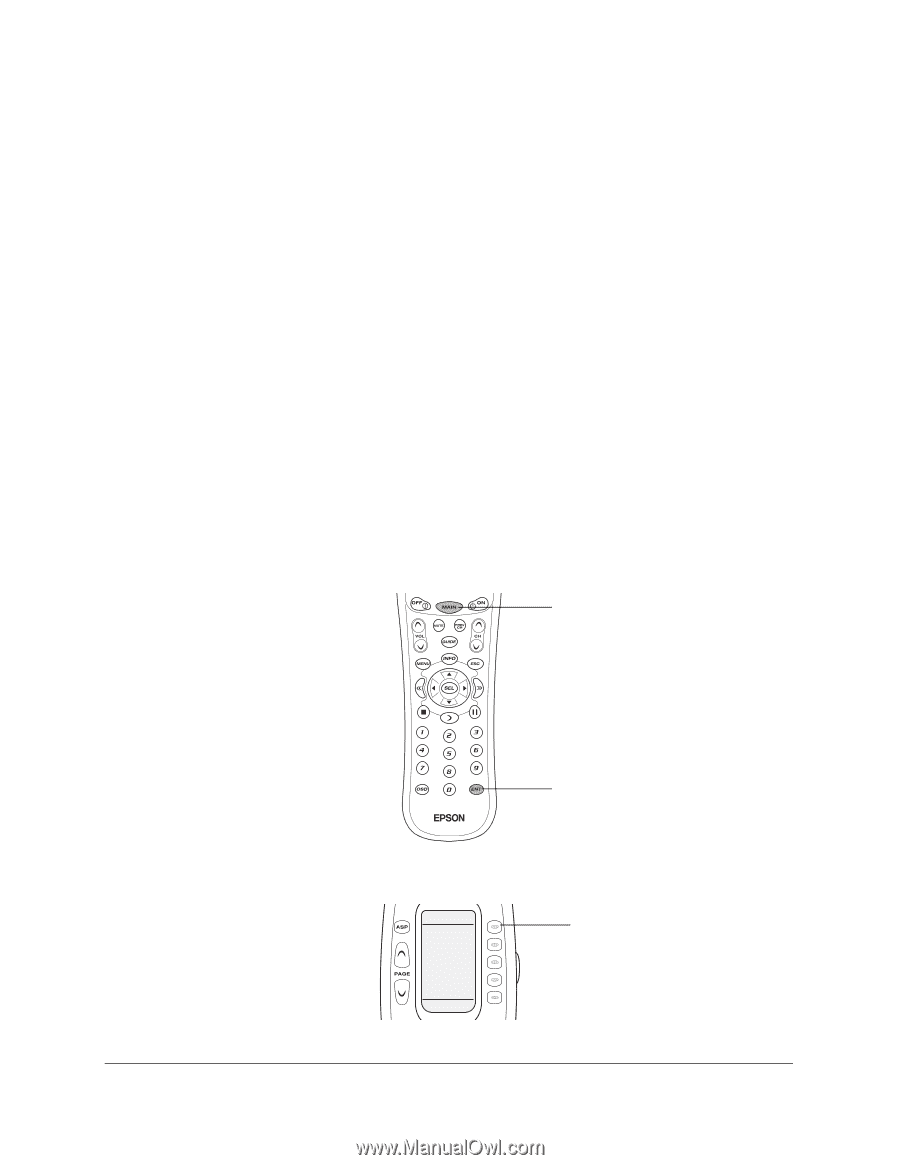
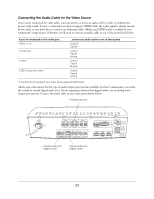
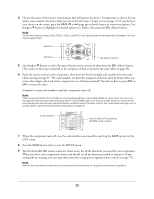
Note The menus for the listed components remain blank until you enter the setup code for the component. The remote control also has several other menus (DVD, RADIO, AUDIO, and PROJ). These are used to operate the built-in components of the Ensemble HD system. If you have a type of component not listed above, first enter its setup code as described in the next section. Then see "Customizing the Remote Control Menu" on page 39 for additional instructions. Entering the Setup Code for Your Component You enable the remote control to recognize the new component by entering a setup code from the tables starting on page 85. You may have to try out several codes before finding the right one for your component. Once the correct code is entered, the remote control will automatically create the appropriate commands in the menu for the new device. If you can't find the correct code, you can "teach" the remote control how to operate your new component one function at a time, but this may take much longer (see page 72). 1 Turn on the component you want to set up. Each time you enter a code, the remote control will try to turn off your component by sending a power-off command. You will know that you have entered the correct code when the component turns off. 2 Press and hold both the MAIN and ENT (Enter) buttons for approximately three seconds to enter the SETUP menu. Note You have 30 seconds to perform a step while you are in the SETUP menu. If you don't press a button, the remote control returns to the MAIN menu. MAIN button ENT button 3 Select the P-PRO (Pre-Programmed) option on the LCD screen. SETUP P-PRO LEARN EDIT MACRO FAV 1 OF 3 Select P-PRO 37
-
 1
1 -
2
-
3
-
4
-
5
-
6
-
7
-
8
-
9
-
10
-
11
-
12
-
13
-
14
-
15
-
16
-
17
-
18
-
19
-
20
-
21
-
22
-
23
-
24
-
25
-
26
-
27
-
28
-
29
-
30
-
31
-
 32
32 -
 33
33 -
 34
34 -
 35
35 -
 36
36 -
 37
37 -
 38
38 -
 39
39 -
 40
40 -
 41
41 -
 42
42 -
43
-
44
-
45
-
46
-
47
-
48
-
49
-
50
-
51
-
52
-
53
-
54
-
55
-
56
-
57
-
58
-
59
-
60
-
61
-
62
-
63
-
64
-
65
-
66
-
67
-
68
-
69
-
70
-
71
-
72
-
73
-
74
-
75
-
76
-
77
-
78
-
79
-
80
-
81
-
82
-
83
-
84
-
85
-
86
-
87
-
88
-
89
-
90
-
91
-
92
-
93
-
94
-
95
-
96
-
97
-
98
-
99
-
100
-
101
-
102
-
103
-
104
-
105
-
106
-
107
-
108
-
109
-
110
-
111
-
112
-
113
-
114
-
115
-
116
-
117
-
118
-
119
-
120
-
121
-
122
-
123
-
124
-
125
-
126
-
127
-
128
-
129
-
130
-
131
-
132
 |
 |