Epson Ensemble HD 720 User's Guide - Page 39
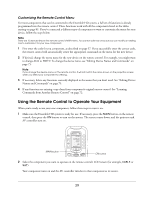
Customizing the Remote Control Menu, Using the Remote Control to Operate Your Equipment
 |
View all Epson Ensemble HD 720 manuals
Add to My Manuals
Save this manual to your list of manuals |
Page 39 highlights
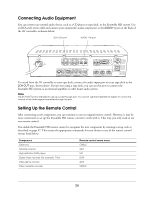
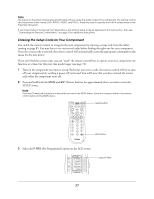
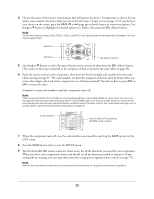
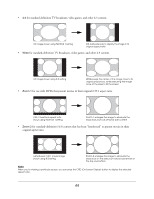
Customizing the Remote Control Menu For most components that can be connected to the Ensemble HD system, a full set of functions is already programmed into the remote control. These functions work with all the components listed in the tables starting on page 85. If you've connected a different type of component or want to customize the menu for your device, follow the steps below. Note There are 10 devices listed in the remote control's MAIN menu. You cannot add new ones, but you can modify an existing one to customize it for your new component. 1 First enter the code for you component, as described on page 37. If you successfully enter the correct code, the remote control will automatically create the appropriate commands in the menu for the new device. 2 If desired, change the menu name for the new device on the remote control. For example, you might want to change AUX to HDTV. To change the device name, see "Editing Device Names and Commands" on page 75. Note If you change the device name on the remote control, it will not match the name shown on the projection screen when you select your component for viewing. 3 If necessary, delete any functions currently displayed in the menu that you don't need. See "Editing Device Names and Commands" on page 75. 4 If any functions are missing, copy them from component's original remote control. See "Learning Commands from Another Remote Control" on page 72. Using the Remote Control to Operate Your Equipment When you're ready to use your new component, follow these steps to turn it on: 1 Make sure the Ensemble HD system is ready for use. If necessary, press the MAIN button on the remote control, then press the ON button to turn on the system. The screen comes down, and the projector and AV controller turn on. MAIN button MAIN DVD CABLE SAT HD RADIO 1 OF 2 ON button 2 Select the component you want to operate on the remote control's LCD screen (for example, CABLE or SAT). Your component turns on and the AV controller switches to that component as its source. 39
-
 1
1 -
2
-
3
-
4
-
5
-
6
-
7
-
8
-
9
-
10
-
11
-
12
-
13
-
14
-
15
-
16
-
17
-
18
-
19
-
20
-
21
-
22
-
23
-
24
-
25
-
26
-
27
-
28
-
29
-
30
-
31
-
32
-
33
-
 34
34 -
 35
35 -
 36
36 -
 37
37 -
 38
38 -
 39
39 -
 40
40 -
 41
41 -
 42
42 -
 43
43 -
 44
44 -
45
-
46
-
47
-
48
-
49
-
50
-
51
-
52
-
53
-
54
-
55
-
56
-
57
-
58
-
59
-
60
-
61
-
62
-
63
-
64
-
65
-
66
-
67
-
68
-
69
-
70
-
71
-
72
-
73
-
74
-
75
-
76
-
77
-
78
-
79
-
80
-
81
-
82
-
83
-
84
-
85
-
86
-
87
-
88
-
89
-
90
-
91
-
92
-
93
-
94
-
95
-
96
-
97
-
98
-
99
-
100
-
101
-
102
-
103
-
104
-
105
-
106
-
107
-
108
-
109
-
110
-
111
-
112
-
113
-
114
-
115
-
116
-
117
-
118
-
119
-
120
-
121
-
122
-
123
-
124
-
125
-
126
-
127
-
128
-
129
-
130
-
131
-
132
 |
 |
