Epson Ensemble HD 720 User's Guide - Page 63
Problem, Solution, The image is too dark.
 |
View all Epson Ensemble HD 720 manuals
Add to My Manuals
Save this manual to your list of manuals |
Page 63 highlights
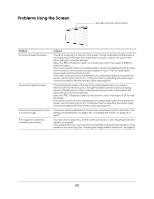
Problem Solution The image is too soft or out of focus. If you cleaned the lens, you may have accidentally changed the position of the focus ring. See "Adjusting the Image Position and Focus" on page 56. Adjust the sharpness of the image using the Sharpness settings (see "Adjusting the Picture" on page 42). Be careful not to over-adjust the sharpness, or you may get banding in some images. The image isn't positioned correctly on the screen. If the image isn't at the right height, you may need to adjust how far the screen comes down. See "Adjusting the Screen Length" on page 54. If you cleaned the lens, you may have accidentally changed the lens position or the position of the zoom ring. See "Adjusting the Image Position and Focus" on page 56. The image is cut off, squeezed in one direction, or stretched out. Press the ASP (Aspect) button on the remote control to select a different aspect ratio setting. See "Adjusting the Aspect Ratio" on page 43. If you've connected a second DVD player as an external component, make sure it's set to output a widescreen 16:9 image. There are black bars at the top and bottom of the image. Press the ASP (Aspect) button on the remote control to select a different aspect ratio setting. See "Adjusting the Aspect Ratio" on page 43. If you're watching a movie released in a theatrical widescreen format (such as 1.85:1 or 2.35:1), you must display it with black bars at the top and bottom if you want to see the whole image. That's because high-definition TVs and home entertainment systems use the slightly narrower 16:9 (1.78:1) aspect ratio. The image is too dark. Make sure you've selected the best Color Mode for your viewing environment. See "Adjusting the Color Mode" on page 42. After setting the Color Mode, you may need to fine-tune the brightness and contrast. See "Adjusting the Picture Quality" on page 45. If the projector lamp is old, you may need to replace it. See "Checking the Projector Lamp" on page 58. The colors don't look right. Make sure you've selected the best Color Mode for your viewing environment. See "Adjusting the Color Mode" on page 42. After setting the Color Mode, you may need to fine-tune the color settings. See "Adjusting the Picture Quality" on page 45. If you've changed several settings and the picture still doesn't look right, you can return all the settings to their original state. However, this option should be used only if necessary. See "Restoring Factory Defaults" on page 51. 63
-
 1
1 -
2
-
3
-
4
-
5
-
6
-
7
-
8
-
9
-
10
-
11
-
12
-
13
-
14
-
15
-
16
-
17
-
18
-
19
-
20
-
21
-
22
-
23
-
24
-
25
-
26
-
27
-
28
-
29
-
30
-
31
-
32
-
33
-
34
-
35
-
36
-
37
-
38
-
39
-
40
-
41
-
42
-
43
-
44
-
45
-
46
-
47
-
48
-
49
-
50
-
51
-
52
-
53
-
54
-
55
-
56
-
57
-
 58
58 -
 59
59 -
 60
60 -
 61
61 -
 62
62 -
 63
63 -
 64
64 -
 65
65 -
 66
66 -
 67
67 -
 68
68 -
69
-
70
-
71
-
72
-
73
-
74
-
75
-
76
-
77
-
78
-
79
-
80
-
81
-
82
-
83
-
84
-
85
-
86
-
87
-
88
-
89
-
90
-
91
-
92
-
93
-
94
-
95
-
96
-
97
-
98
-
99
-
100
-
101
-
102
-
103
-
104
-
105
-
106
-
107
-
108
-
109
-
110
-
111
-
112
-
113
-
114
-
115
-
116
-
117
-
118
-
119
-
120
-
121
-
122
-
123
-
124
-
125
-
126
-
127
-
128
-
129
-
130
-
131
-
132
 |
 |