Epson Stylus COLOR 670 Special Edition Printer Basics - Page 14
Printing from Start to Finish
 |
View all Epson Stylus COLOR 670 Special Edition manuals
Add to My Manuals
Save this manual to your list of manuals |
Page 14 highlights
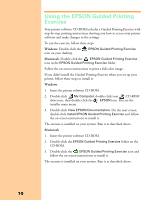
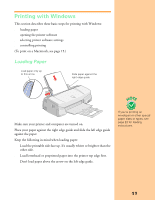
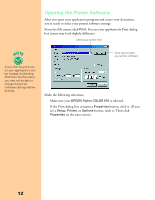
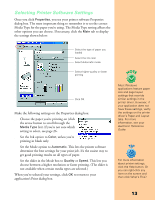
Printing from Start to Finish Here's how you print a basic document-such as a memo, newsletter, or photograph-from loading the paper to selecting print settings to controlling the print job. You can practice selecting settings using the EPSON Guided Printing Exercise, as described on the next page. For step-by-step printing instructions, see these sections: s "Printing with Windows" on page 11 s "Printing on a Macintosh" on page 15 If you're already familiar with ink jet printing, you can skip ahead to these sections: s Improving the quality of low-resolution photos and adding special effects with PhotoEnhance™ , on page 19 s Selecting a preset project type or a color-matching method, on page 20 s Fine-tuning your settings for maximum control of your printouts, on page 21 s Using special papers such as envelopes or EPSON Photo Paper, on page 22 9
-
 1
1 -
2
-
3
-
4
-
5
-
6
-
7
-
8
-
 9
9 -
 10
10 -
 11
11 -
 12
12 -
 13
13 -
 14
14 -
 15
15 -
 16
16 -
 17
17 -
 18
18 -
 19
19 -
20
-
21
-
22
-
23
-
24
-
25
-
26
-
27
-
28
-
29
-
30
-
31
-
32
-
33
-
34
-
35
-
36
-
37
-
38
-
39
-
40
-
41
-
42
-
43
-
44
-
45
-
46
-
47
-
48
-
49
-
50
-
51
-
52
-
53
-
54
-
55
-
56
-
57
-
58
-
59
 |
 |