Epson Stylus COLOR 670 Special Edition Printer Basics - Page 29
Panoramic Photo Paper, Fit to Macintosh settings
 |
View all Epson Stylus COLOR 670 Special Edition manuals
Add to My Manuals
Save this manual to your list of manuals |
Page 29 highlights
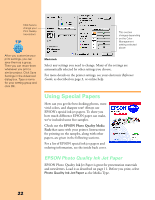
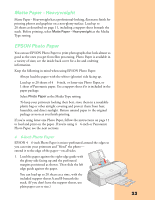
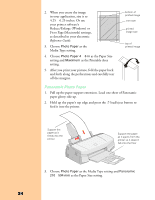
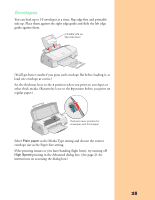
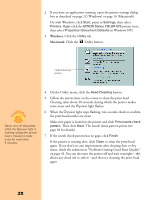
2. When you create the image in your application, size it to 4.25 × 6.25 inches. Or use your printer software's Reduce/Enlarge (Windows) or Fit to Page (Macintosh) settings, as described in your electronic Reference Guide. 3. Choose Photo Paper as the Media Type setting. 4. Choose Photo Paper 4 × 6 in as the Paper Size setting and Maximum as the Printable Area setting. 5. After you print your picture, fold the paper back and forth along the perforations and carefully tear off the margins. bottom of printed image trim size printed image size top of printed image Panoramic Photo Paper 1. Pull up the paper support extension. Load one sheet of Panoramic paper glossy side up. 2. Hold up the paper's top edge and press the E load/eject button to feed it into the printer. Support the paper as it feeds into the printer Support the paper as it ejects from the printer so it doesn't fall onto the floor 3. Choose Photo Paper as the Media Type setting and Panoramic 210 × 594 mm as the Paper Size setting. 24
-
 1
1 -
2
-
3
-
4
-
5
-
6
-
7
-
8
-
9
-
10
-
11
-
12
-
13
-
14
-
15
-
16
-
17
-
18
-
19
-
20
-
21
-
22
-
23
-
 24
24 -
 25
25 -
 26
26 -
 27
27 -
 28
28 -
 29
29 -
 30
30 -
 31
31 -
 32
32 -
 33
33 -
 34
34 -
35
-
36
-
37
-
38
-
39
-
40
-
41
-
42
-
43
-
44
-
45
-
46
-
47
-
48
-
49
-
50
-
51
-
52
-
53
-
54
-
55
-
56
-
57
-
58
-
59
 |
 |
