Epson TM-m50II Web Config Reference Guide - Page 109
Importing for Client Certificate, Import Top Table 10-102 Setting Items
 |
View all Epson TM-m50II manuals
Add to My Manuals
Save this manual to your list of manuals |
Page 109 highlights
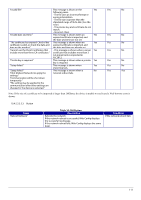
10.4.5.2.3 Importing for Client Certificate 10.4.5.2.3.1 Import Top Page This page is shown after the 'Import' button in the Client certificate settings is pressed. The following figure shows the layout of the page for importing the Client certificate into the printer. 10.4.5.2.3.1.1 Image Setting Items Description Button Figure 10-47 Import Top Page 10.4.5.2.3.1.2 Setting Items On the Import Top Page, the following items can be controlled by the administrator. Items "Client Certificate" File Format "Private Key" "Password" "CA Certificate 1" "CA Certificate 2" Table 10-102 Setting Items Description Enter the file of the Client certificate to import it into the printer. You can also use the file button to select the file. Choose the file format of the server certificate to import it into the printer. "Certificate (PEM/DER)"/ "Certificate with Private Key (PKCS#12)" Enter the private key file of the server certificate to import it into the printer. You can also use the file button to select the file. Enter the passphrase for encryption to create a private key. Usable string: ASCII code (0x20-0x7E) Max of 48 characters. Enter the file of the certificate signed by CA issuing the server certificate to import it into the printer. You can also use the file button to select the file. Max of 255 characters. Enter the file of the certificate signed by CA issuing the first CA certificate to import it into the printer. It also is able to select the file using file button. Condition - Only when certificate (PEM/DER) is selected In certificate with private key (PKCS#12) selected only. In certificate (PEM/DER) selected only. In certificate (PEM/DER) selected only. 10.4.5.2.3.1.3 Description Table 10-103 Description Items "Note: It is recommended to communicate via HTTPS when importing a certificate." Description Fixed Strings 109
-
 1
1 -
2
-
3
-
4
-
5
-
6
-
7
-
8
-
9
-
10
-
11
-
12
-
13
-
14
-
15
-
16
-
17
-
18
-
19
-
20
-
21
-
22
-
23
-
24
-
25
-
26
-
27
-
28
-
29
-
30
-
31
-
32
-
33
-
34
-
35
-
36
-
37
-
38
-
39
-
40
-
41
-
42
-
43
-
44
-
45
-
46
-
47
-
48
-
49
-
50
-
51
-
52
-
53
-
54
-
55
-
56
-
57
-
58
-
59
-
60
-
61
-
62
-
63
-
64
-
65
-
66
-
67
-
68
-
69
-
70
-
71
-
72
-
73
-
74
-
75
-
76
-
77
-
78
-
79
-
80
-
81
-
82
-
83
-
84
-
85
-
86
-
87
-
88
-
89
-
90
-
91
-
92
-
93
-
94
-
95
-
96
-
97
-
98
-
99
-
100
-
101
-
102
-
103
-
 104
104 -
 105
105 -
 106
106 -
 107
107 -
 108
108 -
 109
109 -
 110
110 -
 111
111 -
 112
112 -
 113
113 -
 114
114 -
115
-
116
-
117
-
118
-
119
-
120
-
121
-
122
-
123
-
124
-
125
-
126
-
127
-
128
-
129
-
130
-
131
-
132
-
133
-
134
-
135
-
136
-
137
-
138
-
139
-
140
-
141
-
142
-
143
-
144
-
145
-
146
-
147
-
148
-
149
-
150
-
151
-
152
-
153
-
154
-
155
-
156
-
157
-
158
-
159
-
160
-
161
-
162
-
163
-
164
-
165
-
166
-
167
-
168
-
169
-
170
 |
 |
