HP Designjet 111 HP Designjet 111 Printer Series - User Guide - Page 13
Network connection methods, Con a direct network connection (Windows)
 |
View all HP Designjet 111 manuals
Add to My Manuals
Save this manual to your list of manuals |
Page 13 highlights
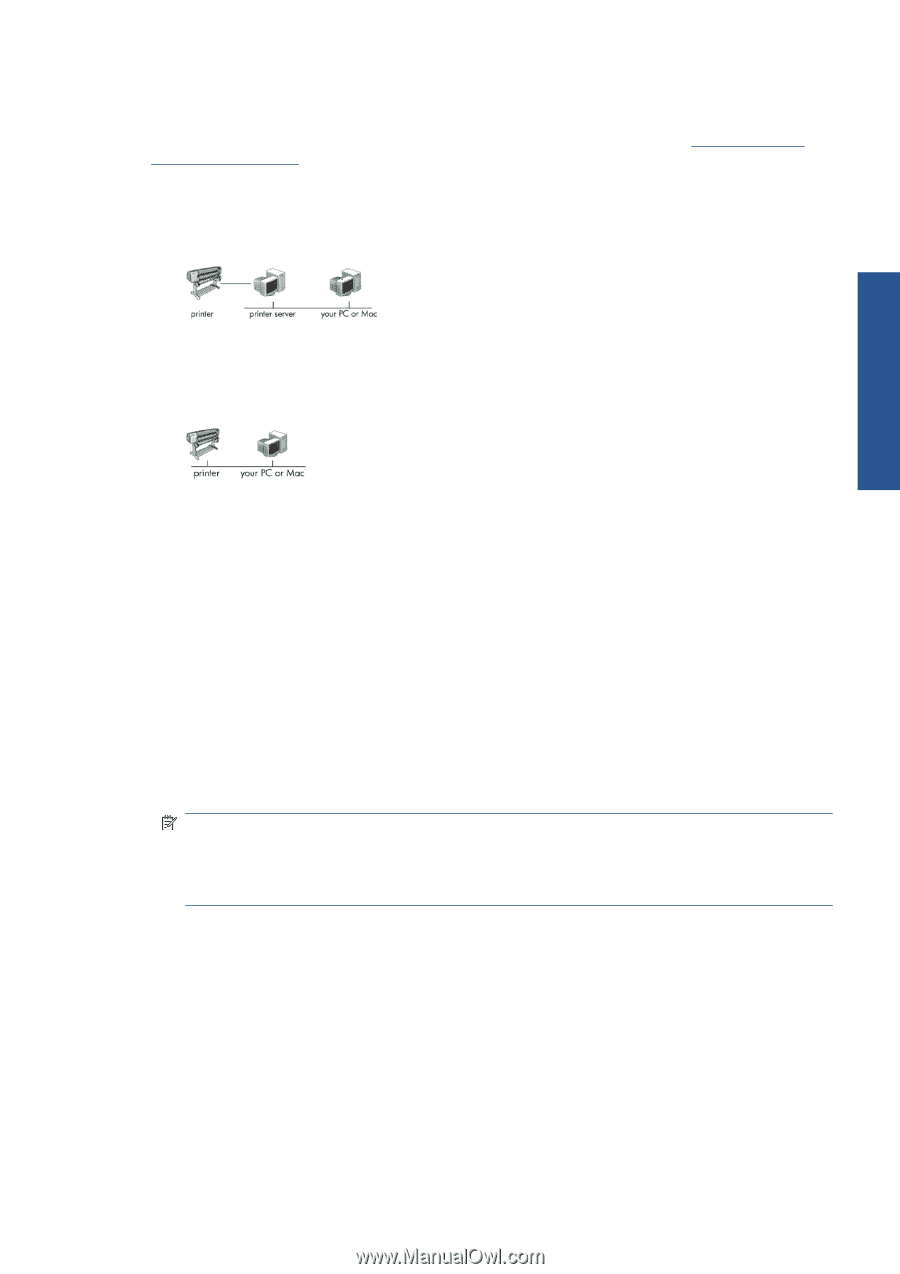
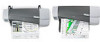
Network connection methods The HP Jetdirect print server allows you to connect the printer to a network. See The HP Jetdirect print server on page 4 and your HP Jetdirect documentation. There are two ways of using it to connect the printer to a network. ● Client-server configuration. In this method the printer is connected to a computer that acts as a print server and manages the print jobs. The printer is used as a shared device. ● Direct network setup. In this method the printer is directly connected to the network and every computer prints directly to it and manages its own print jobs. This type of connection method is equivalent to a direct connection with a parallel or USB cable. The only difference is that instead of having a direct physical link, the link is logical and it is established through the network. Connect & install Configure a direct network connection (Windows) In order to set up a direct network connection, you must configure the IP address of the HP Jetdirect print server. There are two cases, depending on the kind of IP address configuration on your network. Follow only the steps that apply to your network architecture. Automatic IP address configuration In this case, once the network cable is connected and the printer is powered up, the Jetdirect card automatically takes an IP address. You need to get this value and perform the following steps to configure the printer in the network. 1. Print the printer's information pages, by pressing the OK key four times while holding the Power key, then releasing the Power key. 2. Identify the value of the IP address in the TCP/IP section of the first page (I/O page). NOTE: If the printer's IP address is shown as 0.0.0.0, this is an error. Wait five minutes, then print the information pages again. If the IP address remains 0.0.0.0, reset the Jetdirect card, as follows: on the printer's front panel, hold down the Power key while pressing the Cancel key three times and then the OK key once. Then interrupt the power supply to the printer, by pulling out the power plug and then plugging it back in again. 3. Insert the HP Designjet 111 Software and Documentation CD into your computer. 4. Select your printer series (HP Designjet 111). 5. Choose Install. 6. Read the information in the Welcome dialog, and read and accept the licence agreement. 7. Read the firewall notice and mark the check box to continue installation without network connection, or simply click Next to continue with printer discovery. 8. The installer tries to find the printer automatically. If it is successful, select your printer and click Next to complete the installation. Otherwise, continue with the following steps. 9. Choose Connected to the network. ENWW Network connection methods 7
-
 1
1 -
2
-
3
-
4
-
5
-
6
-
7
-
 8
8 -
 9
9 -
 10
10 -
 11
11 -
 12
12 -
 13
13 -
 14
14 -
 15
15 -
 16
16 -
 17
17 -
 18
18 -
19
-
20
-
21
-
22
-
23
-
24
-
25
-
26
-
27
-
28
-
29
-
30
-
31
-
32
-
33
-
34
-
35
-
36
-
37
-
38
-
39
-
40
-
41
-
42
-
43
-
44
-
45
-
46
-
47
-
48
-
49
-
50
-
51
-
52
-
53
 |
 |