HP Designjet 111 HP Designjet 111 Printer Series - User Guide - Page 19
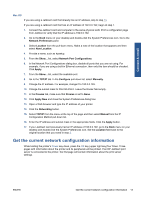
Get the current network configuration information - jetdirect
 |
View all HP Designjet 111 manuals
Add to My Manuals
Save this manual to your list of manuals |
Page 19 highlights
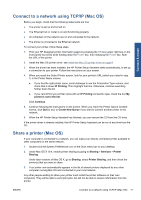
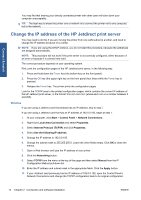
Connect & install Mac OS If you are using a Jetdirect card that already has an IP address, skip to step 13. If you are using a Jetdirect card that has an IP address of 192.0.0.192, begin at step 1. 1. Connect the Jetdirect card and computer to the same physical LAN. Print a configuration page from Jetdirect to verify that the IP address is 192.0.0.192. 2. Go to the Dock menu on your desktop and double-click the System Preferences icon. Go to the Network Preferences pane. 3. Select Location from the pull-down menu. Make a note of the location that appears and then select New Location. 4. Provide a name, such as hpsetup. 5. From the Show... list, select Network Port Configurations. 6. In the Network Port Configurations dialog box, disable all ports that you are not using. For example, if you are using a built-in Ethernet connection, then only this item should be checked. Click Apply. 7. From the Show... list, select the available port. 8. Go to the TCP/IP tab. In the Configure pull-down list, select Manually. 9. Change the IP address. For example, change it to 192.0.0.193. 10. Change the subnet mask to 255.255.255.0. Leave the Router field empty. 11. In the Proxies tab, make sure that Proxies is set to None. 12. Click Apply Now and close the System Preferences dialog box. 13. Open a Web browser and type the IP address of your printer. 14. Click the Networking button. 15. Select TCP/IP from the menu at the top of the page and then select Manual from the IP Configuration Method pull-down list. 16. Enter the IP address and subnet mask in the appropriate fields. Click the Apply button. 17. If your Jetdirect card previously had an IP address of 192.0.0.192, go to the Dock menu on your desktop and double-click the System Preferences icon. Set the Location field back to the original location that you noted in step 3. Get the current network configuration information While holding the printer's Power key down, press the OK key (upper right key) four times. Three pages with information about the printer and its peripherals will be printed. If an HP Jetdirect print server is connected to the printer, the first page will contain information about the print server settings. ENWW Get the current network configuration information 13
-
 1
1 -
2
-
3
-
4
-
5
-
6
-
7
-
8
-
9
-
10
-
11
-
12
-
13
-
 14
14 -
 15
15 -
 16
16 -
 17
17 -
 18
18 -
 19
19 -
 20
20 -
 21
21 -
 22
22 -
 23
23 -
 24
24 -
25
-
26
-
27
-
28
-
29
-
30
-
31
-
32
-
33
-
34
-
35
-
36
-
37
-
38
-
39
-
40
-
41
-
42
-
43
-
44
-
45
-
46
-
47
-
48
-
49
-
50
-
51
-
52
-
53
 |
 |
