HP Designjet 111 HP Designjet 111 Printer Series - User Guide - Page 35
Close the rear part and then the front part of the outer flap., tab - parts
 |
View all HP Designjet 111 manuals
Add to My Manuals
Save this manual to your list of manuals |
Page 35 highlights
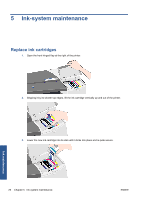
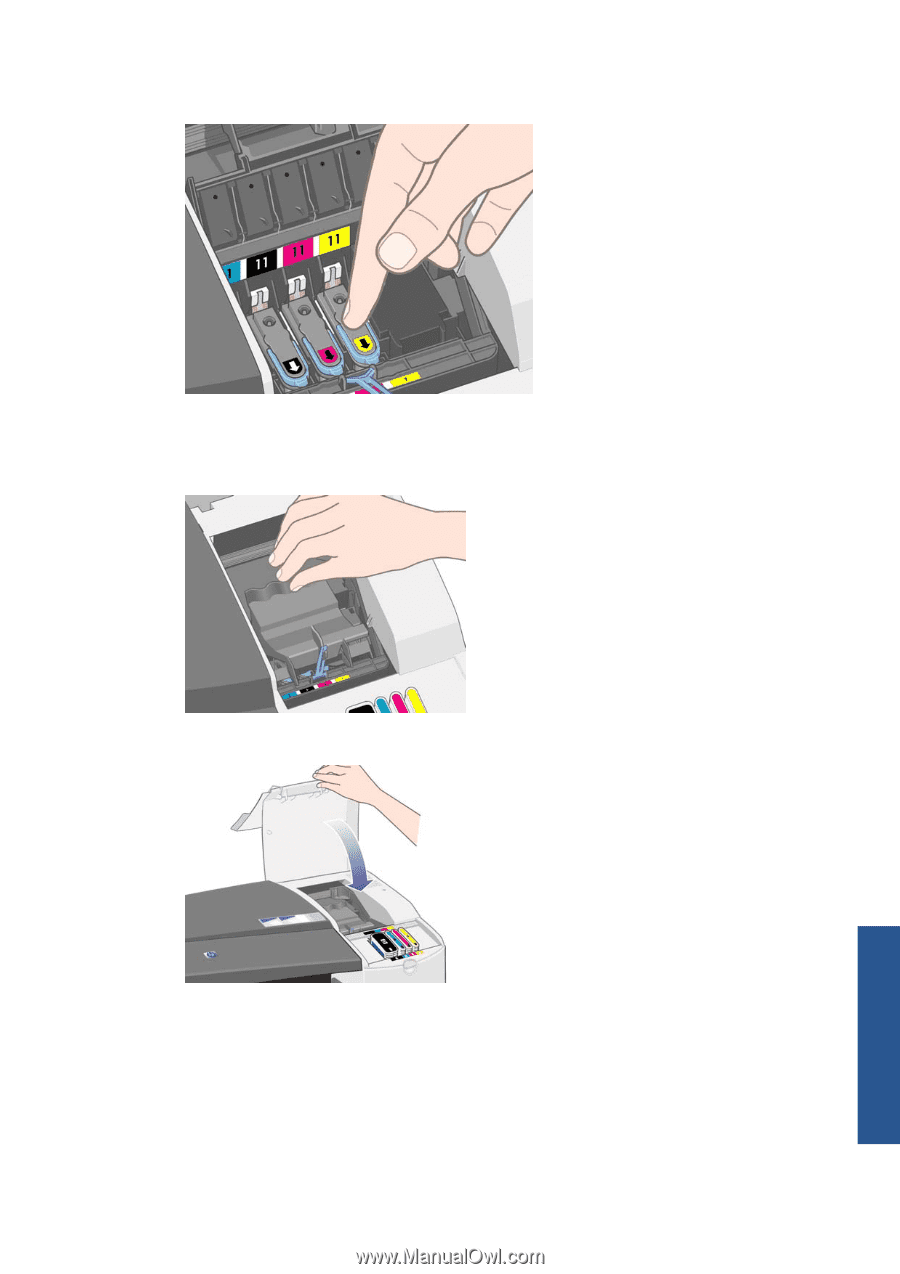
8. Push the printhead gently into place, so that it is quite secure. 9. Repeat the preceding four steps for each printhead that you wish to replace. 10. Pull the printhead cover towards you, ensuring that the hook at its front edge latches onto the tab, and then push it away from you to close the cover. 11. Close the rear part and then the front part of the outer flap. Ink maintenance ENWW Replace printheads 29
-
 1
1 -
2
-
3
-
4
-
5
-
6
-
7
-
8
-
9
-
10
-
11
-
12
-
13
-
14
-
15
-
16
-
17
-
18
-
19
-
20
-
21
-
22
-
23
-
24
-
25
-
26
-
27
-
28
-
29
-
 30
30 -
 31
31 -
 32
32 -
 33
33 -
 34
34 -
 35
35 -
 36
36 -
 37
37 -
 38
38 -
 39
39 -
 40
40 -
41
-
42
-
43
-
44
-
45
-
46
-
47
-
48
-
49
-
50
-
51
-
52
-
53
 |
 |
8.
Push the printhead gently into place, so that it is quite secure.
9.
Repeat the preceding four steps for each printhead that you wish to replace.
10.
Pull the printhead cover towards you, ensuring that the hook at its front edge latches onto the
tab, and then push it away from you to close the cover.
11.
Close the rear part and then the front part of the outer flap.
ENWW
Replace printheads
29
Ink maintenance