HP Designjet 111 HP Designjet 111 Printer Series - User Guide - Page 33
Replace printheads - cartridges
 |
View all HP Designjet 111 manuals
Add to My Manuals
Save this manual to your list of manuals |
Page 33 highlights
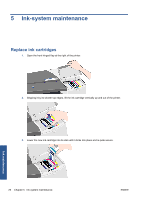
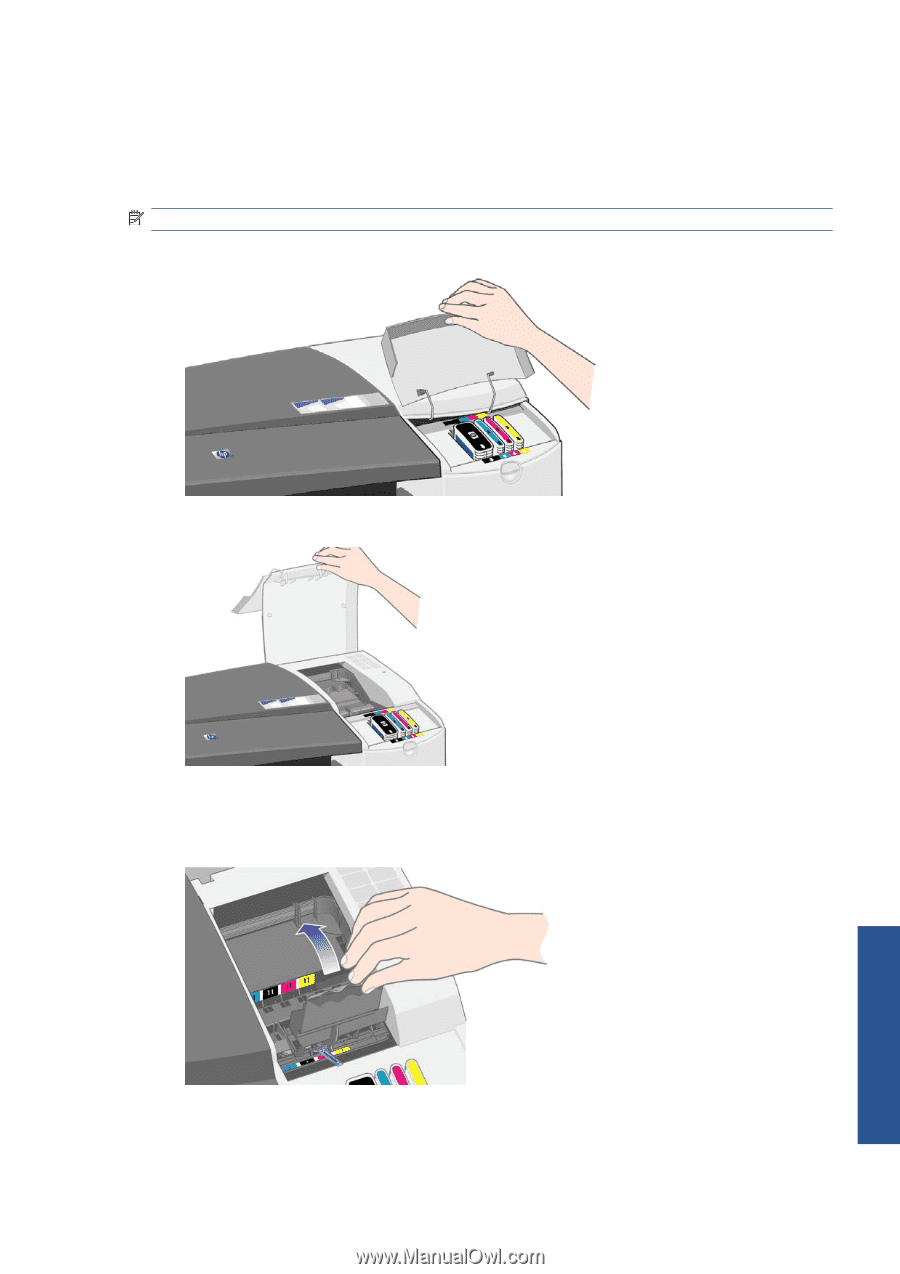
4. Repeat the preceding two steps for each ink cartridge that you wish to replace. 5. Close the outer flap. Replace printheads NOTE: After a printhead is replaced, the printer will automatically realign the printheads. 1. Open the front hinged flap at the right of the printer. 2. Open the second (back) part of the flap and lift it right back. 3. The print carriage will move to the left and then back to the right. Wait for it to stop. 4. Pull the printhead cover up and towards you, so that the hook at the front unlatches itself, and then push the whole cover back so that the printheads are exposed. Ink maintenance ENWW Replace printheads 27
-
 1
1 -
2
-
3
-
4
-
5
-
6
-
7
-
8
-
9
-
10
-
11
-
12
-
13
-
14
-
15
-
16
-
17
-
18
-
19
-
20
-
21
-
22
-
23
-
24
-
25
-
26
-
27
-
 28
28 -
 29
29 -
 30
30 -
 31
31 -
 32
32 -
 33
33 -
 34
34 -
 35
35 -
 36
36 -
 37
37 -
 38
38 -
39
-
40
-
41
-
42
-
43
-
44
-
45
-
46
-
47
-
48
-
49
-
50
-
51
-
52
-
53
 |
 |
4.
Repeat the preceding two steps for each ink cartridge that you wish to replace.
5.
Close the outer flap.
Replace printheads
NOTE:
After a printhead is replaced, the printer will automatically realign the printheads.
1.
Open the front hinged flap at the right of the printer.
2.
Open the second (back) part of the flap and lift it right back.
3.
The print carriage will move to the left and then back to the right. Wait for it to stop.
4.
Pull the printhead cover up and towards you, so that the hook at the front unlatches itself, and
then push the whole cover back so that the printheads are exposed.
ENWW
Replace printheads
27
Ink maintenance