HP Designjet 111 HP Designjet 111 Printer Series - User Guide - Page 14
Manual IP address configuration, Con a client-server connection (Windows) - network
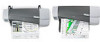 |
View all HP Designjet 111 manuals
Add to My Manuals
Save this manual to your list of manuals |
Page 14 highlights
Connect & install 10. Choose Specify printer by address. 11. Enter the printer's IP address in the applicable text box and click Next. 12. Wait until the configuration program analyzes the printer and the network. The program detects the network settings and suggests the settings to be applied for the printer's configuration. Normally, it is not necessary to change any of these settings, so click Next. 13. Follow the process in the HP Designjet 111 Software and Documentation CD until the installation is finished. Manual IP address configuration In this case, there is no IP address at the moment of starting the installation. The installation process will consist of detecting the printer, configuring its IP address and installing the driver with these settings. Perform the following steps. 1. Print the printer's information pages, by pressing the OK key four times while holding the Power key, then releasing the Power key. 2. Identify the value of the hardware (HW) address in the first page (I/O page). 3. Insert the HP Designjet 111 Software and Documentation CD into your computer. 4. Select your printer series (HP Designjet 111). 5. Choose Install. 6. Read the information in the Welcome dialog, and read and accept the license agreement. 7. Read the firewall notice and mark the check box to continue installation without network connection, or simply click Next to continue with printer discovery. 8. The installer tries to find the printer automatically. If it is successful, select your printer and click Next to complete the installation. Otherwise, continue with the following steps. 9. Choose Connected to the network. 10. Choose Specify printer by address. 11. Enter the printer's hardware address in the applicable text box and click Next. NOTE: Hardware addresses are seen only at one side of a gateway, so make sure there is no gateway between your computer and the printer. In practice, this means the computer and the printer should be on the same subnet. 12. The program analyzes the network and the printer. As there are no TCP/IP parameters configured, the program asks you to enter the IP address, the subnet mask and the gateway. Enter these values according to your network configuration. Take care, when choosing the IP address and the subnet mask, that you select values that will not create conflicts with the current network devices. It is recommended that you get these values from your network administrator. 13. At the end of the installation, your driver is configured to work with your printer and your printer has a valid IP address. In order to see this IP address, you can print the information pages again and check the I/O page. Configure a client-server connection (Windows) If you have the printer directly connected to a computer (using USB, parallel or direct network setup) and shared, you can use the computer to which the printer is attached as a print server. 8 Chapter 2 Connection and software installation ENWW
-
 1
1 -
2
-
3
-
4
-
5
-
6
-
7
-
8
-
 9
9 -
 10
10 -
 11
11 -
 12
12 -
 13
13 -
 14
14 -
 15
15 -
 16
16 -
 17
17 -
 18
18 -
 19
19 -
20
-
21
-
22
-
23
-
24
-
25
-
26
-
27
-
28
-
29
-
30
-
31
-
32
-
33
-
34
-
35
-
36
-
37
-
38
-
39
-
40
-
41
-
42
-
43
-
44
-
45
-
46
-
47
-
48
-
49
-
50
-
51
-
52
-
53
 |
 |