HP Kayak XA-s 02xx HP Kayak XA-s PC Workstation - User Guide for Minitower Mod - Page 14
Unpacking Your PC Workstation
 |
View all HP Kayak XA-s 02xx manuals
Add to My Manuals
Save this manual to your list of manuals |
Page 14 highlights
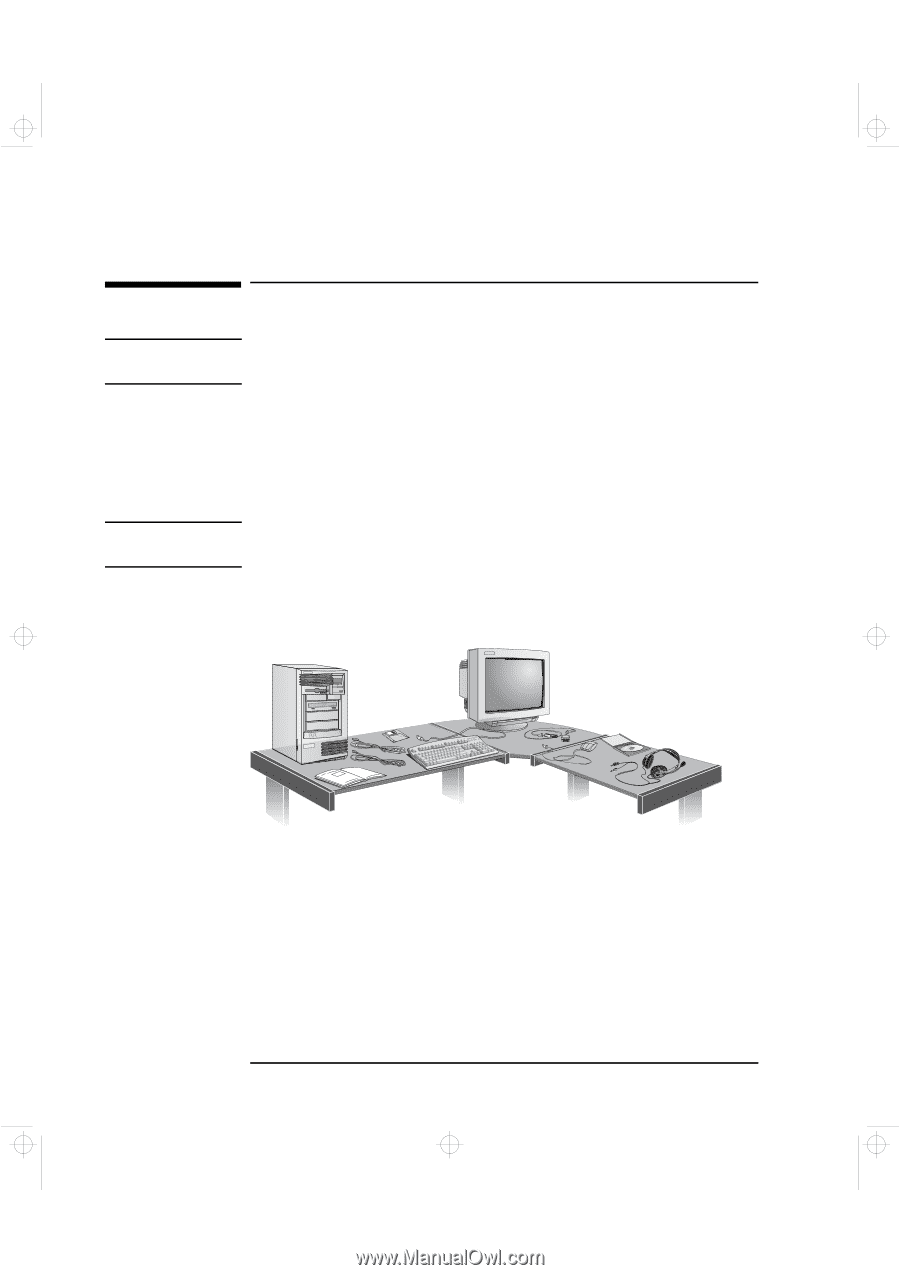
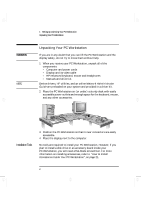
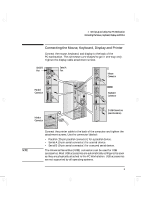
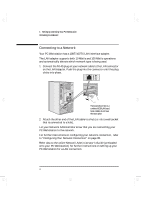
geron.bk : geron-1.fb4 Page 2 Sunday, March 22, 1998 5:03 AM 1 Setting Up and Using Your PC Workstation Unpacking Your PC Workstation WARNING NOTE Unpacking Your PC Workstation If you are in any doubt that you can lift the PC Workstation and the display safely, do not try to move them without help. 1 When you receive your PC Workstation, unpack all of the components: • Computer and power cords • Display and its video cable • HP enhanced keyboard, mouse and headphones • Manuals and driver kit. Device drivers, HP utilities, and an online Network Administrator Guide are preloaded on your system and provided in a driver kit. 2 Place the PC Workstation on (or under) a sturdy desk with easily accessible power outlets and enough space for the keyboard, mouse, and any other accessories. Installation Tools 3 Position the PC Workstation so that its rear connectors are easily accessible. 4 Place the display next to the computer. No tools are required to install your PC Workstation. However, if you plan to install a disk drive or an accessory board inside your PC Workstation, you will need a flat-blade screwdriver. For more information on installing accessories, refer to "How to Install Accessories Inside Your PC Workstation", on page 21. 2 English
-
 1
1 -
2
-
3
-
4
-
5
-
6
-
7
-
8
-
 9
9 -
 10
10 -
 11
11 -
 12
12 -
 13
13 -
 14
14 -
 15
15 -
 16
16 -
 17
17 -
 18
18 -
 19
19 -
20
-
21
-
22
-
23
-
24
-
25
-
26
-
27
-
28
-
29
-
30
-
31
-
32
-
33
-
34
-
35
-
36
-
37
-
38
-
39
-
40
-
41
-
42
-
43
-
44
-
45
-
46
-
47
-
48
-
49
-
50
-
51
-
52
-
53
-
54
-
55
-
56
-
57
-
58
-
59
-
60
-
61
-
62
-
63
-
64
-
65
-
66
-
67
-
68
-
69
-
70
-
71
-
72
-
73
-
74
-
75
-
76
-
77
-
78
-
79
-
80
-
81
-
82
-
83
-
84
-
85
-
86
-
87
-
88
-
89
-
90
-
91
-
92
-
93
-
94
-
95
-
96
-
97
-
98
-
99
-
100
-
101
-
102
-
103
-
104
-
105
-
106
-
107
-
108
-
109
-
110
-
111
-
112
-
113
-
114
-
115
-
116
-
117
-
118
-
119
-
120
-
121
-
122
-
123
-
124
-
125
-
126
-
127
-
128
-
129
-
130
-
131
-
132
-
133
-
134
-
135
-
136
-
137
-
138
-
139
-
140
-
141
-
142
-
143
-
144
-
145
-
146
-
147
-
148
 |
 |