HP Kayak XA-s 02xx HP Kayak XA-s PC Workstation - User Guide for Minitower Mod - Page 23
Creating Back-up Diskettes, Starting Your PC Workstation
 |
View all HP Kayak XA-s 02xx manuals
Add to My Manuals
Save this manual to your list of manuals |
Page 23 highlights
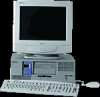
geron.bk : geron-1.fb4 Page 11 Sunday, March 22, 1998 5:03 AM 1 Setting Up and Using Your PC Workstation Starting and Stopping Your PC Workstation • The current date and time. • The type of printer (for example, HP LaserJet 5L). This is shown on the front of the printer. You also need to enter the connection used by the printer. 3 While the initialization program is running, you can complete the Warranty Registration card that came with this manual. 4 When the initialization routine has finished, click OK and the PC Workstation will restart. Creating Back-up Diskettes It is very important that you create master diskettes for your preloaded application software and as an Emergency Repair Disk for the operating system, as soon as possible. HP recommends that you use new diskettes for this purpose. To create these back-up diskettes, follow the instructions that appear on screen when you first start your PC Workstation. For more information on how to create these diskettes, refer to the documentation that came with your application software or operating system. Starting Your PC Workstation 1 Before you start your PC Workstation, first switch on the display. 2 Start your PC Workstation in one of these ways: • Press the power button on the front panel. • Press the keyboard space bar. The keyboard power-on feature will work only if Space-bar is enabled in the Power menu of the Setup program (refer to page 93) and the system board switch 8 (KEYB power) is DOWN (the default setting). Refer to page 91 for more information on system board switches. English 11
-
 1
1 -
2
-
3
-
4
-
5
-
6
-
7
-
8
-
9
-
10
-
11
-
12
-
13
-
14
-
15
-
16
-
17
-
 18
18 -
 19
19 -
 20
20 -
 21
21 -
 22
22 -
 23
23 -
 24
24 -
 25
25 -
 26
26 -
 27
27 -
 28
28 -
29
-
30
-
31
-
32
-
33
-
34
-
35
-
36
-
37
-
38
-
39
-
40
-
41
-
42
-
43
-
44
-
45
-
46
-
47
-
48
-
49
-
50
-
51
-
52
-
53
-
54
-
55
-
56
-
57
-
58
-
59
-
60
-
61
-
62
-
63
-
64
-
65
-
66
-
67
-
68
-
69
-
70
-
71
-
72
-
73
-
74
-
75
-
76
-
77
-
78
-
79
-
80
-
81
-
82
-
83
-
84
-
85
-
86
-
87
-
88
-
89
-
90
-
91
-
92
-
93
-
94
-
95
-
96
-
97
-
98
-
99
-
100
-
101
-
102
-
103
-
104
-
105
-
106
-
107
-
108
-
109
-
110
-
111
-
112
-
113
-
114
-
115
-
116
-
117
-
118
-
119
-
120
-
121
-
122
-
123
-
124
-
125
-
126
-
127
-
128
-
129
-
130
-
131
-
132
-
133
-
134
-
135
-
136
-
137
-
138
-
139
-
140
-
141
-
142
-
143
-
144
-
145
-
146
-
147
-
148
 |
 |