HP Kayak XA-s 02xx HP Kayak XA-s PC Workstation - User Guide for Minitower Mod - Page 63
geron.bk : geron-2.fb4, Sunday, March 22, 1998, 03 AM
 |
View all HP Kayak XA-s 02xx manuals
Add to My Manuals
Save this manual to your list of manuals |
Page 63 highlights
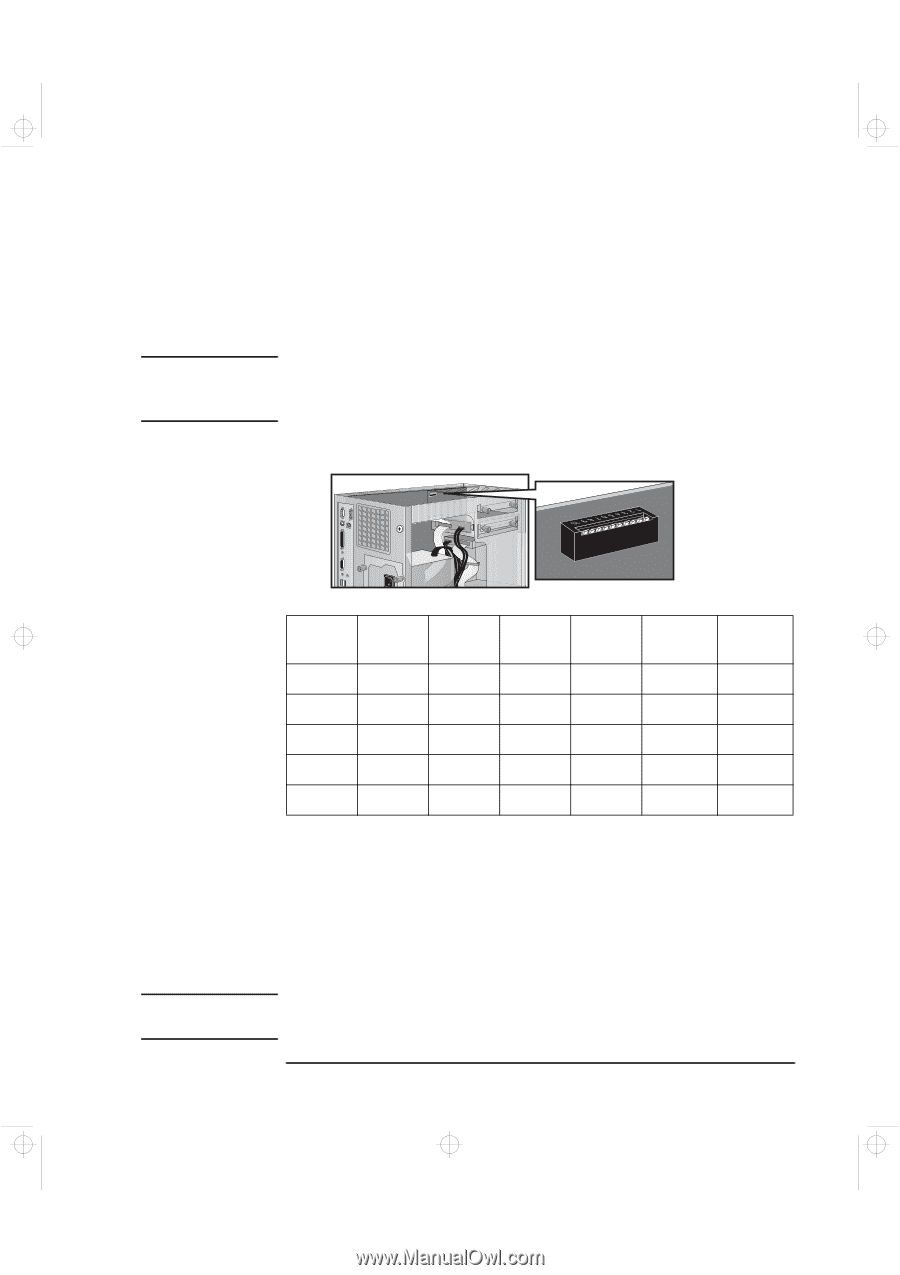
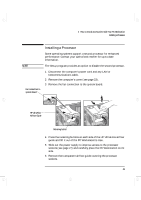
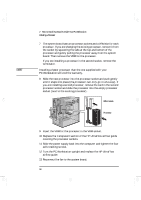
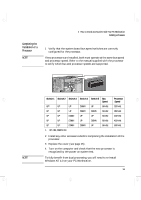
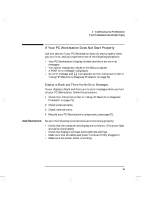
geron.bk : geron-2.fb4 Page 51 Sunday, March 22, 1998 5:03 AM Completing the Installation of a Processor NOTE 2 How to Install Accessories Inside Your PC Workstation Installing a Processor 1 Verify that the system board bus speed switches are correctly configured for the processor. If two processors are installed, both must operate at the same bus speed and processor speed. Refer to the manual supplied with the processor to verify which bus and processor speeds are supported. NOTE Switch 1 UP1 Switch 2 UP Switch 3 UP Switch 4 DOWN Switch 5 UP Bus Speed 66 MHz UP UP UP DOWN DOWN 66 MHz UP UP DOWN UP UP 66 MHz UP UP DOWN UP DOWN 66 MHz UP UP DOWN DOWN UP 66 MHz 1. UP=OFF, DOWN=ON. Processor Speed 333 MHz 350 MHz 400 MHz 450 MHz 500 MHz 2 Install any other accessories before completing the installation of the processor. 3 Replace the cover (see page 25). 4 Turn on the computer and check that the new processor is recognized by the power-on system-test. To fully benefit from dual processing, you will need to re-install Windows NT 4.0 on your PC Workstation. English 51
-
 1
1 -
2
-
3
-
4
-
5
-
6
-
7
-
8
-
9
-
10
-
11
-
12
-
13
-
14
-
15
-
16
-
17
-
18
-
19
-
20
-
21
-
22
-
23
-
24
-
25
-
26
-
27
-
28
-
29
-
30
-
31
-
32
-
33
-
34
-
35
-
36
-
37
-
38
-
39
-
40
-
41
-
42
-
43
-
44
-
45
-
46
-
47
-
48
-
49
-
50
-
51
-
52
-
53
-
54
-
55
-
56
-
57
-
 58
58 -
 59
59 -
 60
60 -
 61
61 -
 62
62 -
 63
63 -
 64
64 -
 65
65 -
 66
66 -
 67
67 -
 68
68 -
69
-
70
-
71
-
72
-
73
-
74
-
75
-
76
-
77
-
78
-
79
-
80
-
81
-
82
-
83
-
84
-
85
-
86
-
87
-
88
-
89
-
90
-
91
-
92
-
93
-
94
-
95
-
96
-
97
-
98
-
99
-
100
-
101
-
102
-
103
-
104
-
105
-
106
-
107
-
108
-
109
-
110
-
111
-
112
-
113
-
114
-
115
-
116
-
117
-
118
-
119
-
120
-
121
-
122
-
123
-
124
-
125
-
126
-
127
-
128
-
129
-
130
-
131
-
132
-
133
-
134
-
135
-
136
-
137
-
138
-
139
-
140
-
141
-
142
-
143
-
144
-
145
-
146
-
147
-
148
 |
 |