HP OmniBook 600C fw 02.00.02-1 and sw 06.00.02 HAFM Server Omnibook - Installa - Page 29
Con HAFM Server Network Information, Begin, Logon, Delete, Logon Information
 |
View all HP OmniBook 600C manuals
Add to My Manuals
Save this manual to your list of manuals |
Page 29 highlights
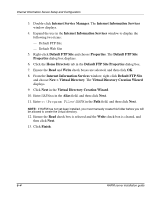
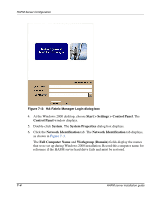
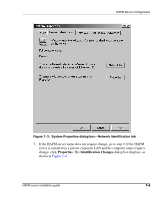
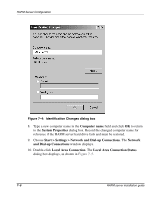
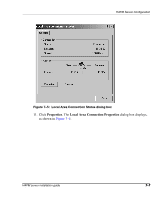
HAFM Server Configuration Configure HAFM Server Network Information Verify the type of LAN installation with the customer's network administrator. If the HAFM server is installed on a dedicated LAN, the network information does not require change, go to "Set HAFM Server Date and Time" on page 7-12. If the HAFM server is installed on a public LAN segment, the following TCP/IP network information must be changed to conform to the customer's LAN addressing scheme: • IP address. • Subnet mask • Gateway address-the address of the local router for the corporate intranet • DNS host name • DNS domain name NOTE: At some customer installations, TCP/IP addresses for the HAFM server may be allocated automatically using DHCP. To configure TCP/IP network information for the HAFM server: 1. Power on the HAFM server. The notebook PC performs a POST and starts the Windows 2000 operating system. After the operating system starts, the Begin Logon dialog box displays. 2. Press Ctrl+Alt+Delete. The Logon Information dialog box displays. 3. Type the default Windows 2000 user name and password and click OK. NOTE: The default user name is Administrator and the password is set up during Windows 2000 installation. The user name and password are case-sensitive. Consult with the customer's network administrator to change the user name and password. The Windows 2000 desktop opens and the HAFM Login dialog box displays, as shown in Figure 7-2. HAFM server installation guide 7-3
-
 1
1 -
2
-
3
-
4
-
5
-
6
-
7
-
8
-
9
-
10
-
11
-
12
-
13
-
14
-
15
-
16
-
17
-
18
-
19
-
20
-
21
-
22
-
23
-
 24
24 -
 25
25 -
 26
26 -
 27
27 -
 28
28 -
 29
29 -
 30
30 -
 31
31 -
 32
32 -
 33
33 -
 34
34 -
35
-
36
-
37
-
38
-
39
-
40
-
41
-
42
-
43
-
44
-
45
-
46
-
47
-
48
-
49
-
50
-
51
-
52
-
53
-
54
-
55
-
56
-
57
-
58
-
59
-
60
-
61
-
62
-
63
-
64
-
65
-
66
-
67
-
68
 |
 |