HP OmniBook 600C fw 02.00.02-1 and sw 06.00.02 HAFM Server Omnibook - Installa - Page 64
Installing the sliding shelf brackets
 |
View all HP OmniBook 600C manuals
Add to My Manuals
Save this manual to your list of manuals |
Page 64 highlights
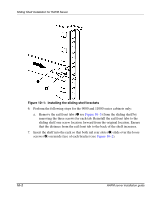
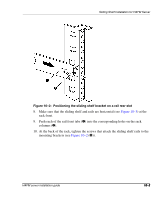
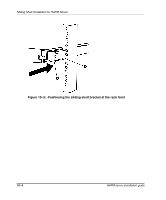
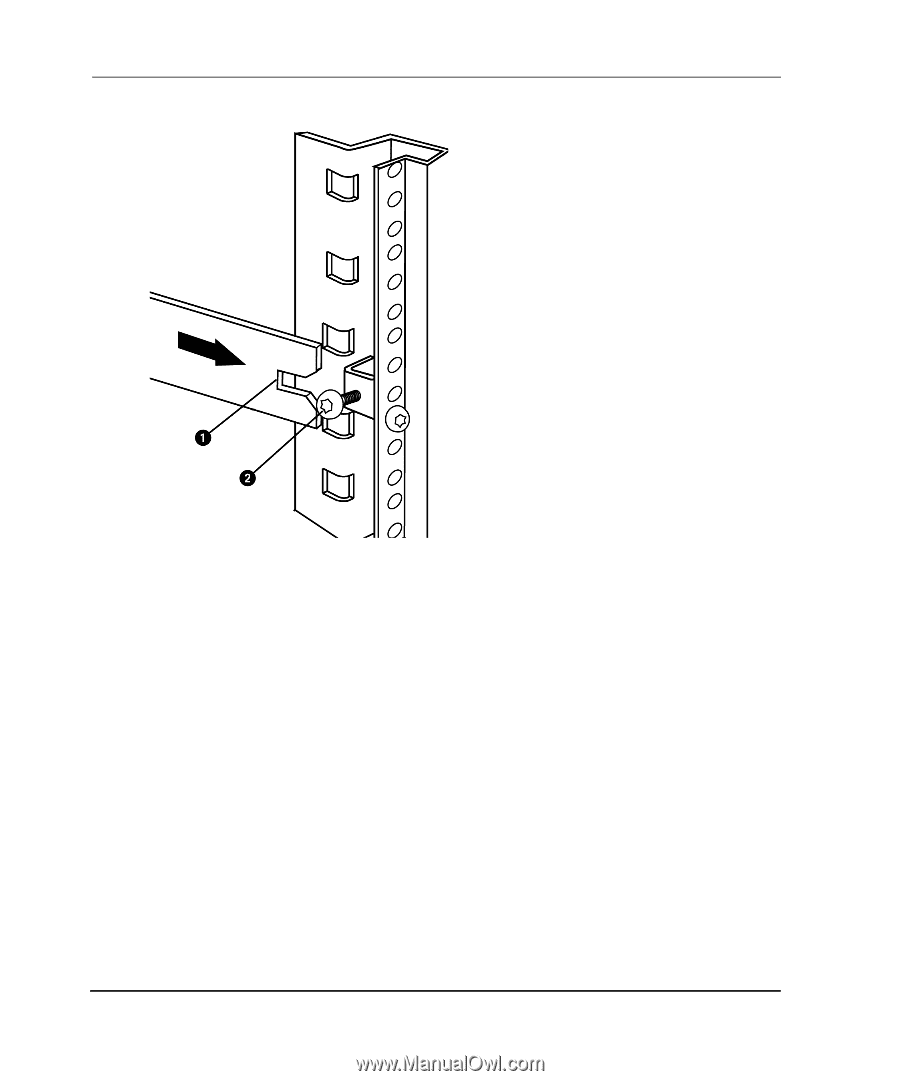
Sliding Shelf Installation for HAFM Server Figure 10-1: Installing the sliding shelf brackets 6. Perform the following steps for the 9000 and 11000 series cabinets only: a. Remove the rail front tabs (1 see Figure 10-3) from the sliding shelf by removing the three screws for each tab. Reinstall the rail front tabs to the sliding shelf one screw location forward from the original location. Ensure that the distance from the rail front tab to the back of the shelf increases. 7. Insert the shelf into the rack so that both rail rear slots (1) slide over the loose screws (2) on inside face of each bracket (see Figure 10-2). 10-2 HAFM server installation guide
-
 1
1 -
2
-
3
-
4
-
5
-
6
-
7
-
8
-
9
-
10
-
11
-
12
-
13
-
14
-
15
-
16
-
17
-
18
-
19
-
20
-
21
-
22
-
23
-
24
-
25
-
26
-
27
-
28
-
29
-
30
-
31
-
32
-
33
-
34
-
35
-
36
-
37
-
38
-
39
-
40
-
41
-
42
-
43
-
44
-
45
-
46
-
47
-
48
-
49
-
50
-
51
-
52
-
53
-
54
-
55
-
56
-
57
-
58
-
 59
59 -
 60
60 -
 61
61 -
 62
62 -
 63
63 -
 64
64 -
 65
65 -
 66
66 -
 67
67 -
 68
68
 |
 |
Sliding Shelf Installation for HAFM Server
10–2
HAFM server installation guide
Figure 10–1:
Installing the sliding shelf brackets
6.
Perform the following steps for the 9000 and 11000 series cabinets only:
a.
Remove the rail front tabs (
1
see
Figure 10–3
) from the sliding shelf by
removing the three screws for each tab. Reinstall the rail front tabs to the
sliding shelf one screw location forward from the original location. Ensure
that the distance from the rail front tab to the back of the shelf increases.
7.
Insert the shelf into the rack so that both rail rear slots (
1
) slide over the loose
screws (
2
) on inside face of each bracket (see
Figure 10–2
).