HP OmniBook 600C fw 02.00.02-1 and sw 06.00.02 HAFM Server Omnibook - Installa - Page 45
Ready to create your connection window, step 15, Remote Notification
 |
View all HP OmniBook 600C manuals
Add to My Manuals
Save this manual to your list of manuals |
Page 45 highlights
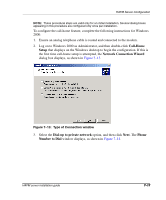
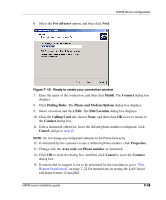
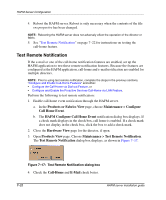
HAFM Server Configuration 6. Select the For all users option, and then click Next. Figure 7-16: Ready to create your connection window 7. Enter the name of the connection, and then click Finish. The Connect dialog box displays. 8. Click Dialing Rules. The Phone and Modem Options dialog box displays. 9. Select a location and click Edit. The Edit Location dialog box displays. 10. Click the Calling Card tab, choose None, and then click OK twice to return to the Connect dialog box. 11. Unless instructed otherwise, leave the default phone number configured, click Cancel, and go to step 15. NOTE: Do not change any configuration defaults for the Phone book entry. 12. If instructed by the customer to use a different phone number, click Properties. 13. Change only the Area code and Phone number as instructed. 14. Click OK to close the dialog box, and then click Cancel to close the Connect dialog box. 15. If remote dial-in support is not to be permitted for the installation, go to "Test Remote Notification" on page 7-22 for instructions on testing the LAN-based call-home feature, if installed. HAFM server installation guide 7-19
-
 1
1 -
2
-
3
-
4
-
5
-
6
-
7
-
8
-
9
-
10
-
11
-
12
-
13
-
14
-
15
-
16
-
17
-
18
-
19
-
20
-
21
-
22
-
23
-
24
-
25
-
26
-
27
-
28
-
29
-
30
-
31
-
32
-
33
-
34
-
35
-
36
-
37
-
38
-
39
-
 40
40 -
 41
41 -
 42
42 -
 43
43 -
 44
44 -
 45
45 -
 46
46 -
 47
47 -
 48
48 -
 49
49 -
 50
50 -
51
-
52
-
53
-
54
-
55
-
56
-
57
-
58
-
59
-
60
-
61
-
62
-
63
-
64
-
65
-
66
-
67
-
68
 |
 |
