HP OmniBook 600C fw 02.00.02-1 and sw 06.00.02 HAFM Server Omnibook - Installa - Page 46
Configuring Windows 2000 to Enable a Dial-up Connection, changes
 |
View all HP OmniBook 600C manuals
Add to My Manuals
Save this manual to your list of manuals |
Page 46 highlights
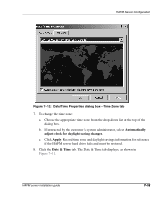
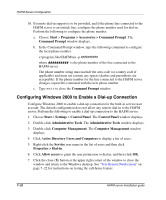
HAFM Server Configuration 16. If remote dial-in support is to be provided, and if the phone line connected to the HAFM server is an outside line, configure the phone number used for dial-in. Perform the following to configure the phone number: a. Choose Start > Programs > Accessories > Command Prompt. The Command Prompt window displays. b. In the Command Prompt window, type the following command to configure the local phone number: c:\program files\HAFM\rns -p ########## where ########## is the phone number of the line connected to the HAFM server. The phone number string must include the area code (or country code if applicable) and must not contain any spaces (dashes and parenthesis are acceptable). If the phone number for the line connected to the HAFM server changes, repeat this command with the new phone number. c. Type exit to close the Command Prompt window. Configuring Windows 2000 to Enable a Dial-up Connection Configure Windows 2000 to enable a dial-up connection for the built-in service user account. The default configuration does not allow any remote dial-in to the HAFM server. Perform the following to enable a dial-up connection to the HAFM server: 1. Choose Start > Settings > Control Panel. The Control Panel window displays. 2. Double-click Administrative Tools. The Administrative Tools window displays. 3. Double-click Computer Management. The Computer Management window displays. 4. Click Active Directory Users and Computers to display a list of users. 5. Right-click the Service user name in the list of users and then click Properties > Dial-in. 6. Click Allow access to grant the user permission to dial in, and then click OK. 7. Click the close (X) button at the upper right corner of the window to close the window and return to the Windows desktop. See "Test Remote Notification" on page 7-22 for instructions on testing the call-home feature. 7-20 HAFM server installation guide
-
 1
1 -
2
-
3
-
4
-
5
-
6
-
7
-
8
-
9
-
10
-
11
-
12
-
13
-
14
-
15
-
16
-
17
-
18
-
19
-
20
-
21
-
22
-
23
-
24
-
25
-
26
-
27
-
28
-
29
-
30
-
31
-
32
-
33
-
34
-
35
-
36
-
37
-
38
-
39
-
40
-
 41
41 -
 42
42 -
 43
43 -
 44
44 -
 45
45 -
 46
46 -
 47
47 -
 48
48 -
 49
49 -
 50
50 -
 51
51 -
52
-
53
-
54
-
55
-
56
-
57
-
58
-
59
-
60
-
61
-
62
-
63
-
64
-
65
-
66
-
67
-
68
 |
 |