HP OmniBook xe3-gc HP OmniBook Notebook PC XE3 Series - Reference Guide - Page 70
To use infrared devices - notebook pc bios
 |
View all HP OmniBook xe3-gc manuals
Add to My Manuals
Save this manual to your list of manuals |
Page 70 highlights
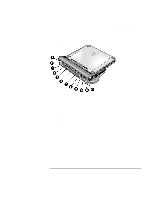
Making Connections Connecting External Components To use infrared devices You can communicate between your HP notebook PC and infrared devices without using cables. To enable the infrared port Before you use your infrared port to transfer files or to print to an infrared printer, you must enable the infrared port in the BIOS: 1. Reboot your computer. 2. When you see the HP logo, press F2. 3. Select the System Devices menu. 4. Set Infrared Port to Enabled. 5. Set Mode to FIR. 6. If DMA channel conflicts with Parallel port DMA channel, change Parallel port Mode to EPP. 7. Save and Exit to continue reboot. To set up the infrared connection Your notebook provides one infrared (IR) port located on the rear panel. The infrared port provides wireless, serial communication between your computer and other IR-equipped devices such as printers and other computers. • Line up the notebook's IR port and the other IR port in as straight a line as possible. The two ports should be no more than one meter apart, with no obstructions in between. Noise from nearby equipment can cause transmission errors. • To check the status of communications in Windows 98, go to Infrared Monitor. To check the status of communications in Windows 2000, go to Wireless Link. You can find both under Start, Settings, Control Panel. If infrared communication is not enabled, you can enable it here; consult help in the application. 70 Reference Guide
-
 1
1 -
2
-
3
-
4
-
5
-
6
-
7
-
8
-
9
-
10
-
11
-
12
-
13
-
14
-
15
-
16
-
17
-
18
-
19
-
20
-
21
-
22
-
23
-
24
-
25
-
26
-
27
-
28
-
29
-
30
-
31
-
32
-
33
-
34
-
35
-
36
-
37
-
38
-
39
-
40
-
41
-
42
-
43
-
44
-
45
-
46
-
47
-
48
-
49
-
50
-
51
-
52
-
53
-
54
-
55
-
56
-
57
-
58
-
59
-
60
-
61
-
62
-
63
-
64
-
 65
65 -
 66
66 -
 67
67 -
 68
68 -
 69
69 -
 70
70 -
 71
71 -
 72
72 -
 73
73 -
 74
74 -
 75
75 -
76
-
77
-
78
-
79
-
80
-
81
-
82
-
83
-
84
-
85
-
86
-
87
-
88
-
89
-
90
-
91
-
92
-
93
-
94
-
95
-
96
-
97
-
98
-
99
-
100
-
101
-
102
-
103
-
104
-
105
-
106
-
107
-
108
-
109
-
110
-
111
-
112
-
113
-
114
-
115
-
116
-
117
-
118
-
119
-
120
-
121
-
122
-
123
-
124
-
125
-
126
-
127
-
128
-
129
-
130
-
131
-
132
-
133
-
134
-
135
-
136
-
137
-
138
-
139
-
140
-
141
-
142
-
143
-
144
-
145
-
146
-
147
-
148
-
149
-
150
-
151
 |
 |