HP OmniBook xe3-gf HP Omnibook Notebook PC XE3-GF - Reference Guide - Page 123
Testing Hardware Operation
 |
View all HP OmniBook xe3-gf manuals
Add to My Manuals
Save this manual to your list of manuals |
Page 123 highlights
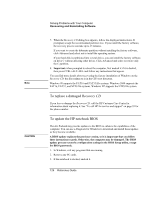
Solving Problems with Your Computer Testing Hardware Operation Testing Hardware Operation The e-Diagtools program included with your computer provides two levels of testing: • Automated testing using the basic hardware test. • Advanced testing using individual hardware tests. The tests are designed to run after the system reboots. This ensures that the computer will be in a predictable state, so the diagnostic program can properly test the hardware components. The tests are nondestructive and are intended to preserve the state of the computer. The computer reboots when you exit the program, so drivers can be loaded. To run the diagnostic test 1. Restart the computer: click Start, Shut Down (or Turn Off Computer), Restart. 2. Press F10 when you see the HP logo. 3. When the menu appears, press ENTER to run e-Diagtools. The first time you run the program, you will be prompted to select the language for the program. 4. Follow the prompts to run e-Diagtools. 5. When the Configuration Description appears, check the list of detected hardware. If a device is not detected, it may be configured incorrectly in the BIOS. You can confirm the problem by running BIOS Setup utility and checking the settings. 6. Run the basic test. Press F2 to start the basic hardware test. The results appear when the test is complete. 7. If you intend to exit without running the advanced tests, press F4 to view the Support Ticket. Press F3 to exit e-Diagtools. 8. Optional: run the advanced tests. Press F2 to open the advanced test screen. Reference Guide 123
-
 1
1 -
2
-
3
-
4
-
5
-
6
-
7
-
8
-
9
-
10
-
11
-
12
-
13
-
14
-
15
-
16
-
17
-
18
-
19
-
20
-
21
-
22
-
23
-
24
-
25
-
26
-
27
-
28
-
29
-
30
-
31
-
32
-
33
-
34
-
35
-
36
-
37
-
38
-
39
-
40
-
41
-
42
-
43
-
44
-
45
-
46
-
47
-
48
-
49
-
50
-
51
-
52
-
53
-
54
-
55
-
56
-
57
-
58
-
59
-
60
-
61
-
62
-
63
-
64
-
65
-
66
-
67
-
68
-
69
-
70
-
71
-
72
-
73
-
74
-
75
-
76
-
77
-
78
-
79
-
80
-
81
-
82
-
83
-
84
-
85
-
86
-
87
-
88
-
89
-
90
-
91
-
92
-
93
-
94
-
95
-
96
-
97
-
98
-
99
-
100
-
101
-
102
-
103
-
104
-
105
-
106
-
107
-
108
-
109
-
110
-
111
-
112
-
113
-
114
-
115
-
116
-
117
-
 118
118 -
 119
119 -
 120
120 -
 121
121 -
 122
122 -
 123
123 -
 124
124 -
 125
125 -
 126
126 -
 127
127 -
 128
128 -
129
-
130
-
131
-
132
-
133
-
134
-
135
-
136
-
137
-
138
-
139
-
140
-
141
-
142
-
143
-
144
-
145
-
146
-
147
-
148
-
149
-
150
-
151
-
152
-
153
-
154
 |
 |