HP OmniBook xe3-gf HP Omnibook Notebook PC XE3-GF - Reference Guide - Page 37
To use the One-Touch buttons - specifications
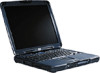 |
View all HP OmniBook xe3-gf manuals
Add to My Manuals
Save this manual to your list of manuals |
Page 37 highlights
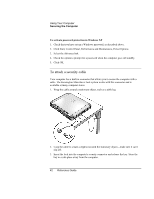
Using Your Computer Operating the Computer To boot from a floppy disk or CD-ROM one time only You can also select the boot drive for that boot only as follows: 1. Restart the computer: click Start, Shut Down (or Turn Off Computer), Restart. 2. When you see the HP logo, press ESC to display the Boot menu. 3. Use the arrow keys to select the boot device, then press Enter. To use the One-Touch buttons The One-Touch buttons on your HP notebook allow you to start your e-mail or a Web browser-or any other application-by pressing a single button. The buttons are configured initially for specific applications, but you can change the configuration to start any applications you want. To configure a One-Touch button 1. Click Start, Settings, Control Panel, then double-click Keyboard (Windows 98 or 2000), or click Start, Control Panel, Printers and Other Hardware, Keyboard (Windows XP). 2. Select the One-Touch buttons tab. 3. Click the button of the key you want to reconfigure. 4. In the Button Label field, type the name of the application you want to start with this button. This name will appear onscreen when you press the button. 5. From the list of preinstalled applications, select the application to be associated with the button. OR If the desired application is not on the list, select "Select a file on your computer" and click the Browse button to choose any file on your notebook. OR If you want to attach a Web page to the button, select "Type in a Web site address" and then select a Favorites page or type the URL of the page you want. 6. Click OK. 7. If you want to display the name of the associated application whenever you press a One-Touch button, click the Onscreen Display tab and select the option to show OneTouch button onscreen messages. Reference Guide 37
-
 1
1 -
2
-
3
-
4
-
5
-
6
-
7
-
8
-
9
-
10
-
11
-
12
-
13
-
14
-
15
-
16
-
17
-
18
-
19
-
20
-
21
-
22
-
23
-
24
-
25
-
26
-
27
-
28
-
29
-
30
-
31
-
 32
32 -
 33
33 -
 34
34 -
 35
35 -
 36
36 -
 37
37 -
 38
38 -
 39
39 -
 40
40 -
 41
41 -
 42
42 -
43
-
44
-
45
-
46
-
47
-
48
-
49
-
50
-
51
-
52
-
53
-
54
-
55
-
56
-
57
-
58
-
59
-
60
-
61
-
62
-
63
-
64
-
65
-
66
-
67
-
68
-
69
-
70
-
71
-
72
-
73
-
74
-
75
-
76
-
77
-
78
-
79
-
80
-
81
-
82
-
83
-
84
-
85
-
86
-
87
-
88
-
89
-
90
-
91
-
92
-
93
-
94
-
95
-
96
-
97
-
98
-
99
-
100
-
101
-
102
-
103
-
104
-
105
-
106
-
107
-
108
-
109
-
110
-
111
-
112
-
113
-
114
-
115
-
116
-
117
-
118
-
119
-
120
-
121
-
122
-
123
-
124
-
125
-
126
-
127
-
128
-
129
-
130
-
131
-
132
-
133
-
134
-
135
-
136
-
137
-
138
-
139
-
140
-
141
-
142
-
143
-
144
-
145
-
146
-
147
-
148
-
149
-
150
-
151
-
152
-
153
-
154
 |
 |