HP OmniBook xe3-gf HP Omnibook Notebook PC XE3-GF - Reference Guide - Page 86
To remove a RAM expansion module
 |
View all HP OmniBook xe3-gf manuals
Add to My Manuals
Save this manual to your list of manuals |
Page 86 highlights
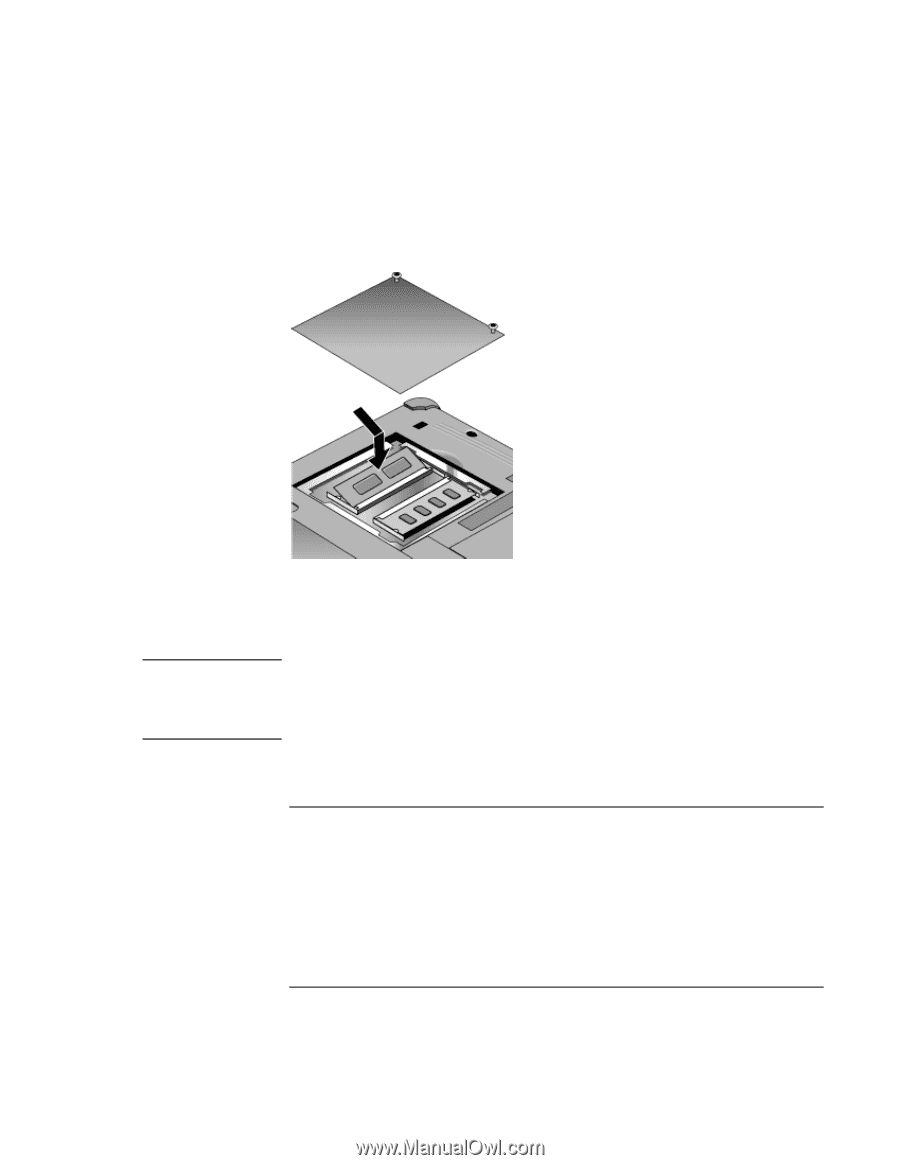
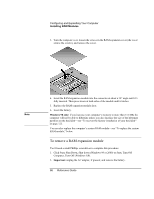
Configuring and Expanding Your Computer Installing RAM Modules 3. Turn the computer over, loosen the screws in the RAM expansion cover (the cover retains the screws), and remove the cover. Note 4. Insert the RAM expansion module into the connector at about a 30° angle until it's fully inserted. Then press down at both sides of the module until it latches. 5. Replace the RAM expansion module door. 6. Insert the battery. Windows 98 only: if you increase your computer's memory to more than 512 MB, the computer will not be able to hibernate unless you also increase the size of the hibernate partition on the hard disk-see "To recover the factory installation of your hard disk" on page 125. You can also replace the computer's system RAM module-see "To replace the system RAM module," below. To remove a RAM expansion module You'll need a small Phillips screwdriver to complete this procedure. 1. Click Start, Shut Down, Shut down (Windows 98 or 2000) or Start, Turn Off Computer, Turn Off (Windows XP). 2. Important: unplug the AC adapter, if present, and remove the battery. 86 Reference Guide
-
 1
1 -
2
-
3
-
4
-
5
-
6
-
7
-
8
-
9
-
10
-
11
-
12
-
13
-
14
-
15
-
16
-
17
-
18
-
19
-
20
-
21
-
22
-
23
-
24
-
25
-
26
-
27
-
28
-
29
-
30
-
31
-
32
-
33
-
34
-
35
-
36
-
37
-
38
-
39
-
40
-
41
-
42
-
43
-
44
-
45
-
46
-
47
-
48
-
49
-
50
-
51
-
52
-
53
-
54
-
55
-
56
-
57
-
58
-
59
-
60
-
61
-
62
-
63
-
64
-
65
-
66
-
67
-
68
-
69
-
70
-
71
-
72
-
73
-
74
-
75
-
76
-
77
-
78
-
79
-
80
-
 81
81 -
 82
82 -
 83
83 -
 84
84 -
 85
85 -
 86
86 -
 87
87 -
 88
88 -
 89
89 -
 90
90 -
 91
91 -
92
-
93
-
94
-
95
-
96
-
97
-
98
-
99
-
100
-
101
-
102
-
103
-
104
-
105
-
106
-
107
-
108
-
109
-
110
-
111
-
112
-
113
-
114
-
115
-
116
-
117
-
118
-
119
-
120
-
121
-
122
-
123
-
124
-
125
-
126
-
127
-
128
-
129
-
130
-
131
-
132
-
133
-
134
-
135
-
136
-
137
-
138
-
139
-
140
-
141
-
142
-
143
-
144
-
145
-
146
-
147
-
148
-
149
-
150
-
151
-
152
-
153
-
154
 |
 |