HP Photosmart C4400 Full User Guide - Page 168
Unable to print - offline
 |
View all HP Photosmart C4400 manuals
Add to My Manuals
Save this manual to your list of manuals |
Page 168 highlights
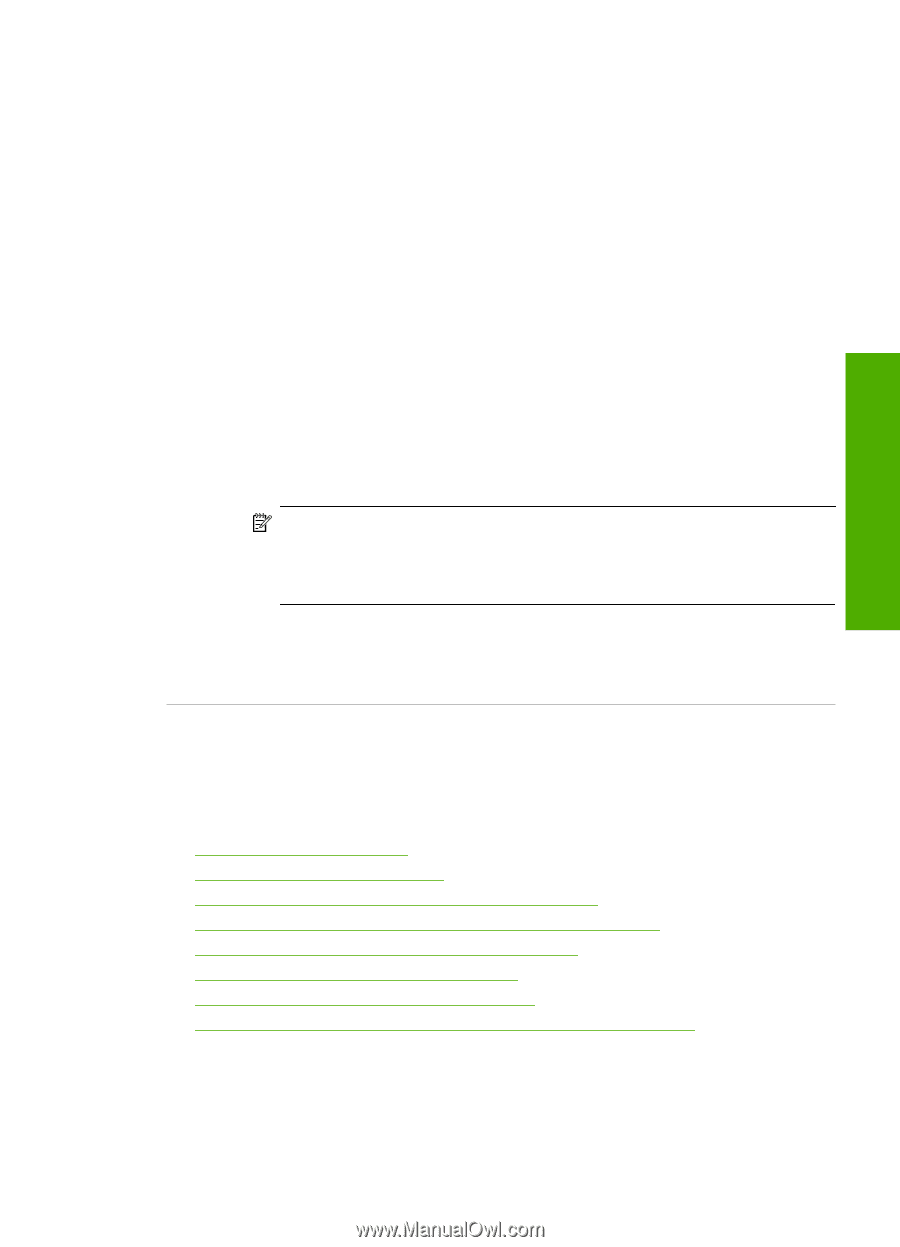
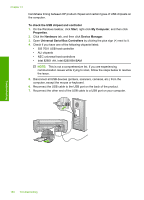
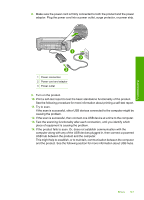
Troubleshooting c. Select the appropriate check boxes to remove the unnecessary components. More information about the Disk Cleanup utility The Disk Cleanup utility frees hard disk space on your computer by doing the following: • Deleting temporary Internet files • Deleting downloaded program files • Emptying the Recycle Bin • Deleting files from your temporary folder • Deleting files created by other Windows tools • Removing optional Windows components that you do not use d. After selecting the components to remove, click OK. 5. Install the software. To install the software a. Insert software CD into the CD-ROM drive of the computer. The software installation will start automatically. NOTE: If the installation does not run automatically, from the Windows Start menu, click Start Search (or Run). In the Start Search (or Run dialog box), type d:\setup.exe, and then press Enter. (If your CD-ROM drive is not assigned to drive letter D, enter the appropriate drive letter.) b. Follow the prompts on the computer screen to install the software. 6. Try using the product again. Cause: The software needed to be completely uninstalled and reinstalled. Unable to print Try the following solutions to resolve the issue. Solutions are listed in order, with the most likely solution first. If the first solution does not solve the problem, continue trying the remaining solutions until the issue is resolved. • Solution 1: Print a test page • Solution 2: Clear the print queue • Solution 3: Disconnect and reconnect the USB cable • Solution 4: Verify that the product is set as the default printer • Solution 5: Check if the printer is paused or offline • Solution 6: Clear the print queue manually • Solution 7: Stop and restart the print spooler • Solution 8: Verify whether the software application has a problem Errors 165
-
 1
1 -
2
-
3
-
4
-
5
-
6
-
7
-
8
-
9
-
10
-
11
-
12
-
13
-
14
-
15
-
16
-
17
-
18
-
19
-
20
-
21
-
22
-
23
-
24
-
25
-
26
-
27
-
28
-
29
-
30
-
31
-
32
-
33
-
34
-
35
-
36
-
37
-
38
-
39
-
40
-
41
-
42
-
43
-
44
-
45
-
46
-
47
-
48
-
49
-
50
-
51
-
52
-
53
-
54
-
55
-
56
-
57
-
58
-
59
-
60
-
61
-
62
-
63
-
64
-
65
-
66
-
67
-
68
-
69
-
70
-
71
-
72
-
73
-
74
-
75
-
76
-
77
-
78
-
79
-
80
-
81
-
82
-
83
-
84
-
85
-
86
-
87
-
88
-
89
-
90
-
91
-
92
-
93
-
94
-
95
-
96
-
97
-
98
-
99
-
100
-
101
-
102
-
103
-
104
-
105
-
106
-
107
-
108
-
109
-
110
-
111
-
112
-
113
-
114
-
115
-
116
-
117
-
118
-
119
-
120
-
121
-
122
-
123
-
124
-
125
-
126
-
127
-
128
-
129
-
130
-
131
-
132
-
133
-
134
-
135
-
136
-
137
-
138
-
139
-
140
-
141
-
142
-
143
-
144
-
145
-
146
-
147
-
148
-
149
-
150
-
151
-
152
-
153
-
154
-
155
-
156
-
157
-
158
-
159
-
160
-
161
-
162
-
 163
163 -
 164
164 -
 165
165 -
 166
166 -
 167
167 -
 168
168 -
 169
169 -
 170
170 -
 171
171 -
 172
172 -
 173
173 -
174
-
175
-
176
-
177
-
178
-
179
-
180
-
181
-
182
-
183
-
184
-
185
-
186
-
187
-
188
-
189
-
190
-
191
-
192
-
193
-
194
-
195
-
196
-
197
-
198
-
199
-
200
-
201
-
202
-
203
-
204
-
205
-
206
-
207
-
208
-
209
-
210
-
211
-
212
-
213
-
214
-
215
-
216
-
217
-
218
-
219
-
220
-
221
-
222
-
223
-
224
-
225
-
226
-
227
-
228
-
229
-
230
-
231
-
232
-
233
-
234
-
235
-
236
-
237
-
238
-
239
-
240
-
241
-
242
-
243
 |
 |