HP Photosmart C4400 Full User Guide - Page 96
To uninstall the software completely, Start, Settings, Control Panel, Add/Remove Programs - update
 |
View all HP Photosmart C4400 manuals
Add to My Manuals
Save this manual to your list of manuals |
Page 96 highlights
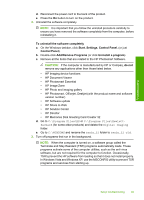
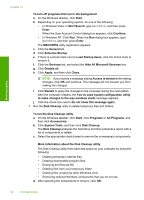
Troubleshooting d. Reconnect the power cord to the back of the product. e. Press the On button to turn on the product. 2. Uninstall the software completely. NOTE: It is important that you follow the uninstall procedure carefully to ensure you have removed the software completely from the computer, before reinstalling it. To uninstall the software completely a. On the Windows taskbar, click Start, Settings, Control Panel, (or just Control Panel). b. Double-click Add/Remove Programs (or click Uninstall a program). c. Remove all the items that are related to the HP Photosmart Software. CAUTION: If the computer is manufactured by HP or Compaq, do not remove any applications other than those listed below. • HP Imaging device functions • HP Document Viewer • HP Photosmart Essential • HP Image Zone • HP Photo and imaging gallery • HP Photosmart, Officejet, Deskjet (with the product name and software version number) • HP Software update • HP Share to Web • HP Solution Center • HP Director • HP Memories Disk Greeting Card Creator 32 d. Go to C:\Program Files\HP or C:\Program Files\HewlettPackard (for some older products) and delete the Digital Imaging folder. e. Go to C:\WINDOWS and rename the twain_32 folder to twain_32 old. 3. Turn off programs that run in the background. NOTE: When the computer is turned on, a software group called the Terminate and Stay Resident (TSR) programs automatically loads. These programs activate some of the computer utilities, such as the anti-virus software, but are not required for the computer to function. Occasionally, TSR's prevent the HP software from loading so that it does not install properly. In Windows Vista and Windows XP, use the MSCONFIG utility to prevent TSR programs and services from starting up. Setup troubleshooting 93
-
 1
1 -
2
-
3
-
4
-
5
-
6
-
7
-
8
-
9
-
10
-
11
-
12
-
13
-
14
-
15
-
16
-
17
-
18
-
19
-
20
-
21
-
22
-
23
-
24
-
25
-
26
-
27
-
28
-
29
-
30
-
31
-
32
-
33
-
34
-
35
-
36
-
37
-
38
-
39
-
40
-
41
-
42
-
43
-
44
-
45
-
46
-
47
-
48
-
49
-
50
-
51
-
52
-
53
-
54
-
55
-
56
-
57
-
58
-
59
-
60
-
61
-
62
-
63
-
64
-
65
-
66
-
67
-
68
-
69
-
70
-
71
-
72
-
73
-
74
-
75
-
76
-
77
-
78
-
79
-
80
-
81
-
82
-
83
-
84
-
85
-
86
-
87
-
88
-
89
-
90
-
 91
91 -
 92
92 -
 93
93 -
 94
94 -
 95
95 -
 96
96 -
 97
97 -
 98
98 -
 99
99 -
 100
100 -
 101
101 -
102
-
103
-
104
-
105
-
106
-
107
-
108
-
109
-
110
-
111
-
112
-
113
-
114
-
115
-
116
-
117
-
118
-
119
-
120
-
121
-
122
-
123
-
124
-
125
-
126
-
127
-
128
-
129
-
130
-
131
-
132
-
133
-
134
-
135
-
136
-
137
-
138
-
139
-
140
-
141
-
142
-
143
-
144
-
145
-
146
-
147
-
148
-
149
-
150
-
151
-
152
-
153
-
154
-
155
-
156
-
157
-
158
-
159
-
160
-
161
-
162
-
163
-
164
-
165
-
166
-
167
-
168
-
169
-
170
-
171
-
172
-
173
-
174
-
175
-
176
-
177
-
178
-
179
-
180
-
181
-
182
-
183
-
184
-
185
-
186
-
187
-
188
-
189
-
190
-
191
-
192
-
193
-
194
-
195
-
196
-
197
-
198
-
199
-
200
-
201
-
202
-
203
-
204
-
205
-
206
-
207
-
208
-
209
-
210
-
211
-
212
-
213
-
214
-
215
-
216
-
217
-
218
-
219
-
220
-
221
-
222
-
223
-
224
-
225
-
226
-
227
-
228
-
229
-
230
-
231
-
232
-
233
-
234
-
235
-
236
-
237
-
238
-
239
-
240
-
241
-
242
-
243
 |
 |
