HP Vectra VEi8 HP Vectra VEi7, User's Guide
HP Vectra VEi8 Manual
 |
View all HP Vectra VEi8 manuals
Add to My Manuals
Save this manual to your list of manuals |
HP Vectra VEi8 manual content summary:
- HP Vectra VEi8 | HP Vectra VEi7, User's Guide - Page 1
User's Guide Corporate PCs See Chapter 1 for Quick Setup www.hp.com/go/vectrasupport - HP Vectra VEi8 | HP Vectra VEi7, User's Guide - Page 2
, or translated to another language without the prior written consent of Hewlett-Packard Company. AdobeTM and AcrobatTM are trademarks of Adobe Systems Incorporated. Microsoft®, MS®, MS-DOS®, Windows®, and Windows NT® are U.S. registered trademarks of Microsoft Corporation. CeleronTM is a trademark - HP Vectra VEi8 | HP Vectra VEi7, User's Guide - Page 3
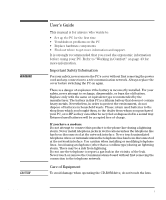
Guide This manual is for anyone who wants to: • Set up the PC for the first time • Troubleshoot problems on the PC • Replace hardware components • Find out where to get more information and support the dealer from whom you purchased your PC, or to HP so they can either be recycled or disposed of in a - HP Vectra VEi8 | HP Vectra VEi7, User's Guide - Page 4
Contents 1 Setting Up and Using Your PC 1 2 Basic Problem Solving 13 3 Replacing Hardware Components 21 4 Working in Comfort 43 Index 55 Regulatory Information and Warranty 57 English ii - HP Vectra VEi8 | HP Vectra VEi7, User's Guide - Page 5
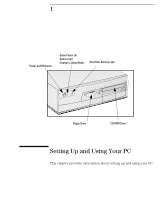
1 Power On/Off Button Green Power On Status Light (Orange in Sleep Mode) Hard Disk Activity Light Floppy Drive CD-ROM Drive Setting Up and Using Your PC This chapter provides information about setting up and using your PC. - HP Vectra VEi8 | HP Vectra VEi7, User's Guide - Page 6
WARNING 1 Setting Up and Using Your PC Unpacking Your PC Unpacking Your PC If you are in any doubt that you can lift the PC or monitor - HP Vectra VEi8 | HP Vectra VEi7, User's Guide - Page 7
1 Setting Up and Using Your PC Connecting the Mouse, Keyboard, Monitor and Printer Connecting the Mouse, Keyboard, . 25-pin Parallel Connector Monitor Mouse Keyboard Two USB connectors1 9-pin Serial Connector 1. USB is supported by: a) the latest version of Windows 95 (preloaded on some models - HP Vectra VEi8 | HP Vectra VEi7, User's Guide - Page 8
PC to the network. Connect the network cable to the RJ-45 UTP (Unshielded Twisted Pair) LAN connector. 10/100BT Connector HP provides drivers and installation information on non-HP network adapter boards. Refer to the LAN Card Ready section on HP's Support web site at www.hp.com/go/vectrasupport - HP Vectra VEi8 | HP Vectra VEi7, User's Guide - Page 9
WARNING 1 Setting Up and Using Your PC Connecting Multimedia Accessories Connecting Multimedia Accessories . Never touch or remove the communications card without first removing the connection to the telephone network. Your PC has a multimedia rear panel with headphone out, microphone in and line in - HP Vectra VEi8 | HP Vectra VEi7, User's Guide - Page 10
that is easily accessible. CAUTION Voltage Selection Switch 1 Remove the warning label covering the PC's power connector, and ensure that the voltage setting is correct for your country. (The voltage is set during manufacture and should already be correct.) Starting your PC on the wrong voltage - HP Vectra VEi8 | HP Vectra VEi7, User's Guide - Page 11
on OK and the PC will restart. After Your PC Has Restarted Ì Set the keyboard to a comfortable position. Ì Adjust the monitor's brightness and monitor. Refer to the monitor's manual for details. Ì Arrange your work environment for comfort (refer to Programs Á HP Info Á Working Comfortably for more - HP Vectra VEi8 | HP Vectra VEi7, User's Guide - Page 12
management in the HP Setup program. Refer to General Power Settings in the Power menu of the Setup program. (To enter the PC's Setup program, restart your PC and press during start-up.) Operating System Power Management Operating systems such as Windows NT 4.0, Windows 95 and Windows 98 differ in - HP Vectra VEi8 | HP Vectra VEi7, User's Guide - Page 13
to HP's web site at: www.hp.com/toptools. Software and Drivers In the "Software and Drivers" section of the HP support site (www.hp.com/go/vectrasupport), you can download the latest drivers and BIOS for your PC. Additional Information and Help Information On Your PC's Hard Disk Drive Additional - HP Vectra VEi8 | HP Vectra VEi7, User's Guide - Page 14
Information On HP's Support Web Site The HP web site contains a wide range of information, including downloadable documentation, service and support options, and the latest versions of drivers and utilities. Manuals for Your PC In the "Manuals" section of the HP Vectra Support site (www.hp.com/go - HP Vectra VEi8 | HP Vectra VEi7, User's Guide - Page 15
it free of charge from Adobe's web site (www.adobe.com). Downloading The Troubleshooting and Upgrade Guide To download the Troubleshooting and Upgrade Guide, connect to the HP Vectra Support site at www.hp.com/go/vectrasupport, look in the "Manuals" section, and then select your PC. English 11 - HP Vectra VEi8 | HP Vectra VEi7, User's Guide - Page 16
1 Setting Up and Using Your PC Additional Information and Help 12 English - HP Vectra VEi8 | HP Vectra VEi7, User's Guide - Page 17
problems • Using HP's hardware diagnostics program, DiagTools • Frequently Asked Questions • What to do if you need more help • Hewlett-Packard's Support and Information Services. For more detailed information, refer to the Troubleshooting and Upgrade Guide, available on HP's Web site at www.hp - HP Vectra VEi8 | HP Vectra VEi7, User's Guide - Page 18
the Troubleshooting and Upgrade Guide available from HP's Web site at: www.hp.com/go/vectrasupport If Your PC Has a Hardware Problem The Have you checked that... The monitor settings in your PC are compatible with your monitor. Refer to the monitor manual for an explanation of the LED signals - HP Vectra VEi8 | HP Vectra VEi7, User's Guide - Page 19
problem Download the latest drivers from HP's Web at: www.hp settings. 1 Turn on or restart your PC. 2 When the message Press F2 to enter Setup appears, press the F2 key.1 1. For more information on the Setup program, refer to the Troubleshooting and Upgrade Guide, available on the HP Web at www.hp - HP Vectra VEi8 | HP Vectra VEi7, User's Guide - Page 20
. • Diagnose hardware-related problems. • Provide precise information to HP-dedicated Support Agents so that they can solve any problems quickly and effectively. For more information about this utility, refer to the Vectra Hardware Diagnostics User's Guide, available on the HP web site in PDF - HP Vectra VEi8 | HP Vectra VEi7, User's Guide - Page 21
utility preloaded on your PC. If the problem continues, update your PC's BIOS. You can download the BIOS and updating instructions from www.hp.com/go/vectrasupport. Q: I've been experiencing problems with my PC ever since I installed some new software. What can I do? A: Uninstall the software - HP Vectra VEi8 | HP Vectra VEi7, User's Guide - Page 22
my PC? A: No. USB is supported by preloaded Windows 95 and Windows 98 only. Q: Is my PC year 2000-compliant? A: All new Vectras are designed to handle the transition to year 2000 without any problem. For more information, refer to HP's Year 2000 Web site: www.hp.com/year2000. Q: An application says - HP Vectra VEi8 | HP Vectra VEi7, User's Guide - Page 23
) to see whether this is a known problem. • Update your PC's BIOS (Basic Input/Output System). The latest BIOS for your PC and instructions on updating the BIOS are available from HP's support Web site at: www.hp.com/go/vectrasupport. • Record the details of the problem so that you can describe it - HP Vectra VEi8 | HP Vectra VEi7, User's Guide - Page 24
2 Basic Problem Solving Hewlett-Packard Support and Information Services Hewlett-Packard Support and Information Services You can learn more about HP service and support from the support Web site: www.hp.com/go/vectrasupport. Collecting Information on Your PC Before Contacting Support Note down - HP Vectra VEi8 | HP Vectra VEi7, User's Guide - Page 25
Accessory Board Slots Processor Hard Disk Drive CD-ROM Drive Front-Access Shelf For example, for a DVD or ZIP drive Floppy Disk Drive Vectra VEi 8 (Pentium Processor) Processor Power Supply Hard Disk Drive System Board CD-ROM Drive Accessory Board Slots Main Memory Front-Access Shelf For - HP Vectra VEi8 | HP Vectra VEi7, User's Guide - Page 26
your safety, never remove the PC's cover without first removing the power cord from the power outlet, and any connection to a telecommunication network. Always replace the cover before switching the PC on again. Static electricity can damage electronic components. Turn all equipment OFF. Don't let - HP Vectra VEi8 | HP Vectra VEi7, User's Guide - Page 27
3 Replacing Hardware Components Removing and Replacing the Cover and Front Panel Removing and Replacing the Cover and Front Panel Removing the Cover Before removing the cover, switch off the monitor and PC, disconnect all power cords and any telecommunication cables. If necessary, unlock the - HP Vectra VEi8 | HP Vectra VEi7, User's Guide - Page 28
3 Replacing Hardware Components Removing and Replacing the Cover and Front Panel Replacing the Cover Before replacing the cover, ensure that all internal cables are properly connected and safely routed. 1 If necessary, replace the front panel. To do this, insert the three plastic tabs into the - HP Vectra VEi8 | HP Vectra VEi7, User's Guide - Page 29
3 Replacing Hardware Components Removing the Airflow Guide (Some Vectra VEi 8 Models only) Removing the Airflow Guide (Some Vectra VEi 8 Models only) NOTE Only some Vectra VEi 8 PC models have an airflow guide. 1 Remove the PC's cover (described in this chapter). 2 Grip the part of the airflow - HP Vectra VEi8 | HP Vectra VEi7, User's Guide - Page 30
at the edges to avoid damage by static electricity. 1 Remove the PC's cover (described in this chapter). 2 Open the two tabs and remove the old memory module. 3 Insert the new memory module (aligning it) and close the two tabs. 4 Replace the cover (described in this chapter). 26 English - HP Vectra VEi8 | HP Vectra VEi7, User's Guide - Page 31
this chapter). 2 Remove the screw that holds the old board in place. 3 Hold the old board firmly and carefully pull it out. 4 Aligning the new board carefully, slide it into position, then press it firmly into the slot and tighten the retaining screw. 5 Replace the cover (described in this chapter - HP Vectra VEi8 | HP Vectra VEi7, User's Guide - Page 32
DVD, or Zip Drive Vectra VEi 7 Master (boot) Hard Disk Drive CD-ROM, CD-RW, DVD or Zip Drive Floppy Disk Drive Vectra VEi 8 Master (boot) Hard Disk Drive Floppy Disk Drive Power Connectors Number in PC 3 1 Use for Hard disk drives, DVD drives, CD-ROM drives, Zip drives Floppy disk drive 28 - HP Vectra VEi8 | HP Vectra VEi7, User's Guide - Page 33
Hardware Components Replacing the Hard Disk Drive Replacing the Hard Disk Drive For information on recovering the contents of your hard disk drive, or adding a second hard drive, refer to the Troubleshooting and Upgrade Guide, available on HP's web site at www.hp.com/go/vectrasupport. 1 Remove - HP Vectra VEi8 | HP Vectra VEi7, User's Guide - Page 34
Remove the PC's cover and front panel (described in this chapter). 2 Remove all the drive's connectors. There may also be an audio cable (not shown here). 3 Remove the screws that secure the old drive and slide the drive out the front of the PC. Optional third screw NOTE Some models have a third - HP Vectra VEi8 | HP Vectra VEi7, User's Guide - Page 35
3 Replacing Hardware Components Replacing the CD-ROM, CD-RW, or DVD Drive 4 Slide the new drive into the bay and replace the screws. 5 Attach all connectors. 6 Replace the PC's front panel and cover (described in this chapter). English 31 - HP Vectra VEi8 | HP Vectra VEi7, User's Guide - Page 36
3 Replacing Hardware Components Replacing the Floppy Drive Replacing the Floppy Drive 1 Remove the PC's cover (described in this chapter). 2 Remove the hard drive's connectors. 3 Remove the floppy drive's connectors. 4 Remove the three retaining screws from the drive tray, then slide the tray back ( - HP Vectra VEi8 | HP Vectra VEi7, User's Guide - Page 37
tray and remove the old floppy drive. 6 Slide the new floppy drive into the drive tray (with the correct orientation) and tighten the screws. 7 Replace the drive tray and tighten the three retaining screws. 8 Attach the connectors to the new floppy drive and the hard disk drive. 9 Replace the cover - HP Vectra VEi8 | HP Vectra VEi7, User's Guide - Page 38
(VEi 7 models) Replacing the Celeron Processor (VEi 7 models) NOTE HP does not support processor upgrades. This information is provided to help you replace a defective unit with a processor provided by HP support services. 1 Remove the computer's cover (described in this chapter). 2 Unclip - HP Vectra VEi8 | HP Vectra VEi7, User's Guide - Page 39
the new Service Handbook, downloadable from the "Manuals" section of www.hp.com/go/vectrasupport. 7 Replace the cover (described in this chapter). If you replace your processor or system board, you may need to update your BIOS. The latest BIOS for your PC and instructions on updating the BIOS - HP Vectra VEi8 | HP Vectra VEi7, User's Guide - Page 40
Processor (VEi 8 models) NOTE HP does not support processor upgrades. This information is provided to help you replace a defective unit with a processor provided by HP support services. 1 Remove the PC's cover (described in this chapter). 2 Remove the airflow guide (described in this chapter - HP Vectra VEi8 | HP Vectra VEi7, User's Guide - Page 41
. Processor frequency jumper (provided with certain processors only) 6 Replace the cover (described in this chapter). If you change your processor or system board, you may need to update your BIOS. The latest BIOS for your PC and instructions on updating the BIOS are available from: www.hp.com/go - HP Vectra VEi8 | HP Vectra VEi7, User's Guide - Page 42
upgrades. This information is provided to help you replace a defective unit with a system board provided by HP support services. 1 Remove the computer's cover (described in this chapter). 2 Remove the airflow guide (described in this chapter). 3 Remove the tray containing the floppy disk and hard - HP Vectra VEi8 | HP Vectra VEi7, User's Guide - Page 43
earlier and replace the drive tray. 8 Replace the cover (described in this chapter). If you change your processor or system board, you may need to update your BIOS. The latest BIOS for your PC and instructions on updating the BIOS are available from: www.hp.com/go/vectrasupport. English - HP Vectra VEi8 | HP Vectra VEi7, User's Guide - Page 44
HP does not support power supply upgrades. This information is provided to help you replace a defective unit with a power supply provided by HP support services. 1 Remove the computer's cover (described in this chapter). 2 Remove all internal power supply connectors. Hard drive(s) DVD/CD-ROM drive - HP Vectra VEi8 | HP Vectra VEi7, User's Guide - Page 45
3 Replacing Hardware Components Replacing the Power Supply 6 Replace the three screws to secure the power supply. 7 Reconnect all internal power supply connectors. 8 Replace the cover (described in this chapter). English 41 - HP Vectra VEi8 | HP Vectra VEi7, User's Guide - Page 46
3 Replacing Hardware Components Replacing the Power Supply 42 English - HP Vectra VEi8 | HP Vectra VEi7, User's Guide - Page 47
4 Working in Comfort Thank you for selecting HP computing equipment. To optimize your comfort and productivity, it is important that you set up your work area correctly and use your HP equipment properly. With that in mind, we have developed some set-up and use recommendations for you to follow - HP Vectra VEi8 | HP Vectra VEi7, User's Guide - Page 48
the hard disk of the your HP computing equipment, or visit HP's Working in Comfort web site at: www.hp.com become irritated or inflamed. RSI has been a reported problem for those who perform repetitive tasks such as assembly , windsurfing and lifting children. The specific causes of RSI have not been - HP Vectra VEi8 | HP Vectra VEi7, User's Guide - Page 49
This discomfort may be a symptom of a repetitive strain injury. Properly setting up and using computing equipment can help to minimize your chances of Typically, the earlier a problem is diagnosed and treated, the easier it is to resolve. Preparing Your Work When using HP computing equipment, it is - HP Vectra VEi8 | HP Vectra VEi7, User's Guide - Page 50
. The front of the seat should be curved and finished in a "waterfall" edge. • An adjustable back support in both height and forward and backward tilt. It is important that the backrest correctly supports the lower part, or lumbar curve, of the back. • A freely rotating swivel so you can move easily - HP Vectra VEi8 | HP Vectra VEi7, User's Guide - Page 51
While sitting at your work surface, make sure your back is supported by the chair's backrest in an erect position or angled slightly take regular breaks to avoid fatigue. Setting Up Your HP Make sure that all the elements of your HP computer system-monitor, Computing Equipment document holder - HP Vectra VEi8 | HP Vectra VEi7, User's Guide - Page 52
be at or slightly below eye level. Most HP monitors come with a tilt-and-swivel feature that monitor so the screen is at a right angle to your window rather than in front of it. If reflection or glare persists with your monitor to adjust the visual settings so that contrast and brightness levels are - HP Vectra VEi8 | HP Vectra VEi7, User's Guide - Page 53
4 Working in Comfort Monitor Use Specifications Document Holders • When viewing your monitor, your head should below horizontal for normal work tasks, such as typing or reading. When keying in data from a hard-copy document, placing it in a document holder rather than on a flat surface will make it - HP Vectra VEi8 | HP Vectra VEi7, User's Guide - Page 54
in front of the screen or document holder, whichever is viewed the most. Your HP keyboard has long cables so you can place it in the position that is most and mouse or trackball: 66 to 71 cm (26 to 28 inches). • Your HP keyboard may have a kickstand that can be opened or closed to raise or lower - HP Vectra VEi8 | HP Vectra VEi7, User's Guide - Page 55
Mice and Other Input Devices • When using your HP keyboard, remember it takes very little pressure or force help keep your hands and wrists in a comfortable and neutral position when you are not typing. Some HP keyboards come with an integrated palm rest. If you use a palm rest, see that it is - HP Vectra VEi8 | HP Vectra VEi7, User's Guide - Page 56
4 Working in Comfort WARNING • If you use your thumb to rotate the ball on a trackball or spaceball, keep it in a relaxed, natural shape, and maintain a neutral posture in your hand, wrist and forearm. • Hold the mouse gently by draping your fingers over it. Keep your hand relaxed and fingers - HP Vectra VEi8 | HP Vectra VEi7, User's Guide - Page 57
than 15 degrees, and try not to turn your head toward the side. • Back - While sitting at your work surface, make sure your back is supported by the chair's backrest in an erect position or angled slightly backwards. • Arms - Make sure your arms and elbows are relaxed and loose, with your - HP Vectra VEi8 | HP Vectra VEi7, User's Guide - Page 58
you, including your employer, doctor, local office supply store, and the Information Sources listed in the online version of Working in Comfort, preloaded on the hard disk of your HP computing equipment. 54 English - HP Vectra VEi8 | HP Vectra VEi7, User's Guide - Page 59
, 43 ergonomics web site, 43 F floppy drive replacing, 32 front panel lights, 1 replacing, 24 H hard disk drive installing, 11 replacing, 29 hardware conflict, 17 hardware problems diagnosing, 16 HP Setup program, 15 HP Support and Information Services, 20 HP Web site, 10 I I/O addresses used by - HP Vectra VEi8 | HP Vectra VEi7, User's Guide - Page 60
stopping the PC, 8 support HP, 20 system board replacing, 38 T technical information, 11 TopTools, 9 troubleshooting basic, 13 Frequently Asked Questions, 17 more detailed, 11 tips, 19 Troubleshooting and Upgrade Guide contents, 11 downloading, 11 U unpacking the PC, 2 updating BIOS, 19 USB devices - HP Vectra VEi8 | HP Vectra VEi7, User's Guide - Page 61
Regulatory Information and Warranty - HP Vectra VEi8 | HP Vectra VEi7, User's Guide - Page 62
: Manufacturer's Address: HEWLETT-PACKARD 5 Avenue Raymond Chanas 38053 Grenoble Cedex 09 FRANCE Declares that the product: Product Name: Personal Computer Model Number: HP VECTRA VEi 7 DT/XXX HP VECTRA VEi 8 DT/XXX Conforms to the following Product Specifications: SAFETY International: Europe - HP Vectra VEi8 | HP Vectra VEi7, User's Guide - Page 63
and used in accordance with the instructions, may cause harmful interference to Hewlett-Packard's FCC Compliance Tests were conducted with HP-supported peripheral devices and HP shielded power cord and any connection to a telecommunication network. Always replace the cover before switching on again - HP Vectra VEi8 | HP Vectra VEi7, User's Guide - Page 64
, radio interference may be caused when used near a radio or TV receiver. Read the instructions for correct operation. Notice for Korea Recycling Your PC HP has a strong commitment toward the environment. Your HP Personal Computer has been designed to respect the environment as much as possible - HP Vectra VEi8 | HP Vectra VEi7, User's Guide - Page 65
process unit. The system processor unit, keyboard, mouse, and Hewlett-Packard accessories inside the system processor unit -- such as video adapters, mass storage devices, and interface controllers -- are covered by this warranty. HP products external to the system processor unit -- such as external - HP Vectra VEi8 | HP Vectra VEi7, User's Guide - Page 66
CD-ROM. If your computer was shipped with a product recovery CD-ROM: (i) The product recovery CD-ROM and/or support utility software may only be used for restoring the hard disk of the HP computer with which the product recovery CD-ROM was originally provided.(ii) The use of any operating system - HP Vectra VEi8 | HP Vectra VEi7, User's Guide - Page 67
UPDATES AND UPGRADES. Customer agrees that the software does not include updates and upgrades which may be available from Hewlett-Packard under a separate support software product will execute its programming instructions when all files are properly installed. HP does not warrant that the software - HP Vectra VEi8 | HP Vectra VEi7, User's Guide - Page 68
exclusion may not apply to you. Obtaining Warranty Service. Warranty service may be obtained from the nearest HP sales office or other location indicated in the owner's manual or service booklet. FOR CONSUMER TRANSACTIONS IN AUSTRALIA AND NEW ZEALAND: THE WARRANTY TERMS CONTAINED IN THIS STATEMENT - HP Vectra VEi8 | HP Vectra VEi7, User's Guide - Page 69
data sheet in the library on HP's web site www.hp.com/desktop. Characteristic Description Weight ( output power: 90W continuous Power Consumption Power Consumption (Windows NT 4.0, Windows 95 and Windows 98) Operating without input/output Standby (Windows 95/98 only) Off 115V / 60Hz and 230V - HP Vectra VEi8 | HP Vectra VEi7, User's Guide - Page 70
Set up your computer Setup This manual Setting Up and Using Your PC Find out how to troubleshoot your PC and about the different support options available Troubleshooting and Support This manual Basic Problem Solving (Summary information only) Troubleshooting and Upgrade Guide for this PC www.hp
-
 1
1 -
 2
2 -
 3
3 -
 4
4 -
 5
5 -
 6
6 -
 7
7 -
8
-
9
-
10
-
11
-
12
-
13
-
14
-
15
-
16
-
17
-
18
-
19
-
20
-
21
-
22
-
23
-
24
-
25
-
26
-
27
-
28
-
29
-
30
-
31
-
32
-
33
-
34
-
35
-
36
-
37
-
38
-
39
-
40
-
41
-
42
-
43
-
44
-
45
-
46
-
47
-
48
-
49
-
50
-
51
-
52
-
53
-
54
-
55
-
56
-
57
-
58
-
59
-
60
-
61
-
62
-
63
-
64
-
65
-
66
-
67
-
68
-
69
-
70
 |
 |
User’s Guide
www.hp.com/go/vectrasupport
Corporate PCs
See Chapter 1 for Quick Setup