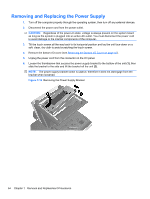
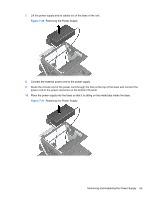
HP ap5000 Maintenance and Service Guide: HP ap5000 All-In-One Point of Sale Sy - Page 60
Removing the Hard Drive from the Carrier
 |
View all HP ap5000 manuals
Add to My Manuals
Save this manual to your list of manuals |
Page 60 highlights
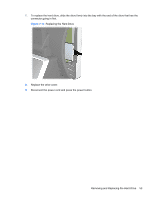
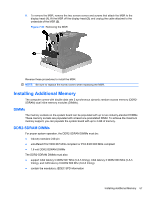
5. To remove the hard drive from the plastic carrier, pull up on the two ends on one side of the carrier (1) and rotate the drive out of the carrier (2). Figure 7-16 Removing the Hard Drive from the Carrier 6. To insert the new drive in the carrier, hold the drive at a slight angle and place one side of the hard drive in the carrier (1), then press the other side straight down into the carrier (2). Figure 7-17 Placing the Hard Drive in the Carrier 52 Chapter 7 Removal and Replacement Procedures
-
 1
1 -
2
-
3
-
4
-
5
-
6
-
7
-
8
-
9
-
10
-
11
-
12
-
13
-
14
-
15
-
16
-
17
-
18
-
19
-
20
-
21
-
22
-
23
-
24
-
25
-
26
-
27
-
28
-
29
-
30
-
31
-
32
-
33
-
34
-
35
-
36
-
37
-
38
-
39
-
40
-
41
-
42
-
43
-
44
-
45
-
46
-
47
-
48
-
49
-
50
-
51
-
52
-
53
-
54
-
 55
55 -
 56
56 -
 57
57 -
 58
58 -
 59
59 -
 60
60 -
 61
61 -
 62
62 -
 63
63 -
 64
64 -
 65
65 -
66
-
67
-
68
-
69
-
70
-
71
-
72
-
73
-
74
-
75
-
76
-
77
-
78
-
79
-
80
-
81
-
82
-
83
-
84
-
85
-
86
-
87
-
88
-
89
 |
 |

5.
To remove the hard drive from the plastic carrier, pull up on the two ends on one side of the
carrier
(1)
and rotate the drive out of the carrier
(2)
.
Figure 7-16
Removing the Hard Drive from the Carrier
6.
To insert the new drive in the carrier, hold the drive at a slight angle and place one side of the
hard drive in the carrier
(1)
, then press the other side straight down into the carrier
(2)
.
Figure 7-17
Placing the Hard Drive in the Carrier
52
Chapter 7
Removal and Replacement Procedures