Honeywell NX4S1 User Guide - Page 103
A.2.6 Clearing the Cache in the Internet Browsers Used by the NetAXS™ Web Server
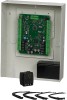 |
View all Honeywell NX4S1 manuals
Add to My Manuals
Save this manual to your list of manuals |
Page 103 highlights
Upgrading NetAXS™ Firmware NetAXS™ Release 3.1.8 Upgrade Procedure i. Click OK. j. Close the web browser and re-open it. k. Enter the IP Address again into the URL box. The login screen appears without the certificate error A.2.6 Clearing the Cache in the Internet Browsers Used by the NetAXS™ Web Server The NetAXS™ panel supports Internet Explorer 7 (IE7), Internet Explorer 6 (IE6), Firefox 2, and Firefox 3. For all browsers, we recommend that you clear the cache after a successful upgrade. To clear the cache using Internet Explorer 7 (IE7): 1. Select Tools > Delete Browsing History. A "Delete Browsing History" popup appears. 2. Click Delete Files. A Delete Files popup prompts, "Are you sure you want to delete all temporary Internet Explorer files?" 3. Click Yes. 4. With the Delete Browsing History screen still open, click Delete Cookies. A Delete Cookies popup prompts, "Are you sure you want to delete all cookies in the Temporary Internet Files folder?" 5. Click Yes. 6. Click Close on the Delete Browsing History screen. To clear cache using Internet Explorer 6 (IE6): 1. Select Tools > Internet Options > General. 2. Click Delete Cookies. A Delete Cookies popup prompts, "Delete all cookies in the Temporary Internet Files folder?" 3. Click OK. 4. With the Internet Options screen open, click Delete Files. A Delete Files message prompts, "Delete all files in the Temporary Internet Files. You can also delete all your offline content stored locally." 5. Click OK. 6. Click OK on the Internet Options screen to close it. To clear cache using Firefox 2 and Firefox 3: 1. Select Tools > Clear Private Data. The Clear Private Data screen appears. 2. Ensure that the Cache and the Cookies checkboxes are enabled. 3. Click Clear Private Data Now. The Clear Private Data screen automatically closes. NetAXS Access Control Unit User's Guide, 800-04410, Revision A 93
-
 1
1 -
2
-
3
-
4
-
5
-
6
-
7
-
8
-
9
-
10
-
11
-
12
-
13
-
14
-
15
-
16
-
17
-
18
-
19
-
20
-
21
-
22
-
23
-
24
-
25
-
26
-
27
-
28
-
29
-
30
-
31
-
32
-
33
-
34
-
35
-
36
-
37
-
38
-
39
-
40
-
41
-
42
-
43
-
44
-
45
-
46
-
47
-
48
-
49
-
50
-
51
-
52
-
53
-
54
-
55
-
56
-
57
-
58
-
59
-
60
-
61
-
62
-
63
-
64
-
65
-
66
-
67
-
68
-
69
-
70
-
71
-
72
-
73
-
74
-
75
-
76
-
77
-
78
-
79
-
80
-
81
-
82
-
83
-
84
-
85
-
86
-
87
-
88
-
89
-
90
-
91
-
92
-
93
-
94
-
95
-
96
-
97
-
 98
98 -
 99
99 -
 100
100 -
 101
101 -
 102
102 -
 103
103 -
 104
104 -
 105
105 -
 106
106 -
 107
107 -
 108
108 -
109
 |
 |