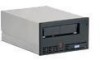
IBM 25R0012 User Guide - Page 25
Connect, Power, Drive, Internal, Cable, Diagnostics
 |
UPC - 000435800176
View all IBM 25R0012 manuals
Add to My Manuals
Save this manual to your list of manuals |
Page 25 highlights
To mount the drive into a server: 1. Refer to the option (or drive) installation instructions in your server Installation Guide. Connect and Test Power to the Drive The drive does not contain its own power source; it must be powered externally. To connect and test power to the drive: __ 1. Ensure that the host (or unit that supplies power to the drive) is powered off. __ 2. Ensure that the power cord is disconnected from both the host and the power outlet. __ 3. Connect the host's internal power cable to the power connector on the drive (see 3 in Figure 3 on page 3). __ 4. Connect the power cord to the host and to the electrical outlet. __ 5. Review the location of the Single-character Display (SCD) and the Status Light in "Single-character Display (SCD)" on page 11 and "Status Light" on page 11 (if your drive does not have a bezel, note that the bulb of the Status Light is recessed and the light is not visible until lit). To ensure that the drive is receiving power, watch for the following while turning on the power to the host: v The SCD presents a series of random characters, then becomes blank (not lit). Attention If the SCD does not come on, the drive may not be getting power. v The Status Light briefly becomes solid amber, then becomes solid green. __ 6. Power-off the host. __ 7. Disconnect the power cord from both the host and the electrical outlet. Connect the Internal SCSI Cable Connect the enclosure's internal SCSI cable to the SCSI connector on the drive (see 1 in Figure 3). Run Drive Diagnostics __ 1. Replace the cover on the host. __ 2. Connect the power cord to both the host and the electrical outlet. __ 3. Power-on the host. __ 4. Run one or more of the following drive diagnostics: v "Function Code 1: Run Drive Diagnostics" on page 16 v "Function Code 6: Run SCSI Wrap Test" on page 20 v "Function Code 7: Run RS-422 Wrap Test" on page 20 If an error code appears on the single-character display (SCD), go to "Error Codes and Messages" on page 45. If no error appears, continue to the next step. __ 5. Power-off the host. Installing the Drive 9
-
 1
1 -
2
-
3
-
4
-
5
-
6
-
7
-
8
-
9
-
10
-
11
-
12
-
13
-
14
-
15
-
16
-
17
-
18
-
19
-
 20
20 -
 21
21 -
 22
22 -
 23
23 -
 24
24 -
 25
25 -
 26
26 -
 27
27 -
 28
28 -
 29
29 -
 30
30 -
31
-
32
-
33
-
34
-
35
-
36
-
37
-
38
-
39
-
40
-
41
-
42
-
43
-
44
-
45
-
46
-
47
-
48
-
49
-
50
-
51
-
52
-
53
-
54
-
55
-
56
-
57
-
58
-
59
-
60
-
61
-
62
-
63
-
64
-
65
-
66
-
67
-
68
-
69
-
70
-
71
-
72
-
73
-
74
-
75
-
76
-
77
-
78
-
79
-
80
-
81
-
82
-
83
-
84
-
85
-
86
-
87
-
88
-
89
-
90
-
91
-
92
-
93
-
94
-
95
-
96
-
97
-
98
-
99
-
100
-
101
-
102
-
103
-
104
-
105
-
106
-
107
-
108
-
109
-
110
-
111
-
112
-
113
-
114
-
115
-
116
-
117
-
118
-
119
-
120
 |
 |
