Icom IC-R8600 Instruction Manual Version 1.01 - Page 38
Recording function
 |
View all Icom IC-R8600 manuals
Add to My Manuals
Save this manual to your list of manuals |
Page 38 highlights
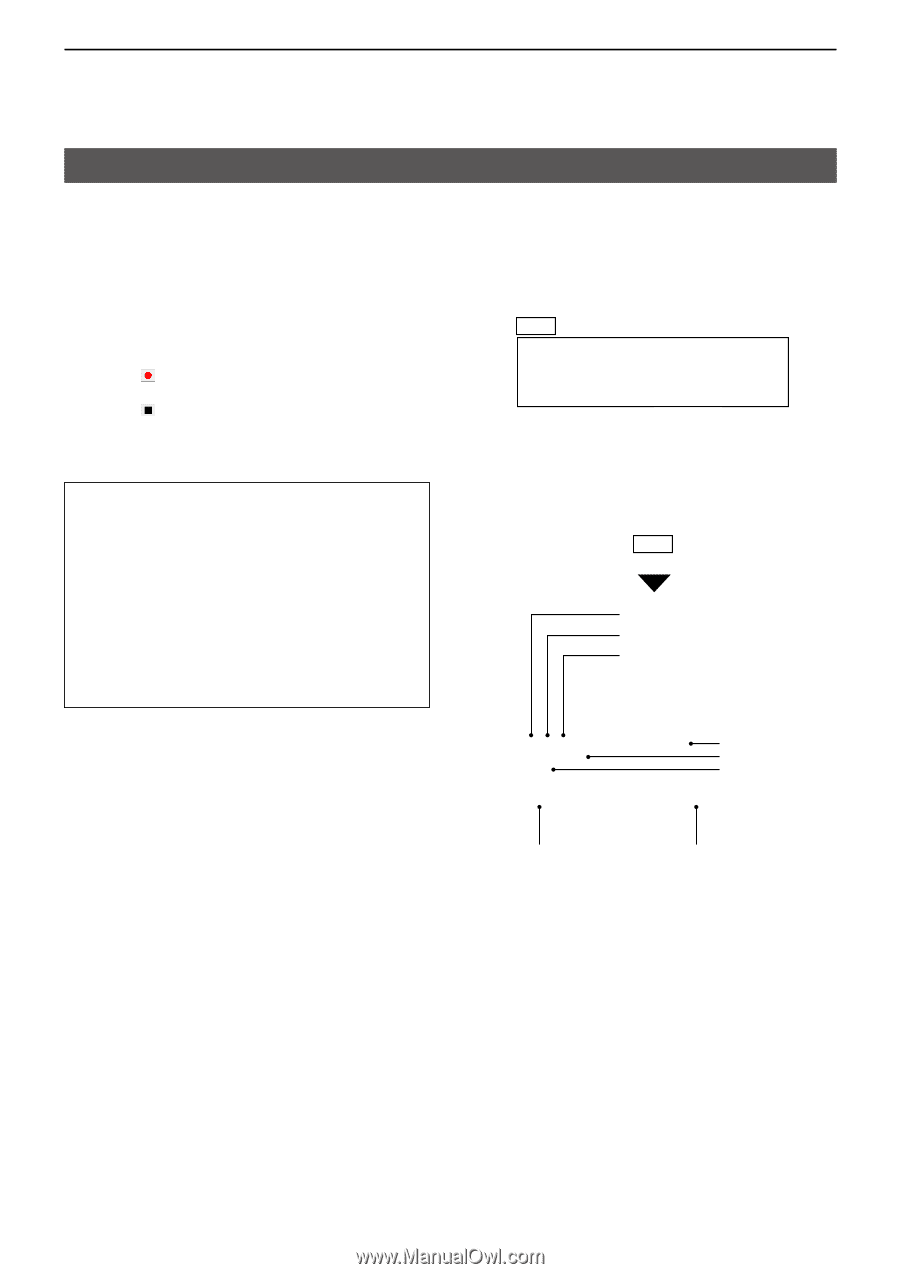
4 ABOUT THE REMOTE UTILITY Recording function While connected to a receiver, you can record the received audio and save it into the PC's hard disk using the Remote PC's Remote Utility. The description in this section is based on the assumption that the connection to the receiver has succeeded. ("" is displayed under the radio name.) 1. Click . 2. Select a receiver with "" under its name. 3. Click . 4. Click < > to start recording. LLWhile recording, click < > to pause. 5. Click < > to stop recording. 1Click 2Select NOTE: ••When you click , the folder in which the recording file is stored will be displayed. ••If you want to change the recording folder, click < >, then select a folder in the Browse For Folder screen. ••Adjust the sample rate frequency and codec to record the audio according to the recording purpose. When you record the audio received from the network, we recommend that you set the same sample rate frequency and codec that are programmed in the Connection Setting screen. 3Click Record button Stop button Pause button Open the folder Recording file name Elapsed time Recording folder name Folder browse button 4-8
-
 1
1 -
2
-
3
-
4
-
5
-
6
-
7
-
8
-
9
-
10
-
11
-
12
-
13
-
14
-
15
-
16
-
17
-
18
-
19
-
20
-
21
-
22
-
23
-
24
-
25
-
26
-
27
-
28
-
29
-
30
-
31
-
32
-
 33
33 -
 34
34 -
 35
35 -
 36
36 -
 37
37 -
 38
38 -
 39
39 -
 40
40 -
 41
41 -
 42
42 -
 43
43 -
44
-
45
-
46
-
47
-
48
-
49
 |
 |