JVC GY-HM600U GY-HM600U Instruction Manual (135 pages) - Page 82
Deleting Clips, Selecting and Deleting Multiple Clips
 |
View all JVC GY-HM600U manuals
Add to My Manuals
Save this manual to your list of manuals |
Page 82 highlights
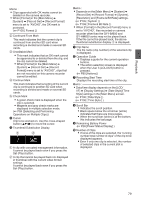
Playback Deleting Clips Delete clip. 3 Select [Delete Clips] B [This Clip] and press the Set button (R). A screen to confirm deletion appears. MENU/THUMB CANCEL 3 MENU/THUMB AE LEVEL OIS / 2 LOLUX / 3 CANCEL . Memo : 0 Clips appended with OK marks cannot be deleted on the camera recorder. 0 Read-only clips can be deleted on a PC. . 4 Select [Delete] using the cross-shaped button (JK), and press the Set button (R). Deleting starts. 4 Deleting One Clip Delete the clip (one clip) pointed by the cursor in [Delete Clips] B [This Clip] in the menu. Memo : 0 Clips with OK mark cannot be deleted. During Thumbnail Screen 1 Move the cursor to the clip to be deleted. Move the cursor to the clip to be deleted using the cross-shaped button (JKH I). 1 . 2 Press the [LOLUX/3] button. The action selection screen is displayed. . Selecting and Deleting Multiple Clips To select and delete multiple clips, refer to "[Selecting and Performing Operations on Multiple Clips] P 84". Deleting All Clips Delete all clips that are displayed. 1 Press the [LOLUX/3] button. The action selection screen is displayed. 2 Select [Delete Clips] B [All Clips]. A screen to confirm deletion appears. 3 Select [Delete] and press the Set button (R). Deleting starts. Memo : 0 The time taken to delete clips depends on the number of clips to be deleted. 82
-
 1
1 -
2
-
3
-
4
-
5
-
6
-
7
-
8
-
9
-
10
-
11
-
12
-
13
-
14
-
15
-
16
-
17
-
18
-
19
-
20
-
21
-
22
-
23
-
24
-
25
-
26
-
27
-
28
-
29
-
30
-
31
-
32
-
33
-
34
-
35
-
36
-
37
-
38
-
39
-
40
-
41
-
42
-
43
-
44
-
45
-
46
-
47
-
48
-
49
-
50
-
51
-
52
-
53
-
54
-
55
-
56
-
57
-
58
-
59
-
60
-
61
-
62
-
63
-
64
-
65
-
66
-
67
-
68
-
69
-
70
-
71
-
72
-
73
-
74
-
75
-
76
-
 77
77 -
 78
78 -
 79
79 -
 80
80 -
 81
81 -
 82
82 -
 83
83 -
 84
84 -
 85
85 -
 86
86 -
 87
87 -
88
-
89
-
90
-
91
-
92
-
93
-
94
-
95
-
96
-
97
-
98
-
99
-
100
-
101
-
102
-
103
-
104
-
105
-
106
-
107
-
108
-
109
-
110
-
111
-
112
-
113
-
114
-
115
-
116
-
117
-
118
-
119
-
120
-
121
-
122
-
123
-
124
-
125
-
126
-
127
-
128
-
129
-
130
-
131
-
132
-
133
-
134
-
135
-
136
 |
 |
