Konica Minolta AccurioPress C14000 Watkiss PowerSquare R2L User Manual - Page 33
Adjust the Connecting Bridge, Introduction, When to do, Procedure
 |
View all Konica Minolta AccurioPress C14000 manuals
Add to My Manuals
Save this manual to your list of manuals |
Page 33 highlights
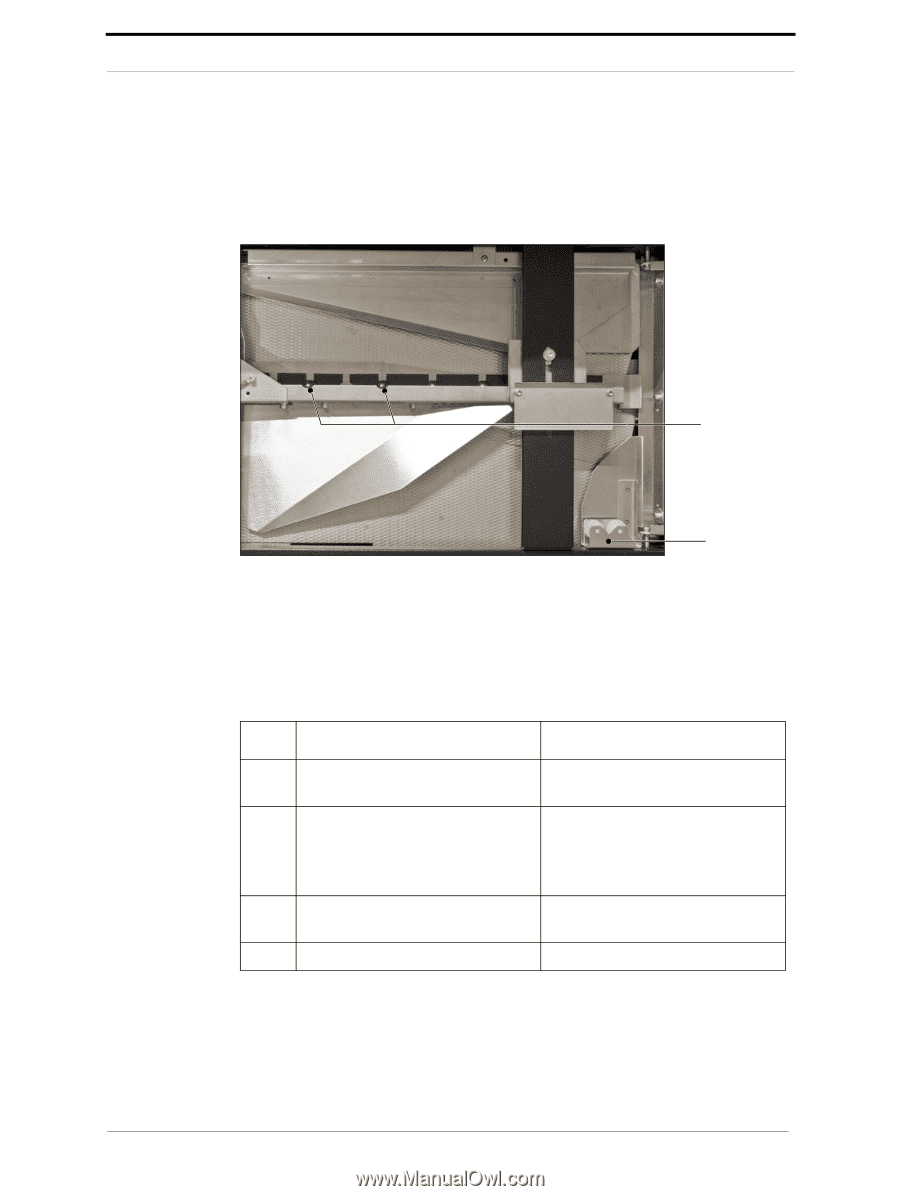
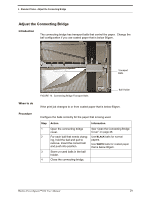
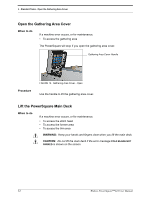
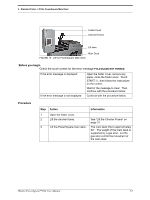
4 - Standard Tasks - Adjust the Connecting Bridge Adjust the Connecting Bridge Introduction The connecting bridge has transport balls that control the paper. Change the ball configuration if you use coated paper that is below 90gsm. Transport Balls When to do Procedure FIGURE 10. Connecting Bridge Transport Balls Ball Holder If the print job changes to or from coated paper that is below 90gsm. Configure the balls correctly for the paper that is being used. Step 1 2 3 4 Action Open the connecting bridge cover. For each ball that needs changing, hold the ball and pull to remove. Insert the correct ball and push into position. Store un-used balls in the ball holder. Close the connecting bridge. Information See "Open the Connecting Bridge Cover" on page 28. Use BLACK balls for normal papers. Use WHITE balls for coated paper that is below 90gsm. Watkiss PowerSquare™224 User Manual 29
-
 1
1 -
2
-
3
-
4
-
5
-
6
-
7
-
8
-
9
-
10
-
11
-
12
-
13
-
14
-
15
-
16
-
17
-
18
-
19
-
20
-
21
-
22
-
23
-
24
-
25
-
26
-
27
-
 28
28 -
 29
29 -
 30
30 -
 31
31 -
 32
32 -
 33
33 -
 34
34 -
 35
35 -
 36
36 -
 37
37 -
 38
38 -
39
-
40
-
41
-
42
-
43
-
44
-
45
-
46
-
47
-
48
-
49
-
50
-
51
-
52
-
53
-
54
-
55
-
56
-
57
-
58
-
59
-
60
-
61
-
62
-
63
-
64
-
65
-
66
-
67
-
68
-
69
-
70
-
71
-
72
-
73
-
74
-
75
-
76
-
77
-
78
-
79
-
80
-
81
-
82
-
83
-
84
-
85
-
86
-
87
-
88
-
89
-
90
-
91
-
92
-
93
-
94
-
95
-
96
-
97
-
98
-
99
-
100
-
101
-
102
-
103
-
104
-
105
-
106
-
107
-
108
-
109
-
110
-
111
-
112
-
113
-
114
 |
 |