Konica Minolta Kodak Scan Station 710 Administration Guide - Page 6
Setting up the Scan Station, Scan Station 700/720EX - Scanner Administration
 |
View all Konica Minolta Kodak Scan Station 710 manuals
Add to My Manuals
Save this manual to your list of manuals |
Page 6 highlights
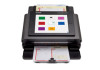
Setting up the Scan Station Carefully unpack the Scan Station 700 and place it on a clean, dry and level surface. Refer to the Installation Guide or the "Rear view" illustration later in this chapter for port locations. 1. Select the appropriate AC power cord. Plug the power adapter into the power port on the Scan Station. Plug one end of the power cord into the power adapter and plug the other end into the wall outlet. 2. Plug one end of the 10/100/1000 Base T network cable (customer provided) into the Ethernet port of the Scan Station and plug the other end of the network cable into the network port. 3. If you have a Scan Station 720EX, connect a phone line to the RJ-11 modem port. 4. When the Scan Station is properly connected, press the power button and wait a few moments for the Scan Station to start up and display the application. 5. Proceed to Chapter 2, Pre-installation Checklist to review and gather the necessary configuration information before installing the Kodak Scan Station 700/720EX - Scanner Administration application and creating configurations. 6. After reviewing the Pre-installation Checklist, you can setup your configurations. See Chapters 3-8 for more information. 1-2 A-61796 December 2013
-
 1
1 -
 2
2 -
 3
3 -
 4
4 -
 5
5 -
 6
6 -
 7
7 -
 8
8 -
 9
9 -
 10
10 -
 11
11 -
 12
12 -
13
-
14
-
15
-
16
-
17
-
18
-
19
-
20
-
21
-
22
-
23
-
24
-
25
-
26
-
27
-
28
-
29
-
30
-
31
-
32
-
33
-
34
-
35
-
36
-
37
-
38
-
39
-
40
-
41
-
42
-
43
-
44
-
45
-
46
-
47
-
48
-
49
-
50
-
51
-
52
-
53
-
54
-
55
-
56
-
57
-
58
-
59
-
60
-
61
-
62
-
63
-
64
-
65
-
66
-
67
-
68
-
69
-
70
-
71
-
72
-
73
-
74
-
75
-
76
-
77
-
78
-
79
-
80
-
81
-
82
-
83
-
84
-
85
-
86
-
87
-
88
-
89
-
90
-
91
-
92
-
93
-
94
-
95
-
96
-
97
-
98
-
99
-
100
-
101
-
102
-
103
-
104
-
105
-
106
-
107
-
108
-
109
-
110
-
111
-
112
-
113
-
114
-
115
-
116
-
117
-
118
-
119
-
120
-
121
-
122
-
123
-
124
-
125
-
126
-
127
-
128
-
129
-
130
-
131
-
132
-
133
-
134
-
135
-
136
-
137
-
138
-
139
-
140
 |
 |
