Konica Minolta Kodak Scan Station 710 Administration Guide - Page 63
Printer Driver Settings, Username, Password, Domain, Finish
 |
View all Konica Minolta Kodak Scan Station 710 manuals
Add to My Manuals
Save this manual to your list of manuals |
Page 63 highlights
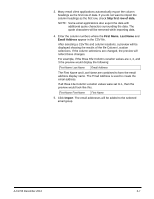
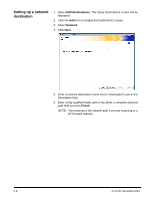
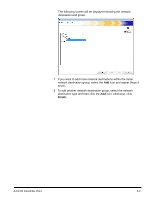
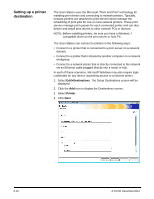
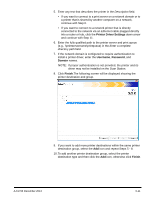
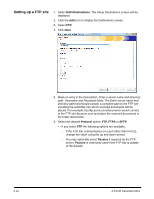
5. Enter any text that describes the printer in the Description field. • If you want to connect to a print server on a network domain or to a printer that is shared by another computer on a network, continue with Step 6. • If you want to connect to a network printer that is directly connected to the network via an Ethernet cable plugged directly into a router or hub, click the Printer Driver Settings down arrow and continue with Step 11. 6. Enter the fully qualified path to the printer server and print queue (e.g., \\printservername\printqueue) in the Enter a complete directory path field. 7. If the network domain is configured to require authentication to install a printer driver, enter the Username, Password, and Domain names. NOTE: If proper authentication is not provided, the printer and its driver may not be installed on the Scan Station. 8. Click Finish.The following screen will be displayed showing the printer destination and group. 9. If you want to add more printer destinations within the same printer destination group, select the Add icon and repeat Steps 5 - 8. 10. To add another printer destination group, select the printer destination type and then click the Add icon, otherwise click Finish. A-61796 December 2013 6-11
-
 1
1 -
2
-
3
-
4
-
5
-
6
-
7
-
8
-
9
-
10
-
11
-
12
-
13
-
14
-
15
-
16
-
17
-
18
-
19
-
20
-
21
-
22
-
23
-
24
-
25
-
26
-
27
-
28
-
29
-
30
-
31
-
32
-
33
-
34
-
35
-
36
-
37
-
38
-
39
-
40
-
41
-
42
-
43
-
44
-
45
-
46
-
47
-
48
-
49
-
50
-
51
-
52
-
53
-
54
-
55
-
56
-
57
-
 58
58 -
 59
59 -
 60
60 -
 61
61 -
 62
62 -
 63
63 -
 64
64 -
 65
65 -
 66
66 -
 67
67 -
 68
68 -
69
-
70
-
71
-
72
-
73
-
74
-
75
-
76
-
77
-
78
-
79
-
80
-
81
-
82
-
83
-
84
-
85
-
86
-
87
-
88
-
89
-
90
-
91
-
92
-
93
-
94
-
95
-
96
-
97
-
98
-
99
-
100
-
101
-
102
-
103
-
104
-
105
-
106
-
107
-
108
-
109
-
110
-
111
-
112
-
113
-
114
-
115
-
116
-
117
-
118
-
119
-
120
-
121
-
122
-
123
-
124
-
125
-
126
-
127
-
128
-
129
-
130
-
131
-
132
-
133
-
134
-
135
-
136
-
137
-
138
-
139
-
140
 |
 |
