Konica Minolta Kodak Scan Station 710 Administration Guide - Page 90
Scan Station 700/720EX - Scanner Administration, Scan Station 700
 |
View all Konica Minolta Kodak Scan Station 710 manuals
Add to My Manuals
Save this manual to your list of manuals |
Page 90 highlights
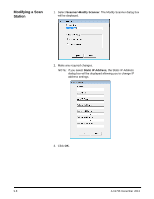
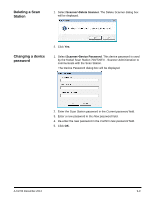
4. Enter the device's password. See the section entitled, "Configuration your device options" in Chapter 4 for more information. NOTE: This field can be left blank. Leave this field blank if the password has not been changed. 5. If desired, enter a name of the group (or location). This name will be displayed in the grid view. For example, the Scan Station may be located in the main branch of a corporation. 6. If desired, enter any additional information that is important to you in the Comment field. For example, you can enter the name of the department where the Scan Station is located. 7. Click Add. The Scan Station name and information will be displayed on the Kodak Scan Station 700/720EX - Scanner Administration main screen. NOTES: • If the Scan Station is not found or if you are adding a Scan Station that will be installed on the network at a later time, the message, There was an error communicating with the device, would you like to Add it anyway? will be displayed. Click Yes to add the Scan Station. • If an incorrect IP address is entered, you may have to delete the Scan Station information from the Kodak Scan Station 700/ 720EX - Scanner Administration main screen and add it again with the correct information. 8. Follow Steps 1 - 7 to add additional Scan Stations to this group. 9-6 A-61796 December 2013
-
 1
1 -
2
-
3
-
4
-
5
-
6
-
7
-
8
-
9
-
10
-
11
-
12
-
13
-
14
-
15
-
16
-
17
-
18
-
19
-
20
-
21
-
22
-
23
-
24
-
25
-
26
-
27
-
28
-
29
-
30
-
31
-
32
-
33
-
34
-
35
-
36
-
37
-
38
-
39
-
40
-
41
-
42
-
43
-
44
-
45
-
46
-
47
-
48
-
49
-
50
-
51
-
52
-
53
-
54
-
55
-
56
-
57
-
58
-
59
-
60
-
61
-
62
-
63
-
64
-
65
-
66
-
67
-
68
-
69
-
70
-
71
-
72
-
73
-
74
-
75
-
76
-
77
-
78
-
79
-
80
-
81
-
82
-
83
-
84
-
 85
85 -
 86
86 -
 87
87 -
 88
88 -
 89
89 -
 90
90 -
 91
91 -
 92
92 -
 93
93 -
 94
94 -
 95
95 -
96
-
97
-
98
-
99
-
100
-
101
-
102
-
103
-
104
-
105
-
106
-
107
-
108
-
109
-
110
-
111
-
112
-
113
-
114
-
115
-
116
-
117
-
118
-
119
-
120
-
121
-
122
-
123
-
124
-
125
-
126
-
127
-
128
-
129
-
130
-
131
-
132
-
133
-
134
-
135
-
136
-
137
-
138
-
139
-
140
 |
 |
