Konica Minolta bizhub 20 bizhub 20 Network User Guide - Page 117
Scanning and PC Fax problems, Network and Internet Connections
 |
View all Konica Minolta bizhub 20 manuals
Add to My Manuals
Save this manual to your list of manuals |
Page 117 highlights
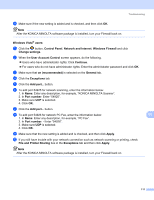
Troubleshooting Scanning and PC Fax problems 11 The network scanning feature does not work in Windows® The network PC Fax feature does not work in Windows® 11 Firewall settings on your PC may be rejecting the necessary network connection. Follow the instructions below to disable the Firewall. If you are using personal Firewall software, see the user's guide for your software or contact the software manufacturer. Windows® XP SP2 users: a Click the Start button, Control Panel, Network and Internet Connections and then Windows Firewall. Make sure that Windows Firewall on the General tab is set to On. b Click the Advanced tab and Settings... button of Network Connection Settings. c Click the Add button. d To add port 54925 for network scanning, enter the information below: 1. In Description of service: Enter any description, for example, "KONICA MINOLTA Scanner". 2. In Name or IP address (for example 192.168.0.12) or the computer hosting this service on your network: Enter "Localhost". 3. In External Port number for this service: Enter "54925". 4. In Internal Port number for this service: Enter "54925". 5. Make sure UDP is selected. 6. Click OK. e Click the Add button. f To add port 54926 for network PC Fax, enter the information below: 1. In Description of service: Enter any description, for example, "PC Fax". 2. In Name or IP address (for example 192.168.0.12) or the computer hosting this service on your network: Enter "Localhost". 3. In External Port number for this service: Enter "54926". 4. In Internal Port number for this service: Enter "54926". 5. Make sure UDP is selected. 6. Click OK. g If you still have trouble with your network connection, click the Add button. h To add port 137 for network scanning, network printing and network PC Fax receiving, enter the information below: 1. In Description of service: Enter any description, for example, PC Fax receiving". 2. In Name or IP address (for example 192.168.0.12) or the computer hosting this service on your network: Enter "Localhost". 3. In External Port number for this service: Enter "137". 4. In Internal Port number for this service: Enter "137". 5. Make sure UDP is selected. 6. Click OK. 11 11 110
-
 1
1 -
2
-
3
-
4
-
5
-
6
-
7
-
8
-
9
-
10
-
11
-
12
-
13
-
14
-
15
-
16
-
17
-
18
-
19
-
20
-
21
-
22
-
23
-
24
-
25
-
26
-
27
-
28
-
29
-
30
-
31
-
32
-
33
-
34
-
35
-
36
-
37
-
38
-
39
-
40
-
41
-
42
-
43
-
44
-
45
-
46
-
47
-
48
-
49
-
50
-
51
-
52
-
53
-
54
-
55
-
56
-
57
-
58
-
59
-
60
-
61
-
62
-
63
-
64
-
65
-
66
-
67
-
68
-
69
-
70
-
71
-
72
-
73
-
74
-
75
-
76
-
77
-
78
-
79
-
80
-
81
-
82
-
83
-
84
-
85
-
86
-
87
-
88
-
89
-
90
-
91
-
92
-
93
-
94
-
95
-
96
-
97
-
98
-
99
-
100
-
101
-
102
-
103
-
104
-
105
-
106
-
107
-
108
-
109
-
110
-
111
-
 112
112 -
 113
113 -
 114
114 -
 115
115 -
 116
116 -
 117
117 -
 118
118 -
 119
119 -
 120
120 -
 121
121 -
 122
122 -
123
-
124
-
125
-
126
-
127
-
128
-
129
-
130
-
131
-
132
-
133
-
134
-
135
-
136
-
137
-
138
-
139
-
140
-
141
-
142
-
143
-
144
-
145
 |
 |