Kyocera FS 2000D FS-2000D/3900DN/4000DN Operation Guide Rev-1.2 (Advanced Edit - Page 87
Using the Microdrive, Using the RAM Disk, Using the Operation Panel, ADVANCED OPERATION GUIDE
 |
View all Kyocera FS 2000D manuals
Add to My Manuals
Save this manual to your list of manuals |
Page 87 highlights
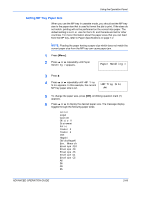
Using the Operation Panel Using the Microdrive Installing the optional Microdrive into the printer allows you to perform the following operations on the Microdrive. • Reading data • Writing data • Deleting data • Formatting Microdrive • Printing a list of data names (partitions) When an Microdrive is inserted into the printer for the first time, it must be formatted before use. If the Microdrive is not formatted, the >Format menu will automatically appear on the display. The operations of the Microdrive are the same as those of the memory card. Refer to the relevant sections in Using the CompactFlash Card on page 2-54. When data is written to the hard disk, the name automatically given to the corresponding file will be DataH001 (for the 1st file), DataH002 (for the 2nd file), DataH003 (for the 3rd file), etc. Using the RAM Disk The RAM disk is a memory space shared within the printer memory that can temporarily store print jobs. The stored print job can then be used to print multiple copies of the job reducing the total amount of time required to print the whole job. It acts similar to the Microdrive except that the data is effective only when the printer is powered up. To use the RAM disk, activate and enter the desired size of the RAM disk in the manner described below. The maximum RAM disk size can be calculated as follows: Maximum RAM disk size = Total printer memory -36MB For example, if the total memory installed in your printer is 192MB, you can set 156MB of RAM disk. If you attempt to set the RAM disk size beyond this restriction, the printer automatically rounds it down so that the size is always 36MB less than the total printer memory. Once the RAM disk size is set, the printer must be reset. To activate RAM disk in the printer's memory, first you must set the RAM disk mode to On and set the desired data size for the RAM disk as described in the following section. This allows you to perform the following operations on the RAM disk. • Reading data • Writing data • Deleting data • Printing a list of data names (partitions) ADVANCED OPERATION GUIDE 2-61
-
 1
1 -
2
-
3
-
4
-
5
-
6
-
7
-
8
-
9
-
10
-
11
-
12
-
13
-
14
-
15
-
16
-
17
-
18
-
19
-
20
-
21
-
22
-
23
-
24
-
25
-
26
-
27
-
28
-
29
-
30
-
31
-
32
-
33
-
34
-
35
-
36
-
37
-
38
-
39
-
40
-
41
-
42
-
43
-
44
-
45
-
46
-
47
-
48
-
49
-
50
-
51
-
52
-
53
-
54
-
55
-
56
-
57
-
58
-
59
-
60
-
61
-
62
-
63
-
64
-
65
-
66
-
67
-
68
-
69
-
70
-
71
-
72
-
73
-
74
-
75
-
76
-
77
-
78
-
79
-
80
-
81
-
 82
82 -
 83
83 -
 84
84 -
 85
85 -
 86
86 -
 87
87 -
 88
88 -
 89
89 -
 90
90 -
 91
91 -
 92
92 -
93
-
94
-
95
-
96
-
97
-
98
-
99
-
100
-
101
-
102
-
103
-
104
-
105
-
106
-
107
-
108
-
109
-
110
-
111
-
112
-
113
-
114
-
115
-
116
-
117
-
118
-
119
-
120
-
121
-
122
-
123
-
124
-
125
-
126
-
127
-
128
-
129
-
130
-
131
-
132
-
133
-
134
-
135
-
136
-
137
-
138
-
139
-
140
-
141
-
142
-
143
-
144
-
145
-
146
 |
 |
