Kyocera KM-4850w KM-4850W Operation Guide Rev-8 - Page 70
Setting of each item
 |
View all Kyocera KM-4850w manuals
Add to My Manuals
Save this manual to your list of manuals |
Page 70 highlights
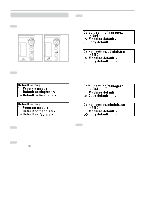
CHAPTER 7 MANAGEMENT AND SETTING 7 Press the w or v key to select a setting item and press the OK key. Set each item referring to the page indicated. > Items that can be selected from machine default 1 Paper width adjustment ... Page 7-10 2 Media Type [Paper working] ... Page 7-11 3 Media type setting [Paper material adjustment] ... Page 7-11 4 Roll end adjustment ... Page 7-11 5 Display contrast ... Page 7-12 6 Orig.eject direct ... Page 7-12 7 Auto Clear Timer [Auto clear time] ... Page 7-12 8 Auto Shut-off Time [Auto shutoff time] ... Page 7-13 9 Timer Set ... Page 7-13 0 Copy size adjustment ... Page 7-14 ! Fusing temperature [Set fixing temp.] ... Page 7-14 @ Custom media type [Custom.pap.material] ... Page 7-15 # Standard size set ... Page 7-15 $ Auto roll over ... Page 7-15 % Management # [Manage.code] ... Page 7-16 > Items that can be selected from copy default 1 Auto rotation mode [Auto rotation] ... Page 7-16 2 Zoom step [Zoom steps] ... Page 7-16 3 Zoom register ... Page 7-16 4 Cut size register ... Page 7-17 5 Exposure step [Exposure steps] ... Page 7-18 6 Auto/Manual exp. ... Page 7-18 7 Default exposure ... Page 7-18 8 Exposure adj. ... Page 7-18 9 Standard drawer ... Page 7-19 0 Auto select set ... Page 7-19 ! AMS mode ... Page 7-19 @ Method copy start ... Page 7-20 # Start late time ... Page 7-20 $ Paper cut [Selec.cut. Method] ... Page 7-20 % Sync. Cut length ... Page 7-20 ^ Delete memory ... Page 7-21 & Per rep copy [Permit repeat] ... Page 7-21 * Chg rep. copy# [Repeat codechange] ... Page 7-21 ( Memory compress ... Page 7-21 ) Maximum Jobs ... Page 7-22 ⁄ Edit Function defaults [Default of edit. function] ... Page 7-22 ¤ Adj. preview copy ... Page 7-23 ‹ Reduce length Ldt. ... Page 7-23 › Batch scanning ... Page 7-23 (3) Setting of each item q Machine default 1 Paper width adjustment 1 Press the w or v key to select the desired paper source. (Inch) (Metric) 2 Press the OK key. 3 To enable automatic detection, press the w or v key to select "Auto". To enter the paper width, select "Input width(# key)". (Inch) (Metric) 8 To set another item, return to step 6. To complete the setting, press the w or v key to select "Back to Default/mgr" ["Back to Default/manager"] and press the OK key. Press the w or v key to select "End". * If "Input width(# key)" is selected, use the numeric keys to enter the paper width between 8.5" and 36.2" [210 mm and 920 mm]. 4 Press the OK key. 5 Press the w or v key to select "Back to machine default". 7-10 6 Press the OK key. The machine will return to the machine default setting screen.
-
 1
1 -
2
-
3
-
4
-
5
-
6
-
7
-
8
-
9
-
10
-
11
-
12
-
13
-
14
-
15
-
16
-
17
-
18
-
19
-
20
-
21
-
22
-
23
-
24
-
25
-
26
-
27
-
28
-
29
-
30
-
31
-
32
-
33
-
34
-
35
-
36
-
37
-
38
-
39
-
40
-
41
-
42
-
43
-
44
-
45
-
46
-
47
-
48
-
49
-
50
-
51
-
52
-
53
-
54
-
55
-
56
-
57
-
58
-
59
-
60
-
61
-
62
-
63
-
64
-
 65
65 -
 66
66 -
 67
67 -
 68
68 -
 69
69 -
 70
70 -
 71
71 -
 72
72 -
 73
73 -
 74
74 -
 75
75 -
76
-
77
-
78
-
79
-
80
-
81
-
82
-
83
-
84
-
85
-
86
-
87
-
88
-
89
-
90
-
91
-
92
-
93
-
94
-
95
-
96
-
97
-
98
-
99
-
100
-
101
-
102
-
103
-
104
-
105
-
106
-
107
-
108
 |
 |
