Lexmark M410 Service Manual - Page 72
Print Quality - Light Print, Right Side Transfer Roll
 |
UPC - 734646261005
View all Lexmark M410 manuals
Add to My Manuals
Save this manual to your list of manuals |
Page 72 highlights
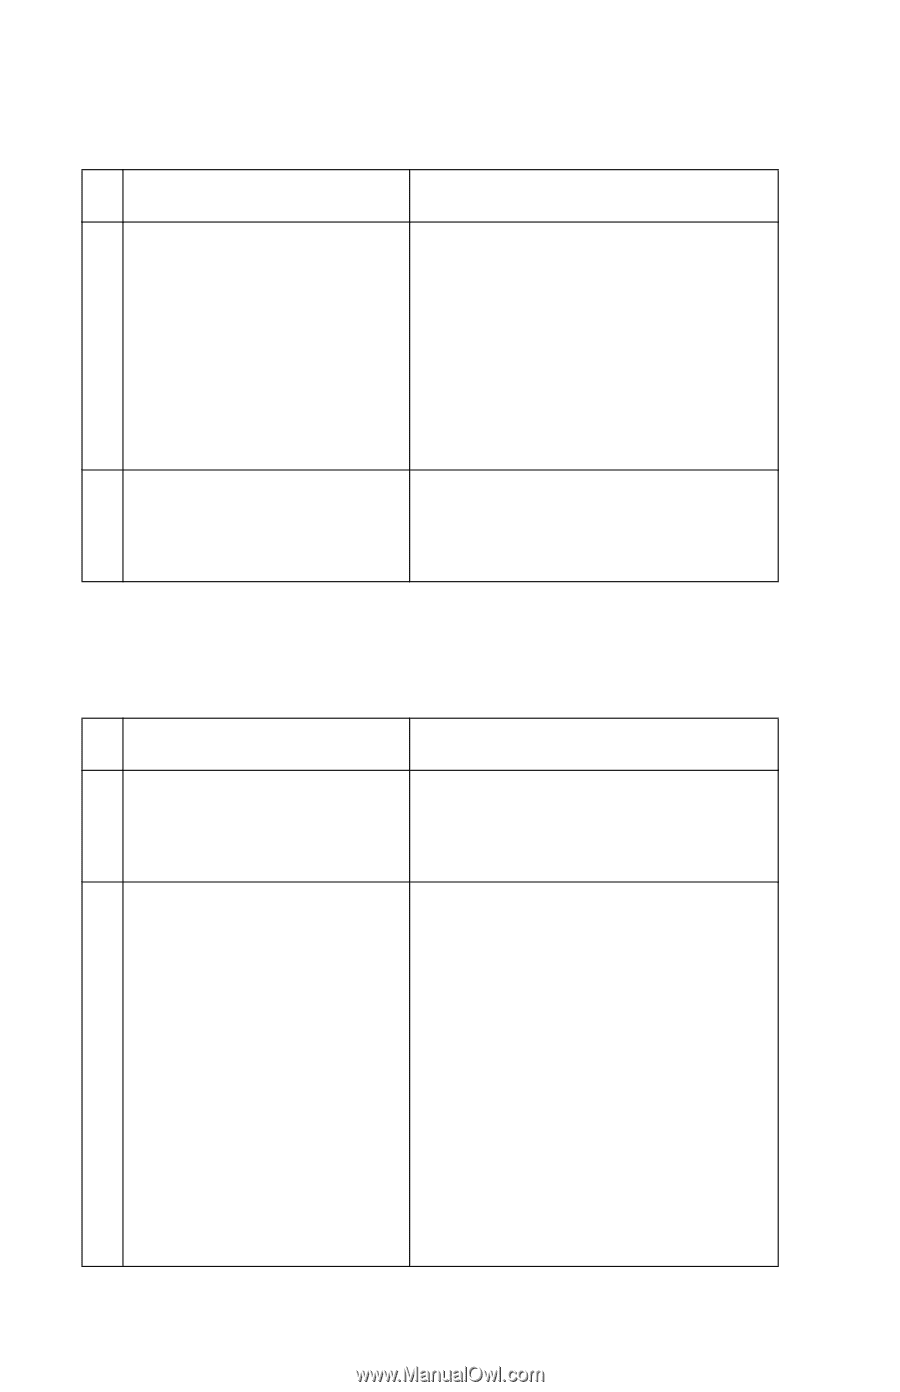
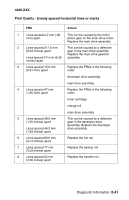
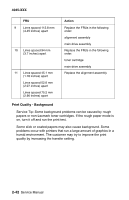
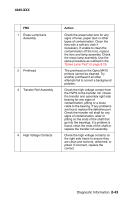
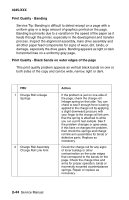
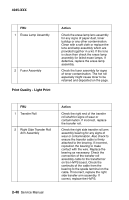
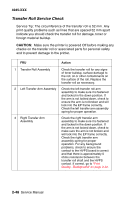
4045-XXX FRU 1 Erase Lamp Assembly 2 Fuser Assembly Print Quality - Light Print Action Check the erase lamp lens assembly for any signs of paper dust, toner buildup or any other contamination. Clean with a soft cloth or replace the lens and lamp assembly which are provided together in a kit. If the lens is clean then check the erase lamp assembly for failed erase lamps. If defective, replace the erase lamp assembly. Check the fuser assembly for signs of toner contamination. The hot roll especially might cause toner to be retained and deposited on the page. FRU 1 Transfer Roll 2 Right Side Transfer Roll Arm Assembly Action Check the right end of the transfer roll shaft for signs of wear or contamination. If incorrect, replace the transfer roll. Check the right side transfer roll arm assembly bearing for any signs of wear or contamination. Also check to ensure the transfer cable is firmly attached to the bearing. If incorrect, reposition the bearing to make contact with the wire. Replace the bearing as necessary. Check the connection of the transfer roll assembly cable to the transformer on the HVPS board. Check the continuity of the cable from the bearing to the spade terminal on the cable. If incorrect, replace the right side transfer arm assembly. If correct, replace the HVPS. 2-46 Service Manual
-
 1
1 -
2
-
3
-
4
-
5
-
6
-
7
-
8
-
9
-
10
-
11
-
12
-
13
-
14
-
15
-
16
-
17
-
18
-
19
-
20
-
21
-
22
-
23
-
24
-
25
-
26
-
27
-
28
-
29
-
30
-
31
-
32
-
33
-
34
-
35
-
36
-
37
-
38
-
39
-
40
-
41
-
42
-
43
-
44
-
45
-
46
-
47
-
48
-
49
-
50
-
51
-
52
-
53
-
54
-
55
-
56
-
57
-
58
-
59
-
60
-
61
-
62
-
63
-
64
-
65
-
66
-
 67
67 -
 68
68 -
 69
69 -
 70
70 -
 71
71 -
 72
72 -
 73
73 -
 74
74 -
 75
75 -
 76
76 -
 77
77 -
78
-
79
-
80
-
81
-
82
-
83
-
84
-
85
-
86
-
87
-
88
-
89
-
90
-
91
-
92
-
93
-
94
-
95
-
96
-
97
-
98
-
99
-
100
-
101
-
102
-
103
-
104
-
105
-
106
-
107
-
108
-
109
-
110
-
111
-
112
-
113
-
114
-
115
-
116
-
117
-
118
-
119
-
120
-
121
-
122
-
123
-
124
-
125
-
126
-
127
-
128
-
129
-
130
-
131
-
132
-
133
-
134
-
135
-
136
-
137
-
138
-
139
-
140
-
141
-
142
-
143
-
144
-
145
-
146
-
147
-
148
-
149
-
150
-
151
-
152
-
153
-
154
-
155
-
156
-
157
-
158
-
159
-
160
-
161
-
162
-
163
-
164
-
165
-
166
-
167
-
168
-
169
-
170
-
171
-
172
-
173
-
174
-
175
-
176
-
177
-
178
-
179
-
180
-
181
-
182
-
183
-
184
-
185
-
186
-
187
-
188
-
189
-
190
-
191
-
192
-
193
-
194
-
195
 |
 |