Lexmark P350 User's Guide - Page 22
Printing photos using the computer
 |
View all Lexmark P350 manuals
Add to My Manuals
Save this manual to your list of manuals |
Page 22 highlights
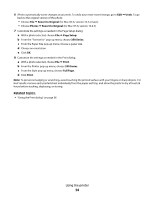
3 From the Paper Type pop-up menu, choose a paper type. 4 Click Print. For Mac OS X version 10.4 or later: 1 With a photo open, click File Œ Print. 2 Click Advanced. 3 From the Copies & Pages pop-up menu, choose Quality & Media. 4 From the Paper Type pop-up menu, choose a paper type. 5 Click Print. Note: To prevent smudging or scratching, avoid touching the printed surface with your fingers or sharp objects. For best results, remove each printed sheet individually from the paper exit tray, and allow the prints to dry at least 24 hours before stacking, displaying, or storing. Related topics: • "Choosing a paper size" on page 21 Printing photos using the computer 1 Load photo paper, with the glossy or printable side facing you. (If you are not sure which side is the printable side, see the instructions that came with the paper.) For more information, see "Loading paper" on page 5. 2 Customize the settings as needed in the Page Setup dialog. a With a photo open, choose File Œ Page Setup. b From the "Format for" pop-up menu, choose 350 Series. c From the Paper Size pop-up menu, choose the paper size loaded. d Choose an orientation. e Click OK. 3 Customize the settings as needed in the Print dialog. a With a photo open, choose File Œ Print. b From the Printer pop-up menu, choose 350 Series. c If you're using Mac OS X version 10.4 or later, click Advanced. Otherwise, proceed to the next step. d From the Copies & Pages pop-up menu, type the number of copies to be printed. e From the same pop-up menu, choose Quality & Media. • From the Paper Type pop-up menu, choose Lexmark Perfectfinish Photo Paper, Lexmark Photo Paper or Standard Glossy/Photo. • From the Print Quality area, choose Photo. f Click Print. Note: To prevent smudging or scratching, avoid touching the printed surface with your fingers or sharp objects. For best results, remove each printed sheet individually from the paper exit tray, and allow the prints to dry at least 24 hours before stacking, displaying, or storing. Using the printer 22
-
 1
1 -
2
-
3
-
4
-
5
-
6
-
7
-
8
-
9
-
10
-
11
-
12
-
13
-
14
-
15
-
16
-
 17
17 -
 18
18 -
 19
19 -
 20
20 -
 21
21 -
 22
22 -
 23
23 -
 24
24 -
 25
25 -
 26
26 -
 27
27 -
28
-
29
-
30
-
31
-
32
-
33
-
34
-
35
-
36
-
37
-
38
-
39
-
40
-
41
-
42
-
43
-
44
-
45
-
46
-
47
-
48
-
49
-
50
-
51
-
52
-
53
-
54
-
55
-
56
-
57
-
58
-
59
-
60
-
61
-
62
-
63
-
64
-
65
-
66
-
67
-
68
 |
 |