Lexmark P350 User's Guide - Page 31
Using the Tools menu, Language, Country, Power Save, View Ink Level, Clean Cartridge, Print Test - ink cartridge and paper
 |
View all Lexmark P350 manuals
Add to My Manuals
Save this manual to your list of manuals |
Page 31 highlights
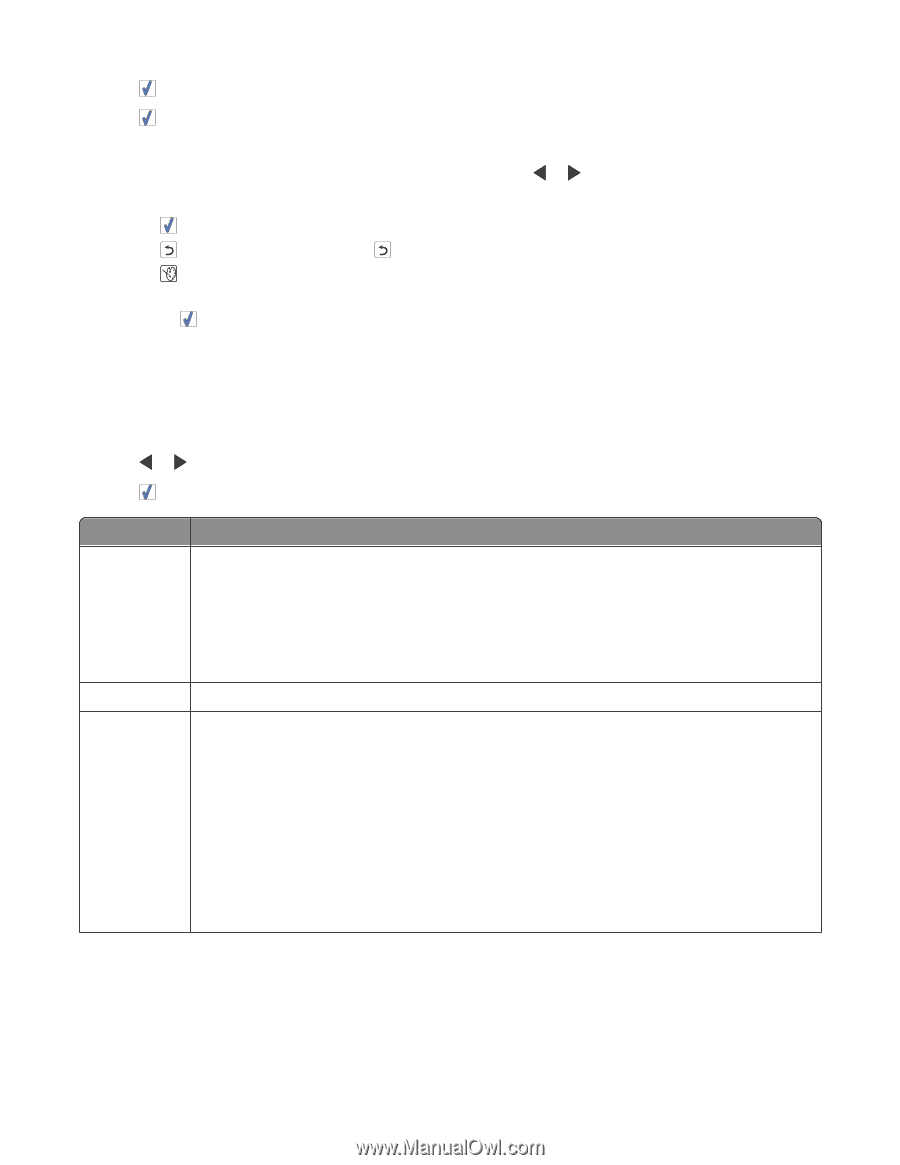
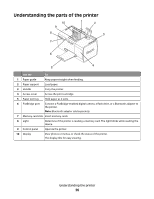
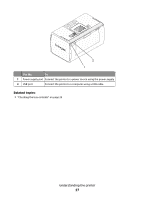
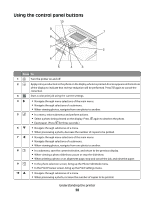
3 Press . 4 Press to continue. Each photo is displayed for a few seconds. 5 If you want to move to the previous or next photo manually, press or . 6 Use any of the following buttons: • Press to select a photo or photos to print after the slideshow. • Press to pause the slideshow. Press again to stop the slideshow. • Press to rotate the photo on the display. When the slideshow is stopped, the photo or photos you selected for printing during the slideshow are displayed by pressing . Related topics: • "Viewing photos" on page 0 Using the Tools menu 1 Press or repeatedly until Tools appears on the display. 2 Press . From here You can Device Defaults Select: • Language to change the language setting. • Country to set the default blank paper size and date format being used in your location. • Power Save to set the length of time before the printer, if left unused, enters a low power state. During Power Save, the display and backlight will be turned off. Press any button to restore power to the printer. Print Settings Select a paper size, photo size, layout, print quality, and paper type. Maintenance Select: • View Ink Level to view a graphic representing the ink level in the print cartridge. For more information, see "Viewing the ink level" on page 50. • Clean Cartridge to clean the print cartridge nozzles. For more information, see "Cleaning the print cartridge nozzles" on page 43. • Align Cartridge to align the cartridge. For more information, see "Aligning the print cartridge" on page 42. • Print Test Page to print a test page. For more information, see "Printing a test page" on page 49. • Reset Defaults to reset default settings to factory settings. Understanding the printer 31
-
 1
1 -
2
-
3
-
4
-
5
-
6
-
7
-
8
-
9
-
10
-
11
-
12
-
13
-
14
-
15
-
16
-
17
-
18
-
19
-
20
-
21
-
22
-
23
-
24
-
25
-
 26
26 -
 27
27 -
 28
28 -
 29
29 -
 30
30 -
 31
31 -
 32
32 -
 33
33 -
 34
34 -
 35
35 -
 36
36 -
37
-
38
-
39
-
40
-
41
-
42
-
43
-
44
-
45
-
46
-
47
-
48
-
49
-
50
-
51
-
52
-
53
-
54
-
55
-
56
-
57
-
58
-
59
-
60
-
61
-
62
-
63
-
64
-
65
-
66
-
67
-
68
 |
 |