Lexmark P350 User's Guide - Page 32
Using the Photo Edit Mode menu, Bluetooth Enable, Discovery Mode, Device Name, Device Address
 |
View all Lexmark P350 manuals
Add to My Manuals
Save this manual to your list of manuals |
Page 32 highlights
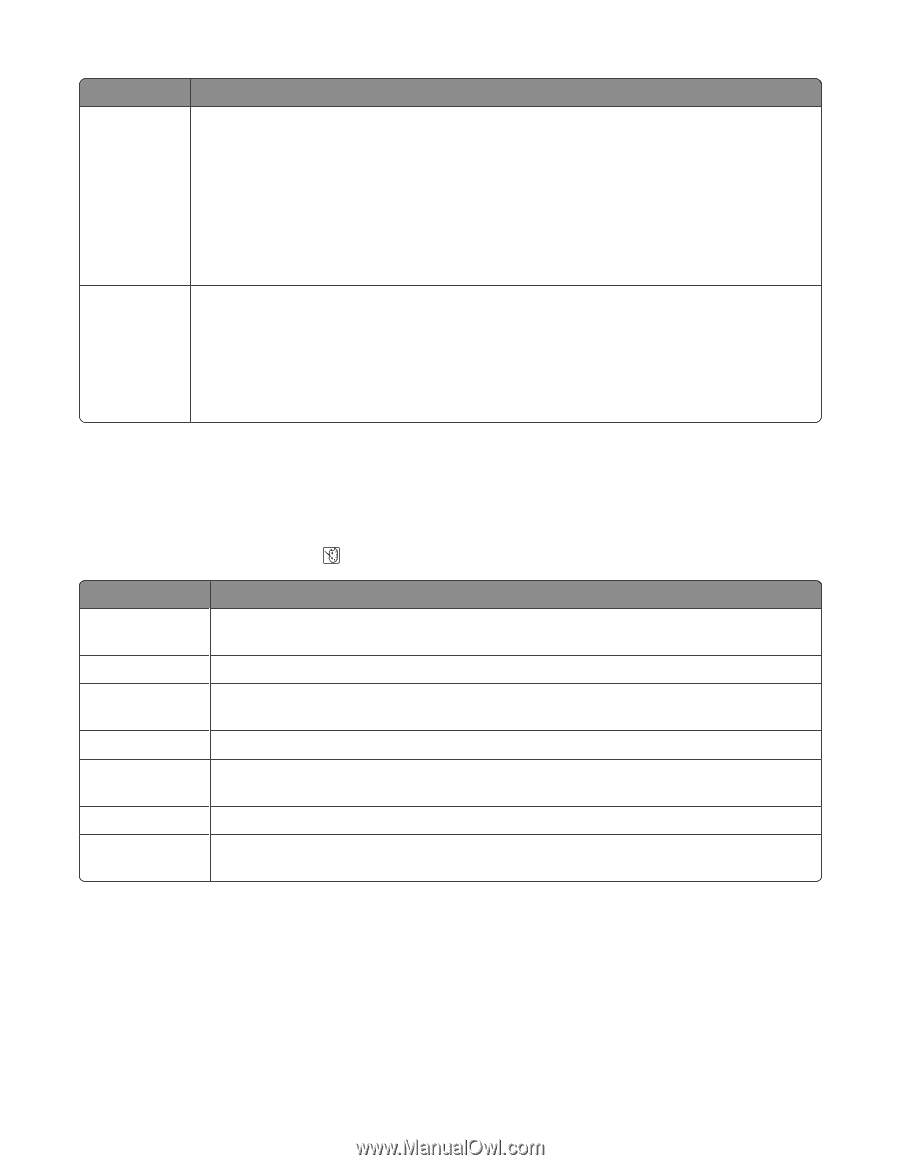
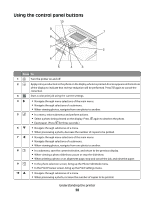
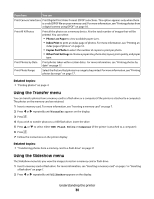
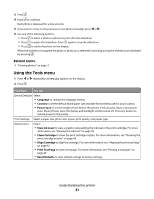
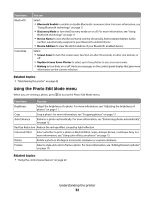
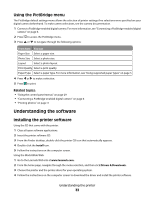
From here Bluetooth Customize You can Select: • Bluetooth Enable to enable or disable Bluetooth communication. For more information, see "Using Bluetooth technology" on page 0 . • Discovery Mode to turn the Discovery mode on or off. For more information, see "Using Bluetooth technology" on page 0 . • Device Name to view the Device Name and the Universally Administered Address (UAA) number automatically assigned to your Bluetooth-enabled device. • Device Address to view the 48-bit address of your Bluetooth-enabled device. Select: • Screen Saver to turn the screen saver function on after 30 seconds, on after one minute, or off. • Replace Screen Saver Photos to select up to four photos to use as screen savers. • Hinting to turn hints on or off. Hints are messages on the control panel display that give more information on the current selection. Related topics: • "Maintaining the printer" on page 42 Using the Photo Edit Mode menu When you are viewing a photo, press to access the Photo Edit Mode menu. From here You can Brightness Adjust the brightness of a photo. For more information, see "Adjusting the brightness of photos" on page 11. Crop Crop a photo. For more information, see "Cropping photos" on page 11. Auto Enhance Enhance a photo automatically. For more information, see "Enhancing photos automatically" on page 12. Red Eye Reduction Reduce the red-eye effect caused by light reflection. Colorized Effect Select whether to print a photo in Black & White, Sepia, Antique Brown, or Antique Gray. For more information, see "Using color effects on photos" on page 13. Rotate Rotate a photo in 90-degree increments clockwise or counter-clockwise. Frames Select a style and color to frame a photo. For more information, see "Adding frames to photos" on page 10. Related topics: • "Using the control panel menus" on page 29 Understanding the printer 32
-
 1
1 -
2
-
3
-
4
-
5
-
6
-
7
-
8
-
9
-
10
-
11
-
12
-
13
-
14
-
15
-
16
-
17
-
18
-
19
-
20
-
21
-
22
-
23
-
24
-
25
-
26
-
 27
27 -
 28
28 -
 29
29 -
 30
30 -
 31
31 -
 32
32 -
 33
33 -
 34
34 -
 35
35 -
 36
36 -
 37
37 -
38
-
39
-
40
-
41
-
42
-
43
-
44
-
45
-
46
-
47
-
48
-
49
-
50
-
51
-
52
-
53
-
54
-
55
-
56
-
57
-
58
-
59
-
60
-
61
-
62
-
63
-
64
-
65
-
66
-
67
-
68
 |
 |