Netgear PR2000 User Manual (Cellular Version) - Page 81
Access and Share Your Network Storage, Common Uses of Network Sharing
 |
View all Netgear PR2000 manuals
Add to My Manuals
Save this manual to your list of manuals |
Page 81 highlights
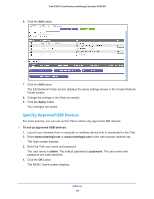
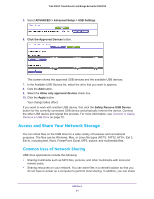
Trek N300 Travel Router and Range Extender PR2000 5. Select ADVANCED > Advanced Setup > USB Settings. 6. Click the Approved Devices button. This screen shows the approved USB devices and the available USB devices. 7. In the Available USB Devices list, select the drive that you want to approve. 8. Click the Add button. 9. Select the Allow only approved devices check box. 10. Click the Apply button. Your change takes effect. If you want to work with another USB device, first click the Safely Remove USB Device button for the currently connected USB device and physically remove the device. Connect the other USB device and repeat this process. For more information, see Connect or Safely Remove a USB Drive on page 72. Access and Share Your Network Storage You can share files on the USB drive for a wide variety of business and recreational purposes. The files can be Windows, Mac, or Linux file types (NTFS, FAT32, HFS+, Ext 3, Ext 4), including text, Word, PowerPoint, Excel, MP3, picture, and multimedia files. Common Uses of Network Sharing USB drive applications include the following: • Sharing multimedia such as MP3 files, pictures, and other multimedia with local and remote users. • Sharing resources on your network. You can store files in a central location so that you do not have to power up a computer to perform local sharing. In addition, you can share USB Port 81
-
 1
1 -
2
-
3
-
4
-
5
-
6
-
7
-
8
-
9
-
10
-
11
-
12
-
13
-
14
-
15
-
16
-
17
-
18
-
19
-
20
-
21
-
22
-
23
-
24
-
25
-
26
-
27
-
28
-
29
-
30
-
31
-
32
-
33
-
34
-
35
-
36
-
37
-
38
-
39
-
40
-
41
-
42
-
43
-
44
-
45
-
46
-
47
-
48
-
49
-
50
-
51
-
52
-
53
-
54
-
55
-
56
-
57
-
58
-
59
-
60
-
61
-
62
-
63
-
64
-
65
-
66
-
67
-
68
-
69
-
70
-
71
-
72
-
73
-
74
-
75
-
 76
76 -
 77
77 -
 78
78 -
 79
79 -
 80
80 -
 81
81 -
 82
82 -
 83
83 -
 84
84 -
 85
85 -
 86
86 -
87
-
88
-
89
-
90
-
91
-
92
-
93
-
94
-
95
-
96
-
97
-
98
-
99
-
100
-
101
-
102
-
103
-
104
-
105
-
106
-
107
-
108
-
109
-
110
-
111
-
112
-
113
-
114
-
115
-
116
-
117
-
118
-
119
-
120
-
121
-
122
-
123
-
124
-
125
-
126
-
127
-
128
-
129
-
130
-
131
-
132
-
133
-
134
-
135
-
136
-
137
-
138
-
139
-
140
-
141
-
142
-
143
-
144
-
145
-
146
-
147
-
148
-
149
 |
 |
