Netgear RN528X Software Manual - Page 247
Local, Browse, Remote, Export seed for this job, Backup > ReadyDR, Enable, Finish, Load System
 |
View all Netgear RN528X manuals
Add to My Manuals
Save this manual to your list of manuals |
Page 247 highlights
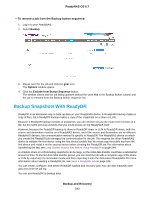
ReadyNAS OS 6.7 Note If either the source or destination is on a remote device, you must install the local ReadyNAS's public key on the remote ReadyNAS. For information, see Load System Access Key Before Using ReadyDR on page 244. 6. Do one of the following: • If you clicked the Local button, click the Browse button and navigate to and select the share or LUN that you want to back up. • If you clicked the Remote button, do the following: a. Enter the host name. b. Click the Browse button and navigate to and select the share or LUN. 7. To store the backup locally, on the right side of the window click the Local button, or click the Remote button. The window updates to show the appropriate set of parameters. 8. Do one of the following: • If you clicked the Local button, click the Browse button and navigate to and select the destination ReadyDR share. • If you clicked the Remote button, do the following: a. Enter the host name. b. Click the Browse button and navigate to and select the destination ReadyDR share. 9. Click the Next button. The Add ReadyDR Job window updates to show the options and schedule fields. 10. Adjust any of the schedule parameters as desired. You can schedule a job to automatically run as frequently as once every hour, daily, or just once a week. 11. Adjust the maximum bandwidth used for the transfer, if desired. If the network connection between the source and destination systems is fast, the transfer could slow either or both of the devices. This is very likely if the source and destination are both local. Zero, the default, sets no limit to the bandwidth. 12. To seed the job, click the Export seed for this job box. Note Clicking the Export seed for this job box disables the job. After you transfer the seed archive file, start the job by selecting Backup > ReadyDR, selecting the job, clicking the gear icon, and selecting the Enable menu item. For information about transfering job seed archive files, see Seed a ReadyDR Job on page 245. 13. Click the Finish button. The window closes and the new job is added to the Jobs list. Backup and Recovery 247
-
 1
1 -
2
-
3
-
4
-
5
-
6
-
7
-
8
-
9
-
10
-
11
-
12
-
13
-
14
-
15
-
16
-
17
-
18
-
19
-
20
-
21
-
22
-
23
-
24
-
25
-
26
-
27
-
28
-
29
-
30
-
31
-
32
-
33
-
34
-
35
-
36
-
37
-
38
-
39
-
40
-
41
-
42
-
43
-
44
-
45
-
46
-
47
-
48
-
49
-
50
-
51
-
52
-
53
-
54
-
55
-
56
-
57
-
58
-
59
-
60
-
61
-
62
-
63
-
64
-
65
-
66
-
67
-
68
-
69
-
70
-
71
-
72
-
73
-
74
-
75
-
76
-
77
-
78
-
79
-
80
-
81
-
82
-
83
-
84
-
85
-
86
-
87
-
88
-
89
-
90
-
91
-
92
-
93
-
94
-
95
-
96
-
97
-
98
-
99
-
100
-
101
-
102
-
103
-
104
-
105
-
106
-
107
-
108
-
109
-
110
-
111
-
112
-
113
-
114
-
115
-
116
-
117
-
118
-
119
-
120
-
121
-
122
-
123
-
124
-
125
-
126
-
127
-
128
-
129
-
130
-
131
-
132
-
133
-
134
-
135
-
136
-
137
-
138
-
139
-
140
-
141
-
142
-
143
-
144
-
145
-
146
-
147
-
148
-
149
-
150
-
151
-
152
-
153
-
154
-
155
-
156
-
157
-
158
-
159
-
160
-
161
-
162
-
163
-
164
-
165
-
166
-
167
-
168
-
169
-
170
-
171
-
172
-
173
-
174
-
175
-
176
-
177
-
178
-
179
-
180
-
181
-
182
-
183
-
184
-
185
-
186
-
187
-
188
-
189
-
190
-
191
-
192
-
193
-
194
-
195
-
196
-
197
-
198
-
199
-
200
-
201
-
202
-
203
-
204
-
205
-
206
-
207
-
208
-
209
-
210
-
211
-
212
-
213
-
214
-
215
-
216
-
217
-
218
-
219
-
220
-
221
-
222
-
223
-
224
-
225
-
226
-
227
-
228
-
229
-
230
-
231
-
232
-
233
-
234
-
235
-
236
-
237
-
238
-
239
-
240
-
241
-
 242
242 -
 243
243 -
 244
244 -
 245
245 -
 246
246 -
 247
247 -
 248
248 -
 249
249 -
 250
250 -
 251
251 -
 252
252 -
253
-
254
-
255
 |
 |
