Ricoh 2020D Operating Instructions - Page 28
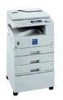
Main power indicator and On, indicator, Operation switch, Quick Dial keys, Quick Dial Flip Plate, - photo copier
 |
View all Ricoh 2020D manuals
Add to My Manuals
Save this manual to your list of manuals |
Page 28 highlights
Getting Started 14. {Clear/Stop} key 22. {Original Type} key • Clear: Press to select the original type registered Clears an entered numeric value. in [Original Type 1 (Text)] or [Original Type 2 • Stop: (Photo)]. When the original type is select- 1 Stops a job in progress, such as scanning, faxing, or printing. ed, the corresponding indicator lights. 23. {Cancel} key 15. Main power indicator and On Press to cancel an operation or return to indicator the previous display. The main power indicator lights when the main power switch is turned on. The On indicator lights when the operation switch is on. Important ❒ Do not turn off the main power switch while the On indicator is lit or blinking. Doing so may damage the memory. 24. {OK} key Press to set a selected item or an entered numeric value. 25. Number keys Press to enter numeric values. 26. {#} key Press to set a selected item or an entered numeric value. 16. Operation switch Press to turn the power on. The On indicator lights. To turn the power off, press again. 27. {Start} key Press to start copying, printing, or scanning or sending. 17. Quick Dial keys Press to select the registered destination at a single touch, or to enter letters and symbols. 18. Quick Dial Flip Plate Flip this plate down to access Quick Dial keys 01 through 16; flip it up to access keys 17 through 32. 19. {On Line} key Reference Printer Reference 1 and Printer Reference 2 20. Copier function keys Reference Copy Reference 21. {Lighter} and {Darker} keys Press to change the image density setting. Select the image density in five increments, Lighter to Darker. 16
-
 1
1 -
2
-
3
-
4
-
5
-
6
-
7
-
8
-
9
-
10
-
11
-
12
-
13
-
14
-
15
-
16
-
17
-
18
-
19
-
20
-
21
-
22
-
 23
23 -
 24
24 -
 25
25 -
 26
26 -
 27
27 -
 28
28 -
 29
29 -
 30
30 -
 31
31 -
 32
32 -
 33
33 -
34
-
35
-
36
-
37
-
38
-
39
-
40
-
41
-
42
-
43
-
44
-
45
-
46
-
47
-
48
-
49
-
50
-
51
-
52
-
53
-
54
-
55
-
56
-
57
-
58
-
59
-
60
-
61
-
62
-
63
-
64
-
65
-
66
-
67
-
68
-
69
-
70
-
71
-
72
-
73
-
74
-
75
-
76
-
77
-
78
-
79
-
80
-
81
-
82
-
83
-
84
-
85
-
86
-
87
-
88
-
89
-
90
-
91
-
92
-
93
-
94
-
95
-
96
-
97
-
98
-
99
-
100
-
101
-
102
-
103
-
104
-
105
-
106
-
107
-
108
-
109
-
110
-
111
-
112
-
113
-
114
-
115
-
116
-
117
-
118
-
119
-
120
-
121
-
122
-
123
-
124
-
125
-
126
-
127
-
128
 |
 |
