Samsung SCH-I500 User Manual (user Manual) (ver.f5) (English) - Page 127
Accounts & sync - extended batteries
 |
UPC - 635753488401
View all Samsung SCH-I500 manuals
Add to My Manuals
Save this manual to your list of manuals |
Page 127 highlights
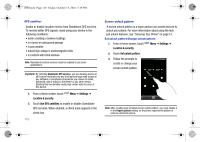
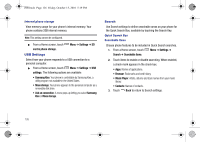
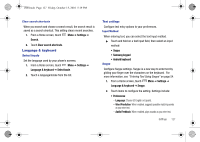
i500.book Page 123 Friday, October 15, 2010 5:19 PM Accounts & sync Set up and manage accounts, including your Google and Backup Assistant accounts. General sync settings Background data When enabled, all accounts can sync, send, and receive data at any time, in the background. Important!: Disabling background data can extend battery life and lower data use. Some applications may still use the background data connection, even if this setting is disabled. 1. From a Home screen, touch Accounts & sync. Menu ➔ Settings ➔ 2. Touch Background data to enable or disable the setting. When enabled, a check mark appears in the check box. Auto-sync When enabled, all accounts sync data at any time, automatically. 1. From a Home screen, touch Menu ➔ Settings ➔ Accounts & sync. 2. Touch Auto-sync to enable or disable the setting. When enabled, a check mark appears in the check box. Manage accounts Use Manage accounts to set up and configure your accounts. Note: Available settings depend on the type of account. Not all settings are available for all accounts. 1. From a Home screen, touch Accounts & sync. Menu ➔ Settings ➔ 2. Under Manage accounts, touch the account to modify its settings. Tip: For more information about managing accounts, see "Setting Up Your Accounts" on page 40. Adding an account 1. From a Home screen, touch Accounts & sync. Menu ➔ Settings ➔ 2. Under Manage accounts, touch Add account and follow the prompts to enter your credentials and set up the account. Tip: For more information about adding accounts, see "Setting Up Your Accounts" on page 40. Settings 123
-
 1
1 -
2
-
3
-
4
-
5
-
6
-
7
-
8
-
9
-
10
-
11
-
12
-
13
-
14
-
15
-
16
-
17
-
18
-
19
-
20
-
21
-
22
-
23
-
24
-
25
-
26
-
27
-
28
-
29
-
30
-
31
-
32
-
33
-
34
-
35
-
36
-
37
-
38
-
39
-
40
-
41
-
42
-
43
-
44
-
45
-
46
-
47
-
48
-
49
-
50
-
51
-
52
-
53
-
54
-
55
-
56
-
57
-
58
-
59
-
60
-
61
-
62
-
63
-
64
-
65
-
66
-
67
-
68
-
69
-
70
-
71
-
72
-
73
-
74
-
75
-
76
-
77
-
78
-
79
-
80
-
81
-
82
-
83
-
84
-
85
-
86
-
87
-
88
-
89
-
90
-
91
-
92
-
93
-
94
-
95
-
96
-
97
-
98
-
99
-
100
-
101
-
102
-
103
-
104
-
105
-
106
-
107
-
108
-
109
-
110
-
111
-
112
-
113
-
114
-
115
-
116
-
117
-
118
-
119
-
120
-
121
-
 122
122 -
 123
123 -
 124
124 -
 125
125 -
 126
126 -
 127
127 -
 128
128 -
 129
129 -
 130
130 -
 131
131 -
 132
132 -
133
-
134
-
135
-
136
-
137
-
138
-
139
-
140
-
141
-
142
-
143
-
144
-
145
-
146
-
147
-
148
-
149
-
150
-
151
-
152
-
153
-
154
-
155
-
156
-
157
-
158
-
159
-
160
-
161
-
162
-
163
-
164
-
165
-
166
-
167
-
168
-
169
-
170
 |
 |
