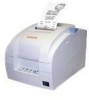
Samsung SRP-275CEPG Operation Manual - Page 7
Installing ribbon cassette, 5 Installing paper roll
 |
View all Samsung SRP-275CEPG manuals
Add to My Manuals
Save this manual to your list of manuals |
Page 7 highlights
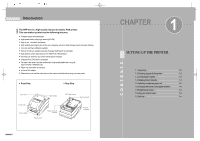
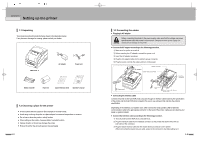
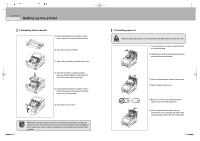
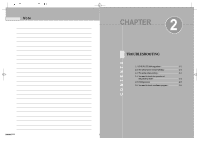
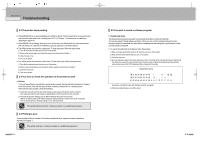
CHAPTER 1 Setting up the printer 1.4 Installing ribbon cassette 1) Before inserting the ribbon cassette, turn the knob clockwise to prevent twisting the ribbon. 2) Open the front cover of printer. 3) Take out the old ribbon cassette if there is one. 4) Insert the new ribbon cassette as shown and pay particular attention to the placement of the ribbon behind the Printer Head. 5) During inserting the ribbon cassette, turn the knob clockwise again to make sure the ribbon moves freely in the cassette. 6) Close front cover of printer. Malfunctions and other problems may arise if other than specified ribbon cassettes are used in the printer. The Warranty may be void if other than specified ribbon cassettes are used. Contact your dealer or place of purchase for more information about proper ribbon cassettes. 1-4 1.5 Installing paper roll Notice the caution label and do not touch the auto cutter blade when you open rear cover. 1) To prevent data loss, make sure that the printer is not receiving data. 2) Open the rear cover by pushing the open button and push the arrow mark back. 3) Remove the used paper roll core if there is one. 4) Insert the paper roll as shown. 5) Be sure to note the correct direction that the paper should come off the paper roll. 6) Pull out small amount of paper as shown. Then close the rear cover and tear off the extra paper by pulling it toward the front of the printer. 1-5
-
 1
1 -
 2
2 -
 3
3 -
 4
4 -
 5
5 -
 6
6 -
 7
7 -
 8
8 -
 9
9 -
 10
10 -
 11
11 -
 12
12 -
13
-
14
-
15
-
16
-
17
-
18
-
19
-
20
-
21
-
22
-
23
-
24
-
25
-
26
-
27
-
28
-
29
-
30
-
31
-
32
-
33
-
34
-
35
-
36
-
37
-
38
-
39
-
40
-
41
-
42
-
43
-
44
-
45
-
46
-
47
-
48
-
49
-
50
-
51
-
52
-
53
-
54
-
55
-
56
-
57
-
58
-
59
-
60
-
61
-
62
-
63
-
64
-
65
-
66
-
67
-
68
-
69
-
70
-
71
-
72
-
73
-
74
-
75
-
76
-
77
-
78
-
79
-
80
-
81
-
82
-
83
-
84
-
85
-
86
-
87
-
88
-
89
-
90
-
91
-
92
-
93
-
94
-
95
-
96
-
97
-
98
-
99
-
100
-
101
-
102
-
103
-
104
-
105
-
106
-
107
-
108
-
109
-
110
 |
 |
