Sony Ericsson R380 WORLD User Guide - Page 19
To re-calibrate the stylus
 |
View all Sony Ericsson R380 WORLD manuals
Add to My Manuals
Save this manual to your list of manuals |
Page 19 highlights
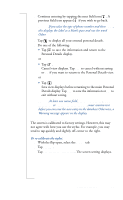
4. Continue entering by tapping the next field icon . A previous field icon appears if you wish to go back. Note: If you select the type of phone number and then Other, this displays the label as a blank space and not the word Other. 5. Tap to display all your entered personal details. 6. Do one of the following: • Tap OK to save the information and return to the Personal Details display. or • Tap . Cancel view displays. Tap Yes to cancel without saving or No if you want to return to the Personal Details view. or • Tap . Save view displays before returning to the main Personal Details display. Tap Yes to save the information or No to exit without saving. Note: At least one name field, , or , must contain text before you can save the new entry in the database.Otherwise, a Warning message appears in the display. Touch screen Calibration The screen is calibrated to factory settings. However, this may not agree with how you use the stylus. For example, you may tend to tap quickly and slightly off-center to the right. To re-calibrate the stylus: 1. With the flip open, select the Extras tab. 2. Tap System. 3. Tap Touchscreen calibration. The screen setting displays. Preparing for Use 19
-
 1
1 -
2
-
3
-
4
-
5
-
6
-
7
-
8
-
9
-
10
-
11
-
12
-
13
-
 14
14 -
 15
15 -
 16
16 -
 17
17 -
 18
18 -
 19
19 -
 20
20 -
 21
21 -
 22
22 -
 23
23 -
 24
24 -
25
-
26
-
27
-
28
-
29
-
30
-
31
-
32
-
33
-
34
-
35
-
36
-
37
-
38
-
39
-
40
-
41
-
42
-
43
-
44
-
45
-
46
-
47
-
48
-
49
-
50
-
51
-
52
-
53
-
54
-
55
-
56
-
57
-
58
-
59
-
60
-
61
-
62
-
63
-
64
-
65
-
66
-
67
-
68
-
69
-
70
-
71
-
72
-
73
-
74
-
75
-
76
-
77
-
78
-
79
-
80
-
81
-
82
-
83
-
84
-
85
-
86
-
87
-
88
-
89
-
90
-
91
-
92
-
93
-
94
-
95
-
96
-
97
-
98
-
99
-
100
-
101
-
102
-
103
-
104
-
105
-
106
-
107
-
108
-
109
-
110
-
111
-
112
-
113
-
114
-
115
-
116
-
117
-
118
-
119
-
120
-
121
-
122
-
123
-
124
-
125
-
126
-
127
-
128
-
129
-
130
-
131
-
132
-
133
-
134
-
135
-
136
-
137
-
138
-
139
-
140
-
141
-
142
-
143
-
144
-
145
-
146
-
147
-
148
-
149
-
150
-
151
-
152
-
153
-
154
-
155
-
156
-
157
-
158
-
159
-
160
-
161
-
162
-
163
-
164
-
165
-
166
-
167
-
168
-
169
-
170
-
171
-
172
-
173
-
174
-
175
-
176
-
177
-
178
-
179
-
180
-
181
-
182
-
183
-
184
-
185
-
186
-
187
-
188
-
189
-
190
-
191
-
192
-
193
-
194
-
195
-
196
-
197
-
198
-
199
-
200
-
201
-
202
-
203
-
204
-
205
-
206
-
207
-
208
-
209
-
210
-
211
-
212
-
213
-
214
-
215
-
216
-
217
-
218
-
219
-
220
-
221
-
222
-
223
-
224
-
225
-
226
-
227
-
228
-
229
-
230
-
231
-
232
-
233
-
234
-
235
-
236
-
237
-
238
-
239
-
240
-
241
-
242
-
243
-
244
-
245
-
246
-
247
-
248
-
249
-
250
-
251
-
252
-
253
-
254
-
255
-
256
-
257
 |
 |
